Since getting a CSA this year, I had the opportunity to try new things I have never had before. In a previous post, I made a pea shoot salad for the first time.
Two weeks ago we got a red Kuri squash in our CSA box from the Angelic Organics farm. I got inspired by this recipe and modified it based on which ingredients I had on hand and also made it dairy free since it called for goat cheese. But first, here is a red Kuri squash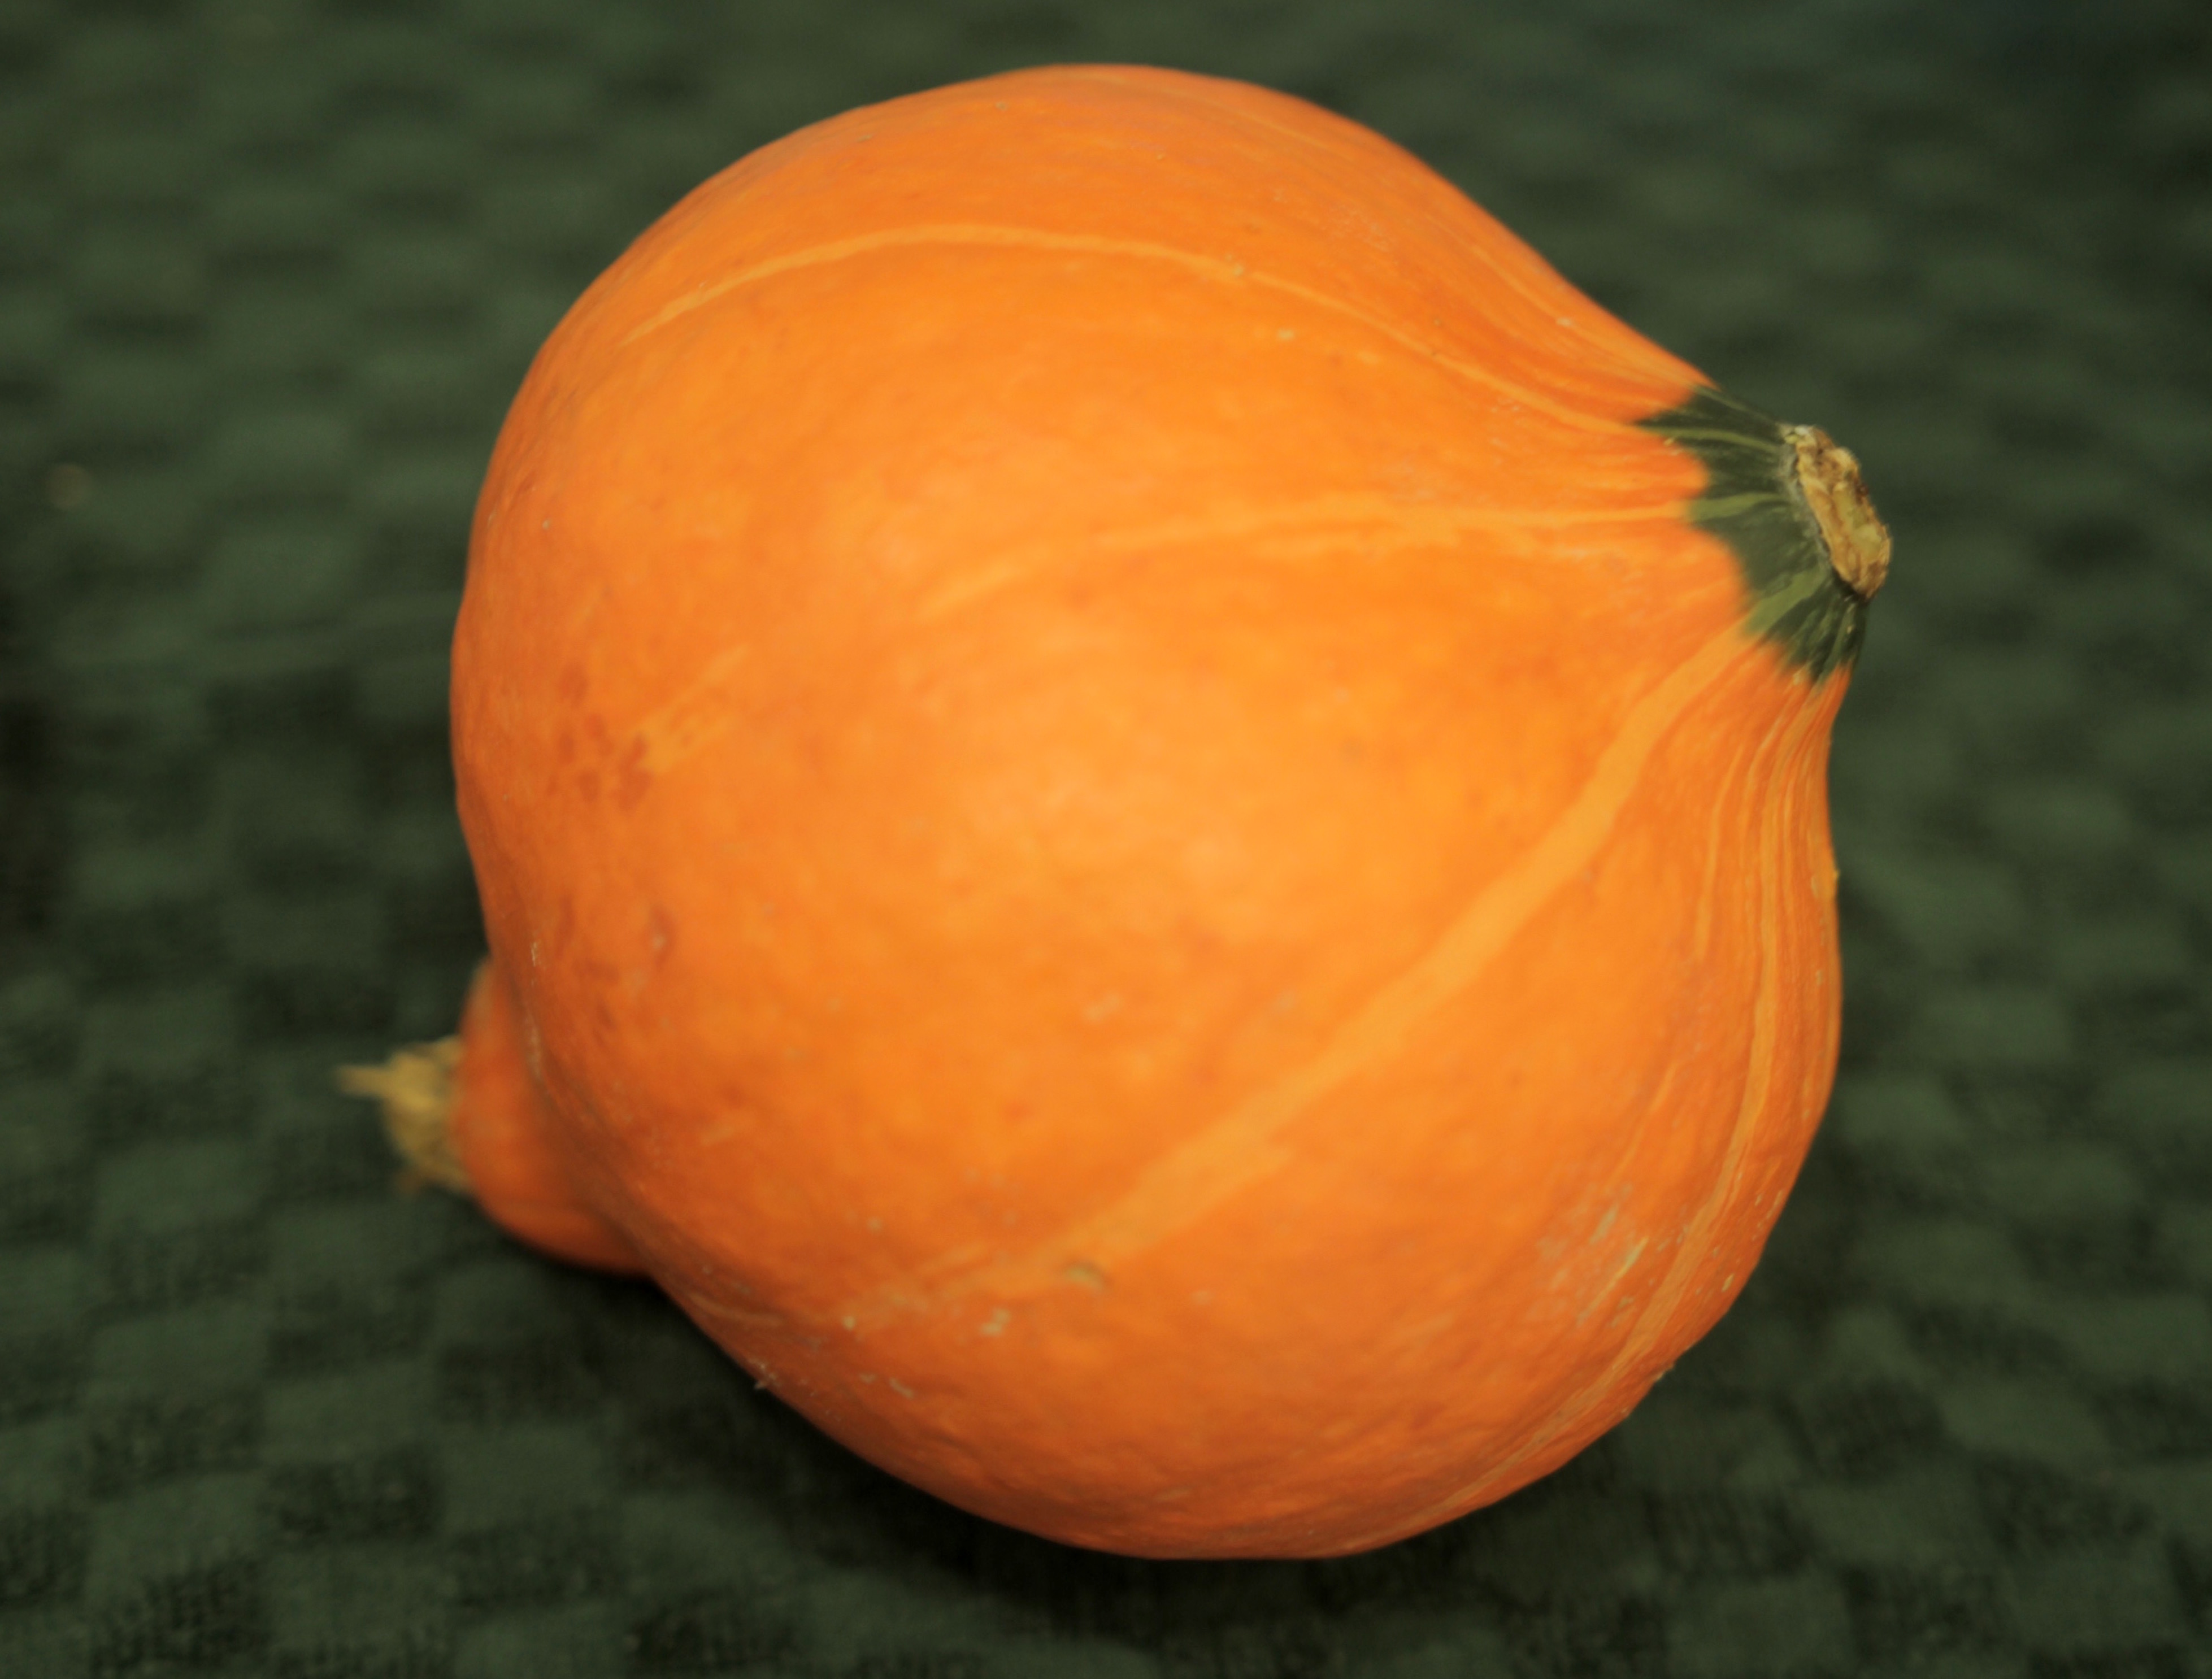 I did not peel the squash. The skin is tender enough to eat when cooked and I am all for maximizing usage. The seeds can also be roasted and enjoyed as a snack much like pumpkin seeds.
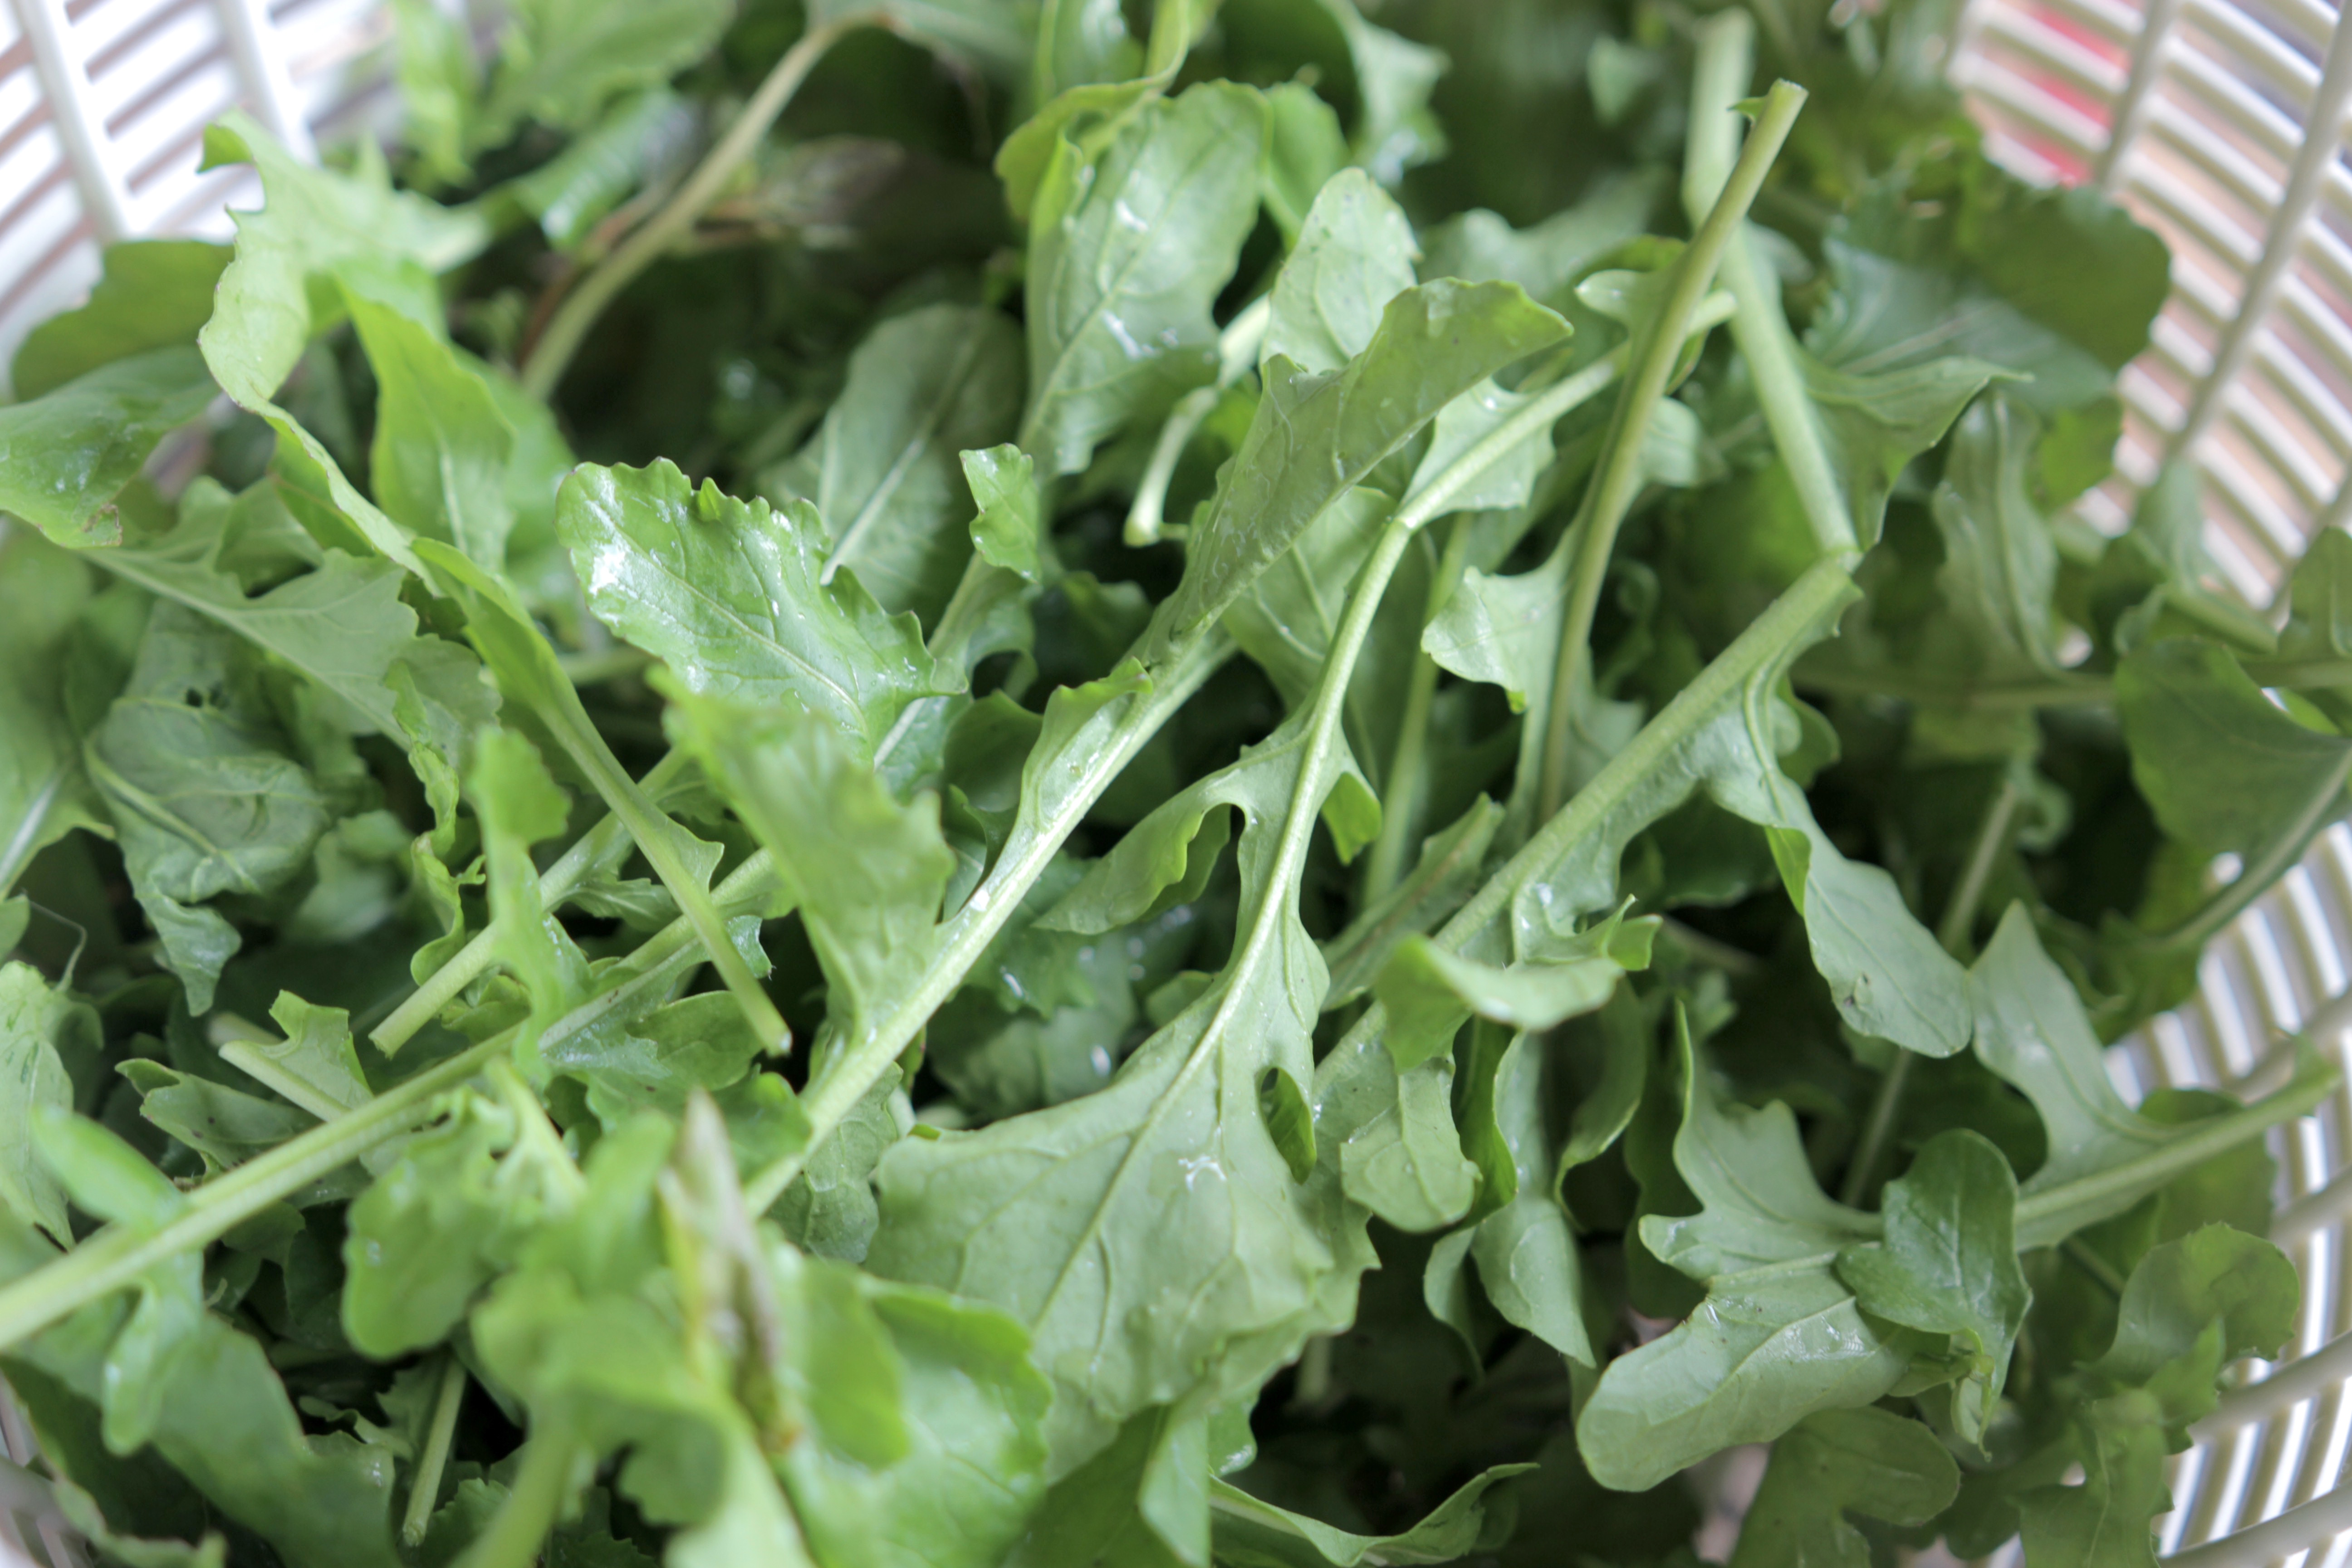
I made the salad with the arugula that was in this week’s CSA box and used a sweet vinaigrette to balance its spiciness. I like how the slightly sweet flavor of the squash marries with the sweet and spicy arugula.
I also added tomatoes since we have a lot of those right now.
Red Kuri squash salad bowl
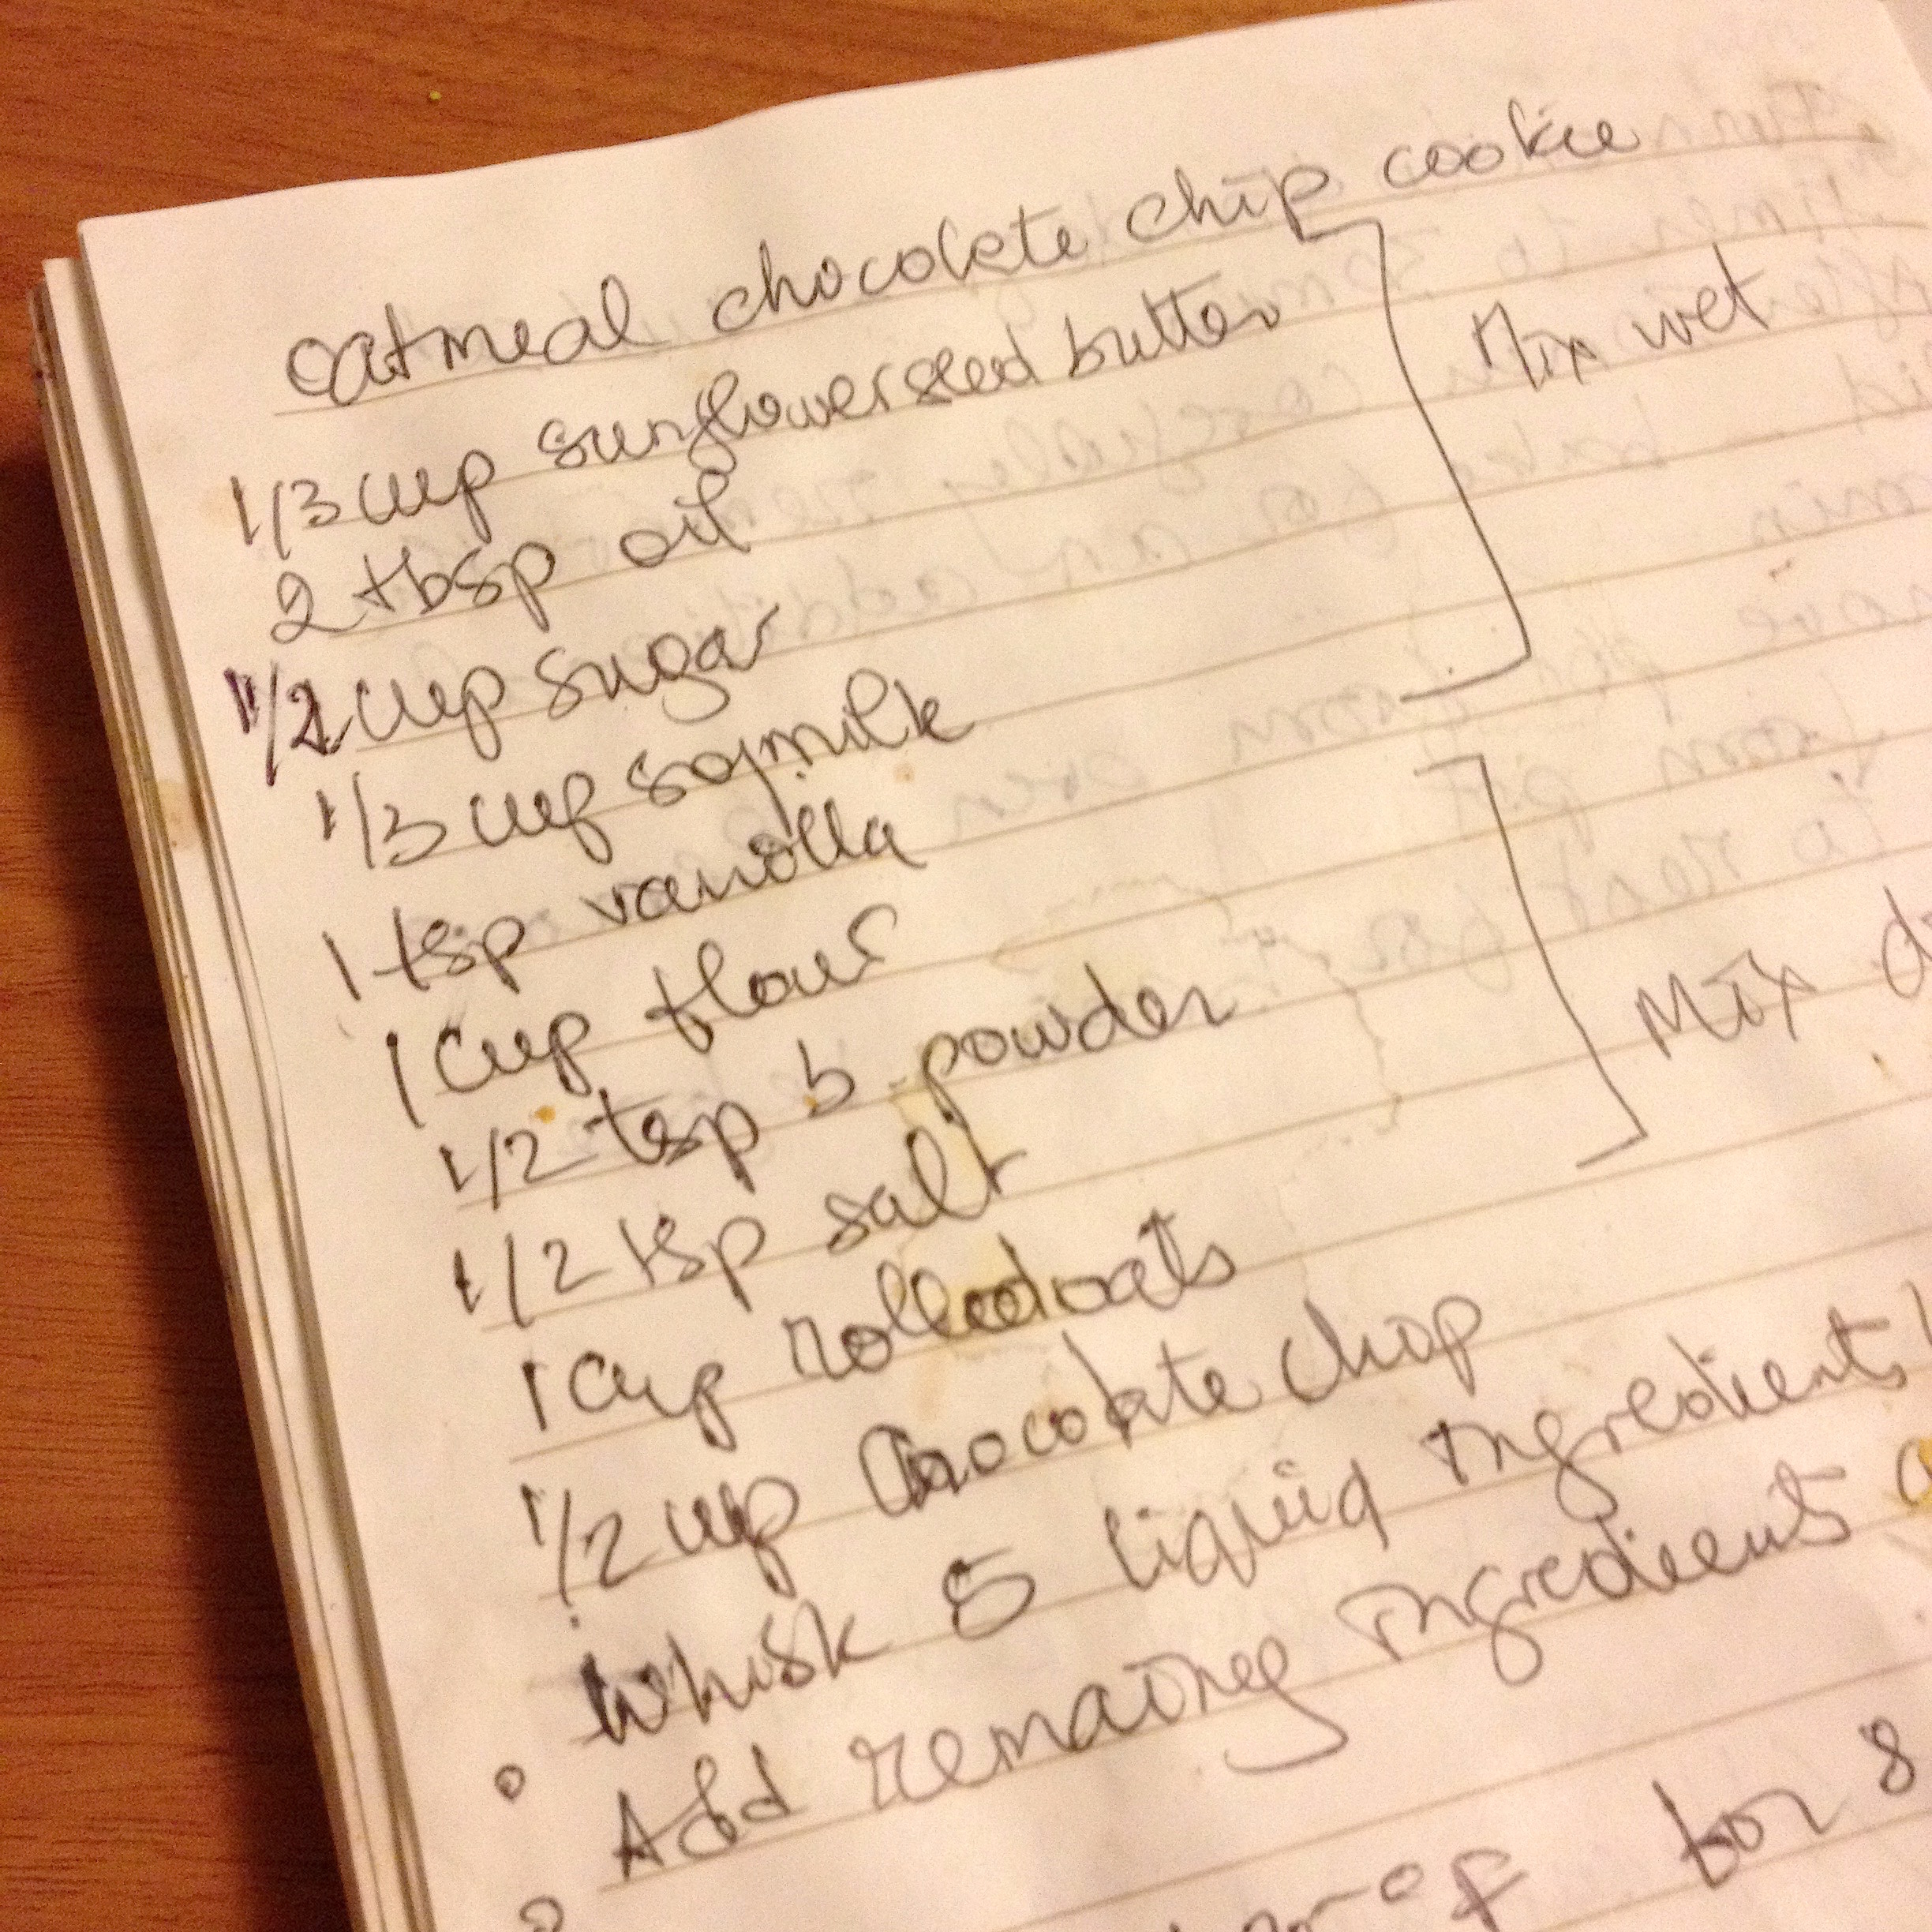
– 1 red kuri squash
– olive oil
– salt (optional)
Salad:
– 3 cups of arugula (can substitute with baby arugula or spinach)
– 1 can of cannellini beans
– 1 onion
– 2 garlic cloves or 1 big clove
– 1 big tomato or two medium tomatoes, sliced
Salad dressing
– 3 tablespoon olive oil
– 1 tablespoon apple cider vinegar
– juice of 1 lime
– 1 teaspoon mustard
– 1/2 tablespoon maple syrup
– salt
– pepper
Heat the oven at 385°F. Scrub the skin of the squash clean and pat dry. Cut it in half and scoop the seeds out. Cut each half of the squash in two. Brush the top of the slices with some olive oil. Salt and pepper as needed. Bake for 35-40 minutes until tender.

Remove the beans from the can and rinse. Slice the onion thinly and chop the garlic. Heat some olive oil in a pan and first add the garlic to flavor the oil then add the onion and saute for a few minutes until tender. Add the beans and saute for another 5-10 minutes. Salt and pepper as needed. Set aside to cool. 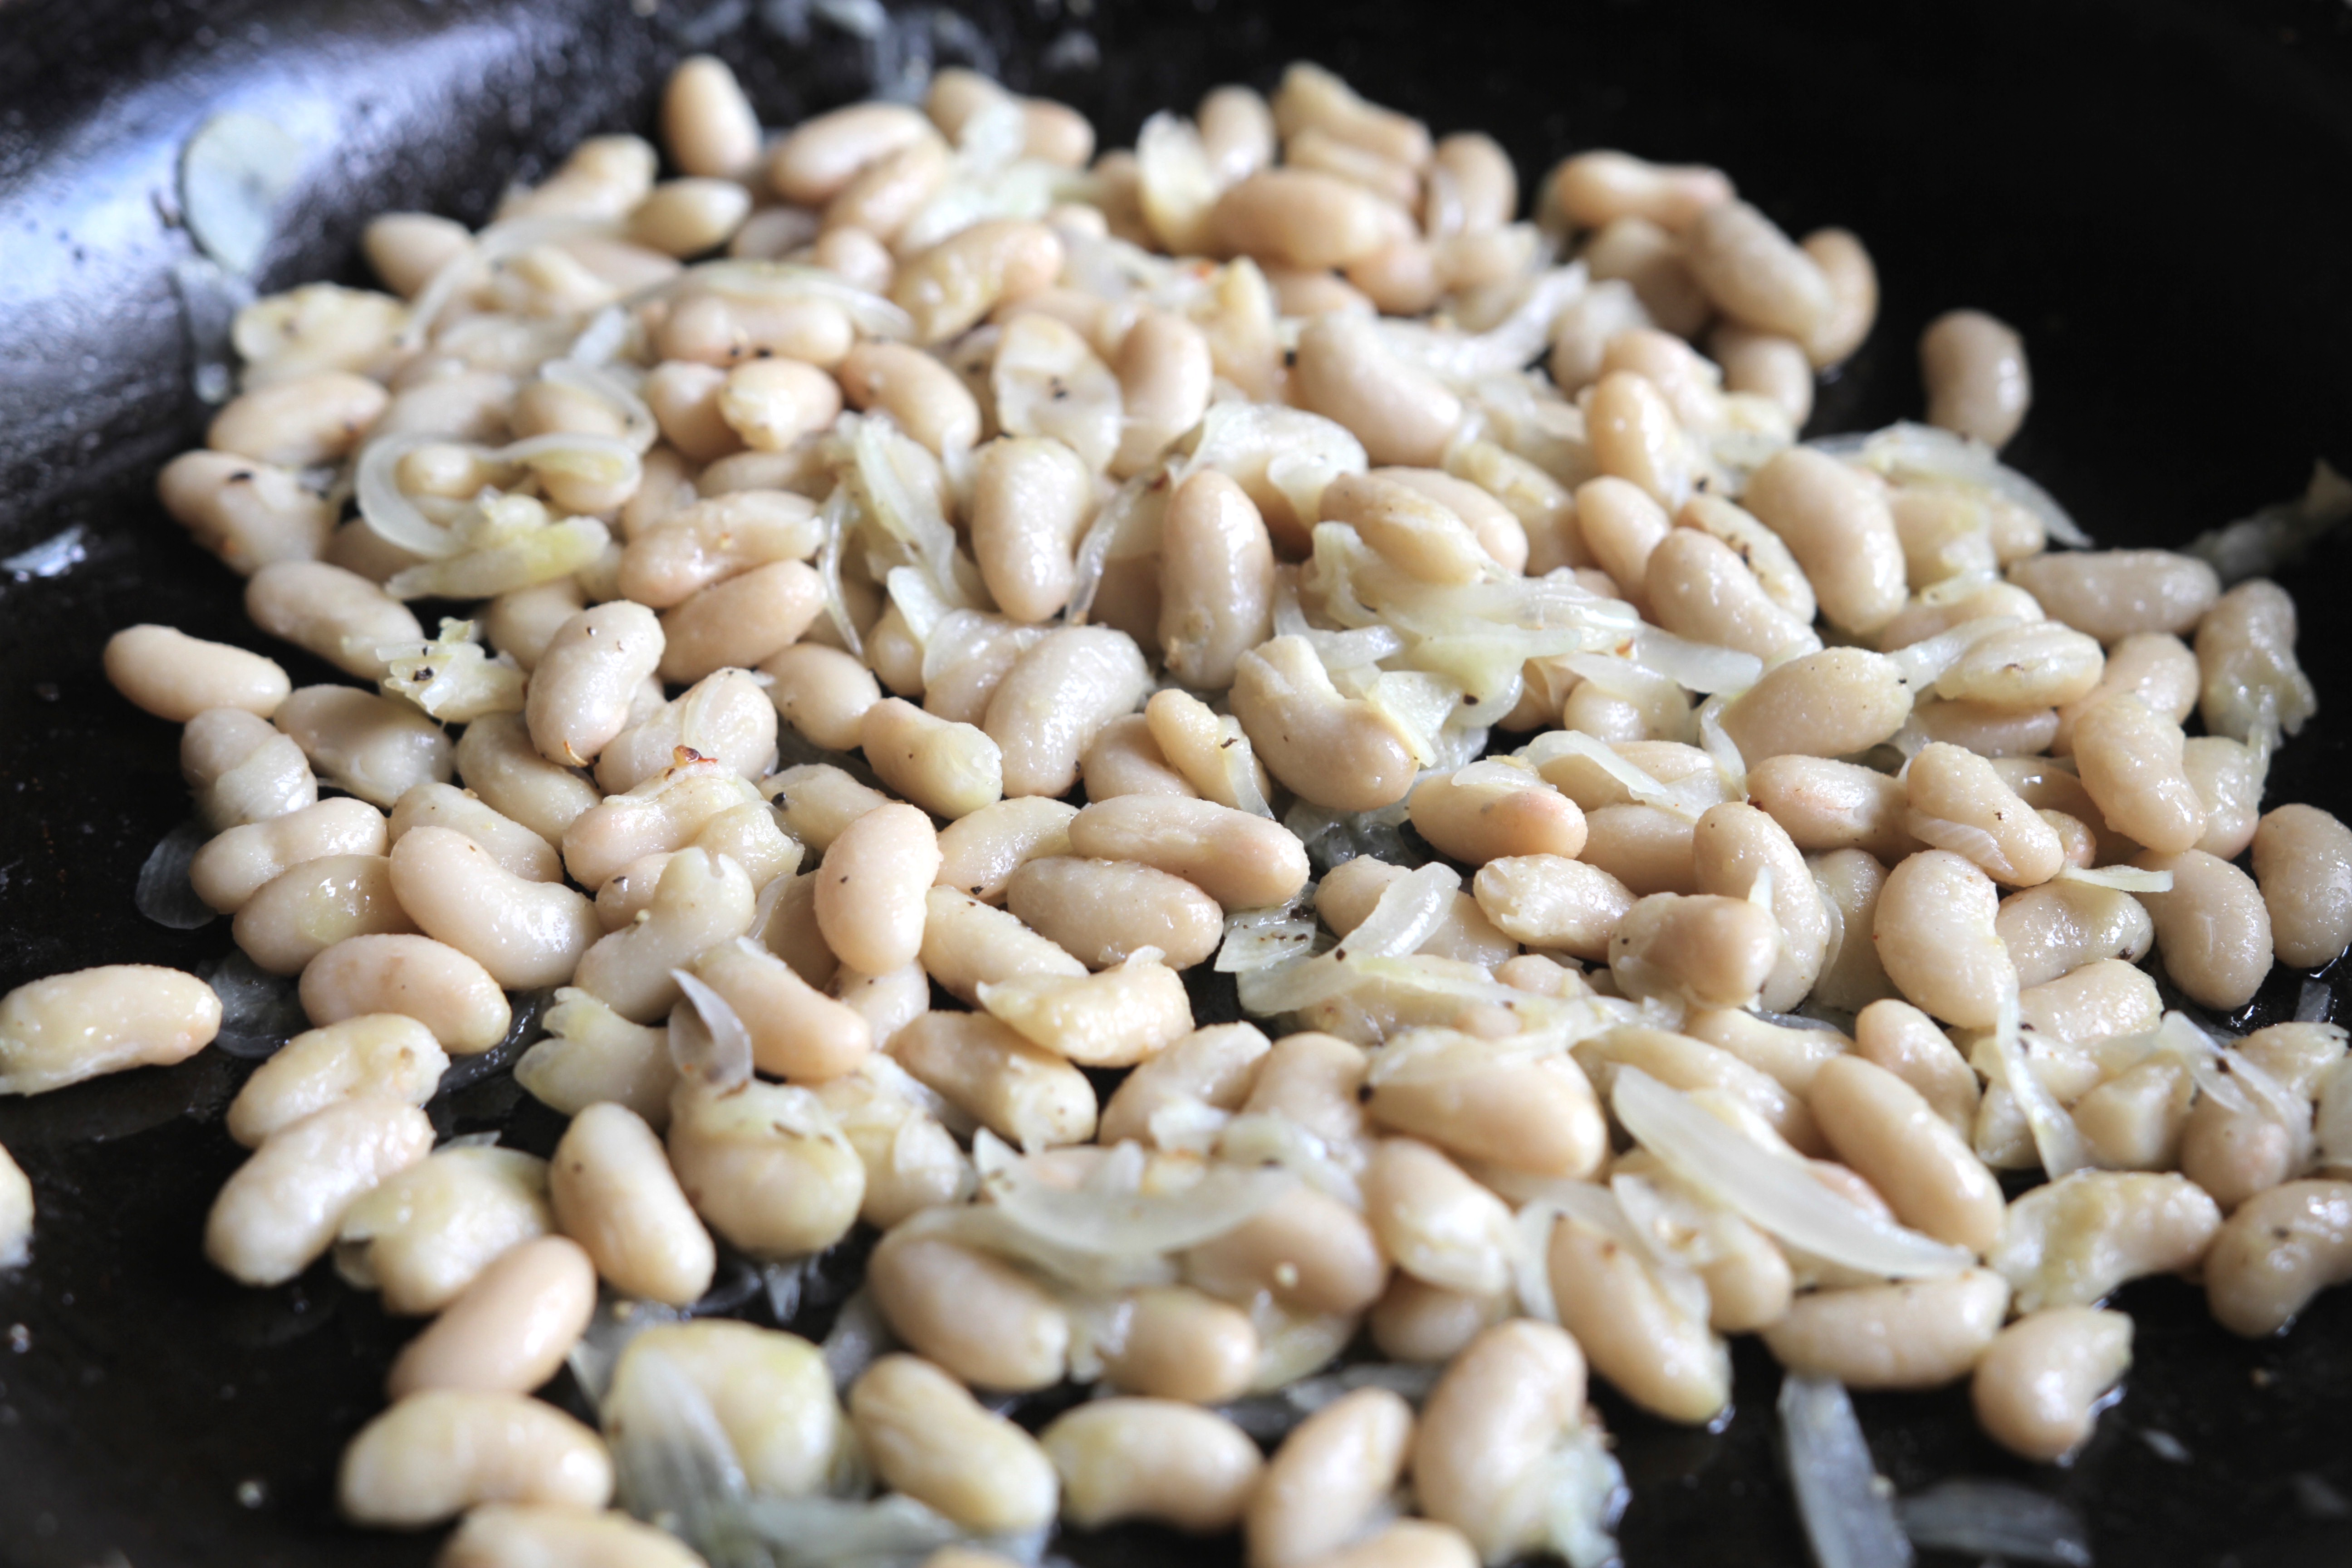
Mix the ingredients for the salad dressing in a small bowl
Rinse and dry the arugula. I chopped the leaves with scissors since they were quite big but if using baby arugula, just leave as is. Place the arugula in a big salad bowl, add the beans and salad dressing. Toss.
Scoop the salad onto the roasted squash. Enjoy!