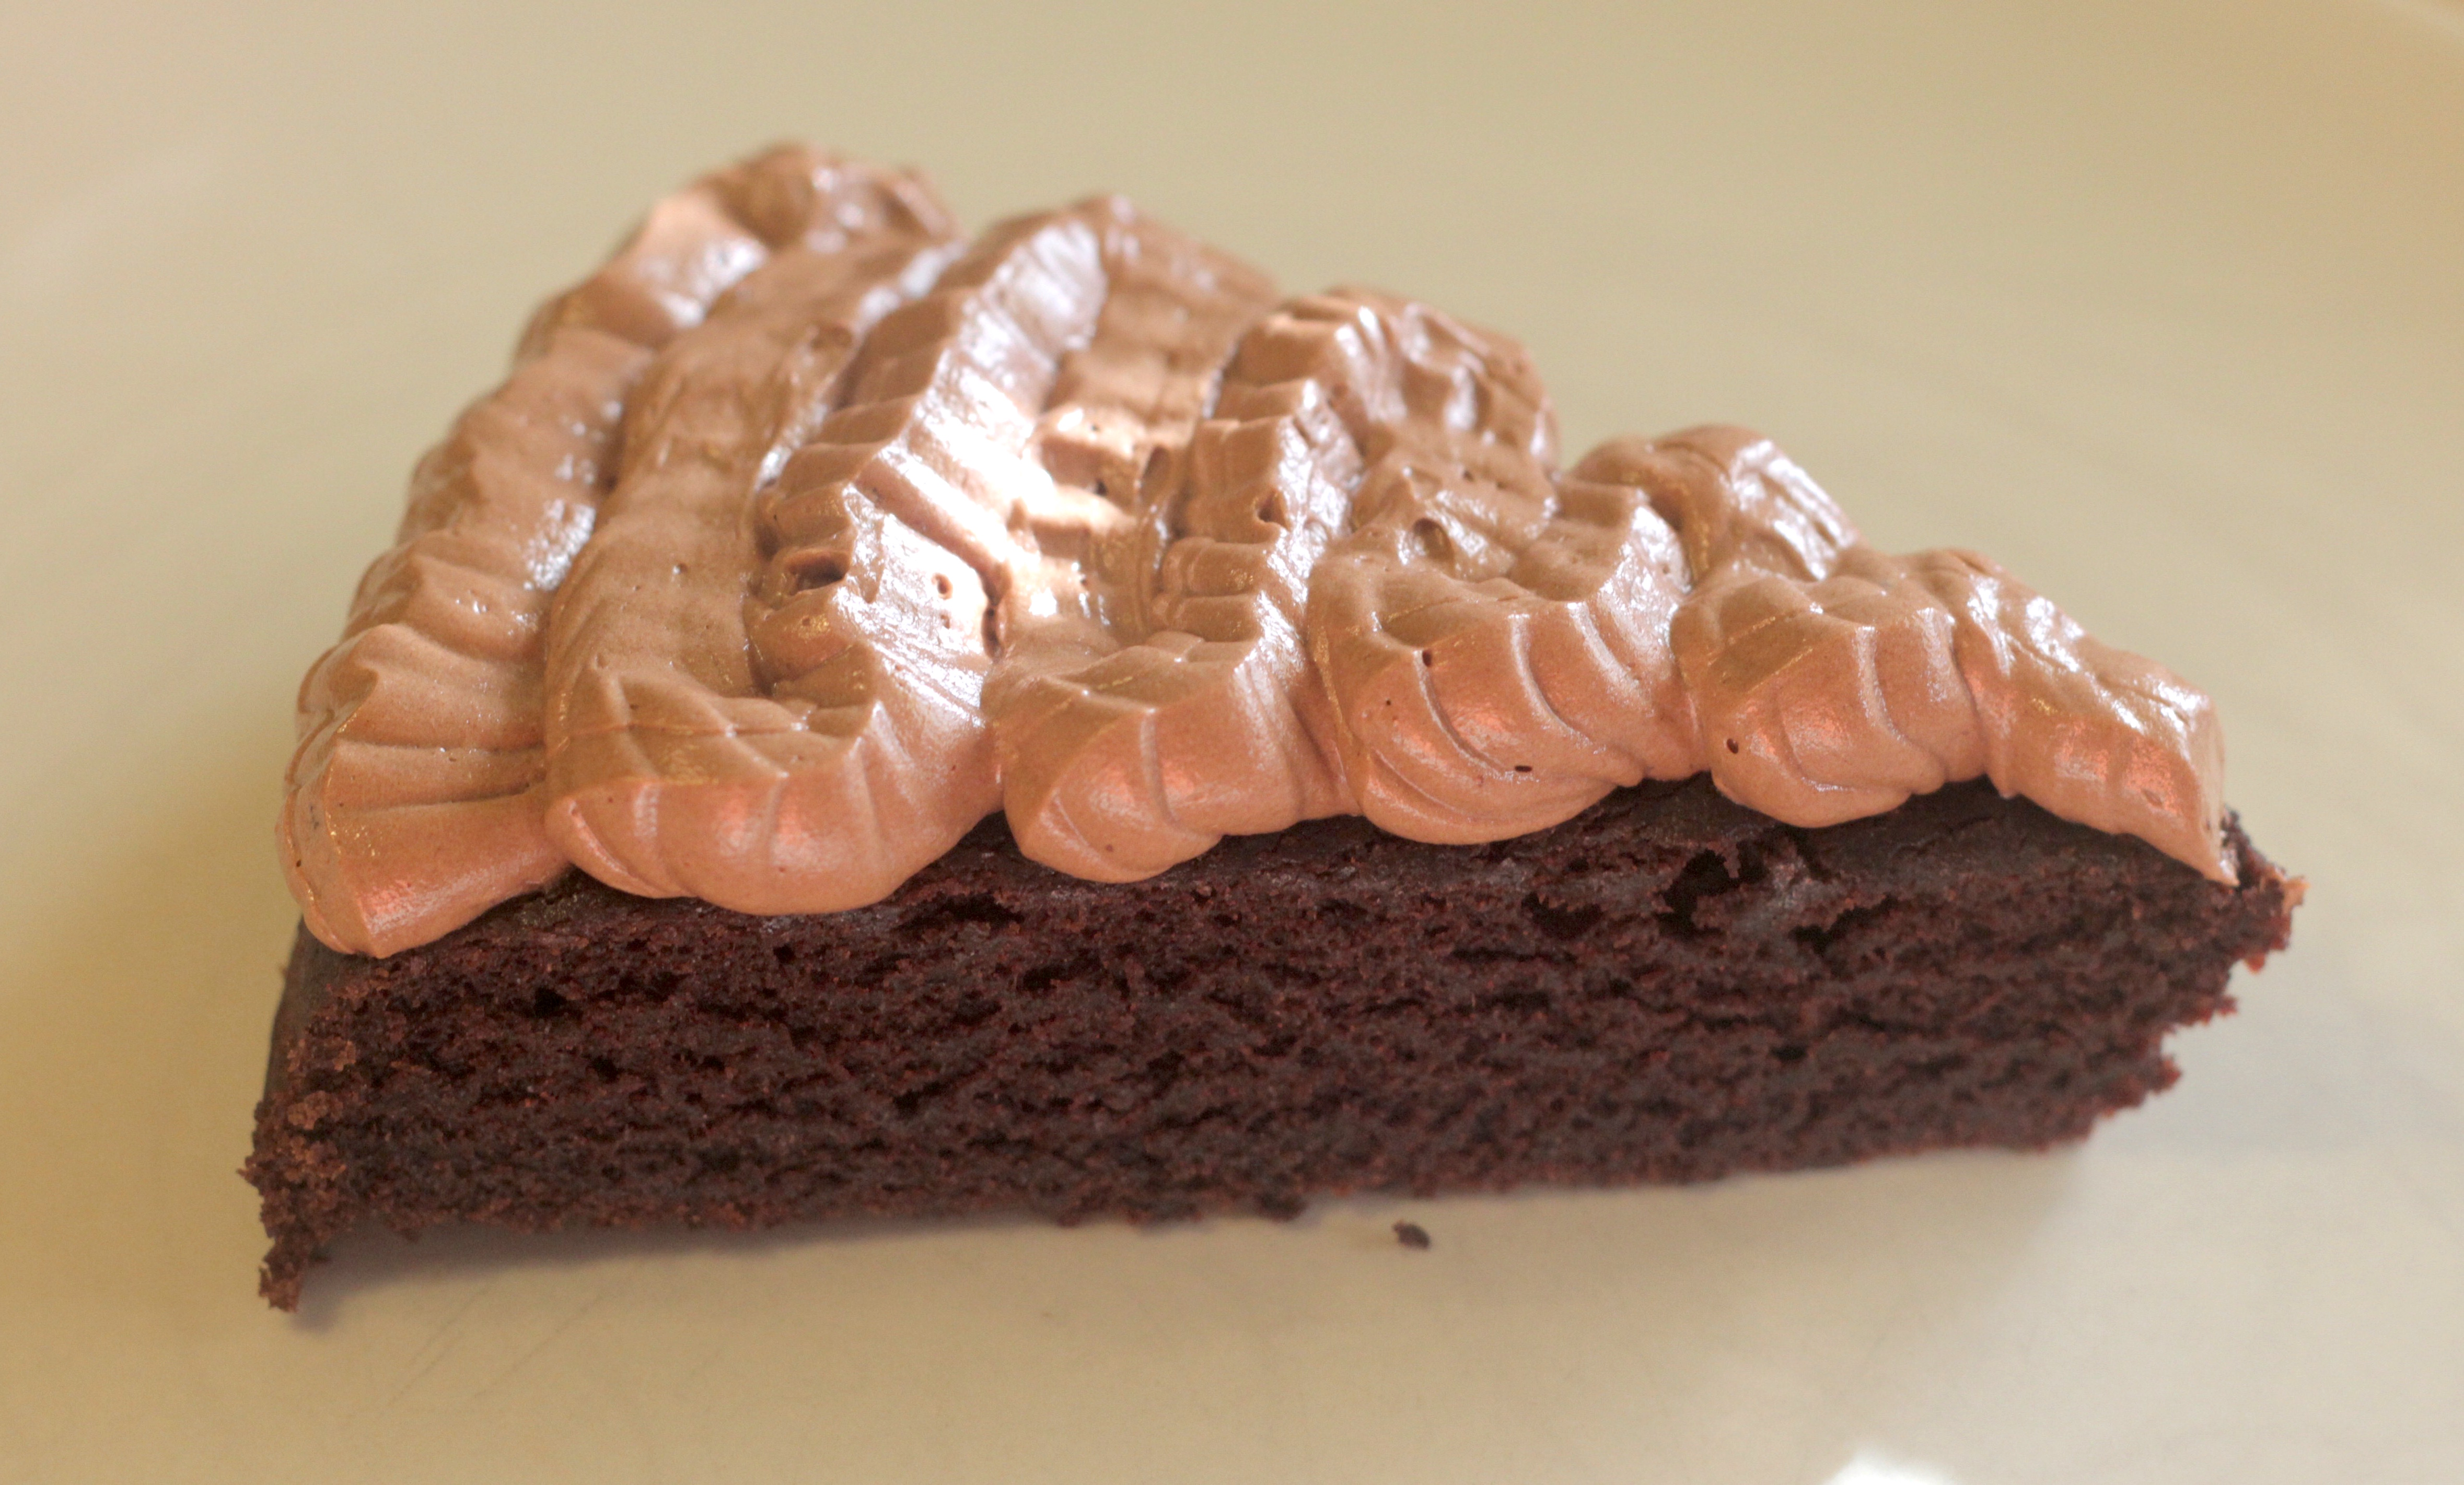
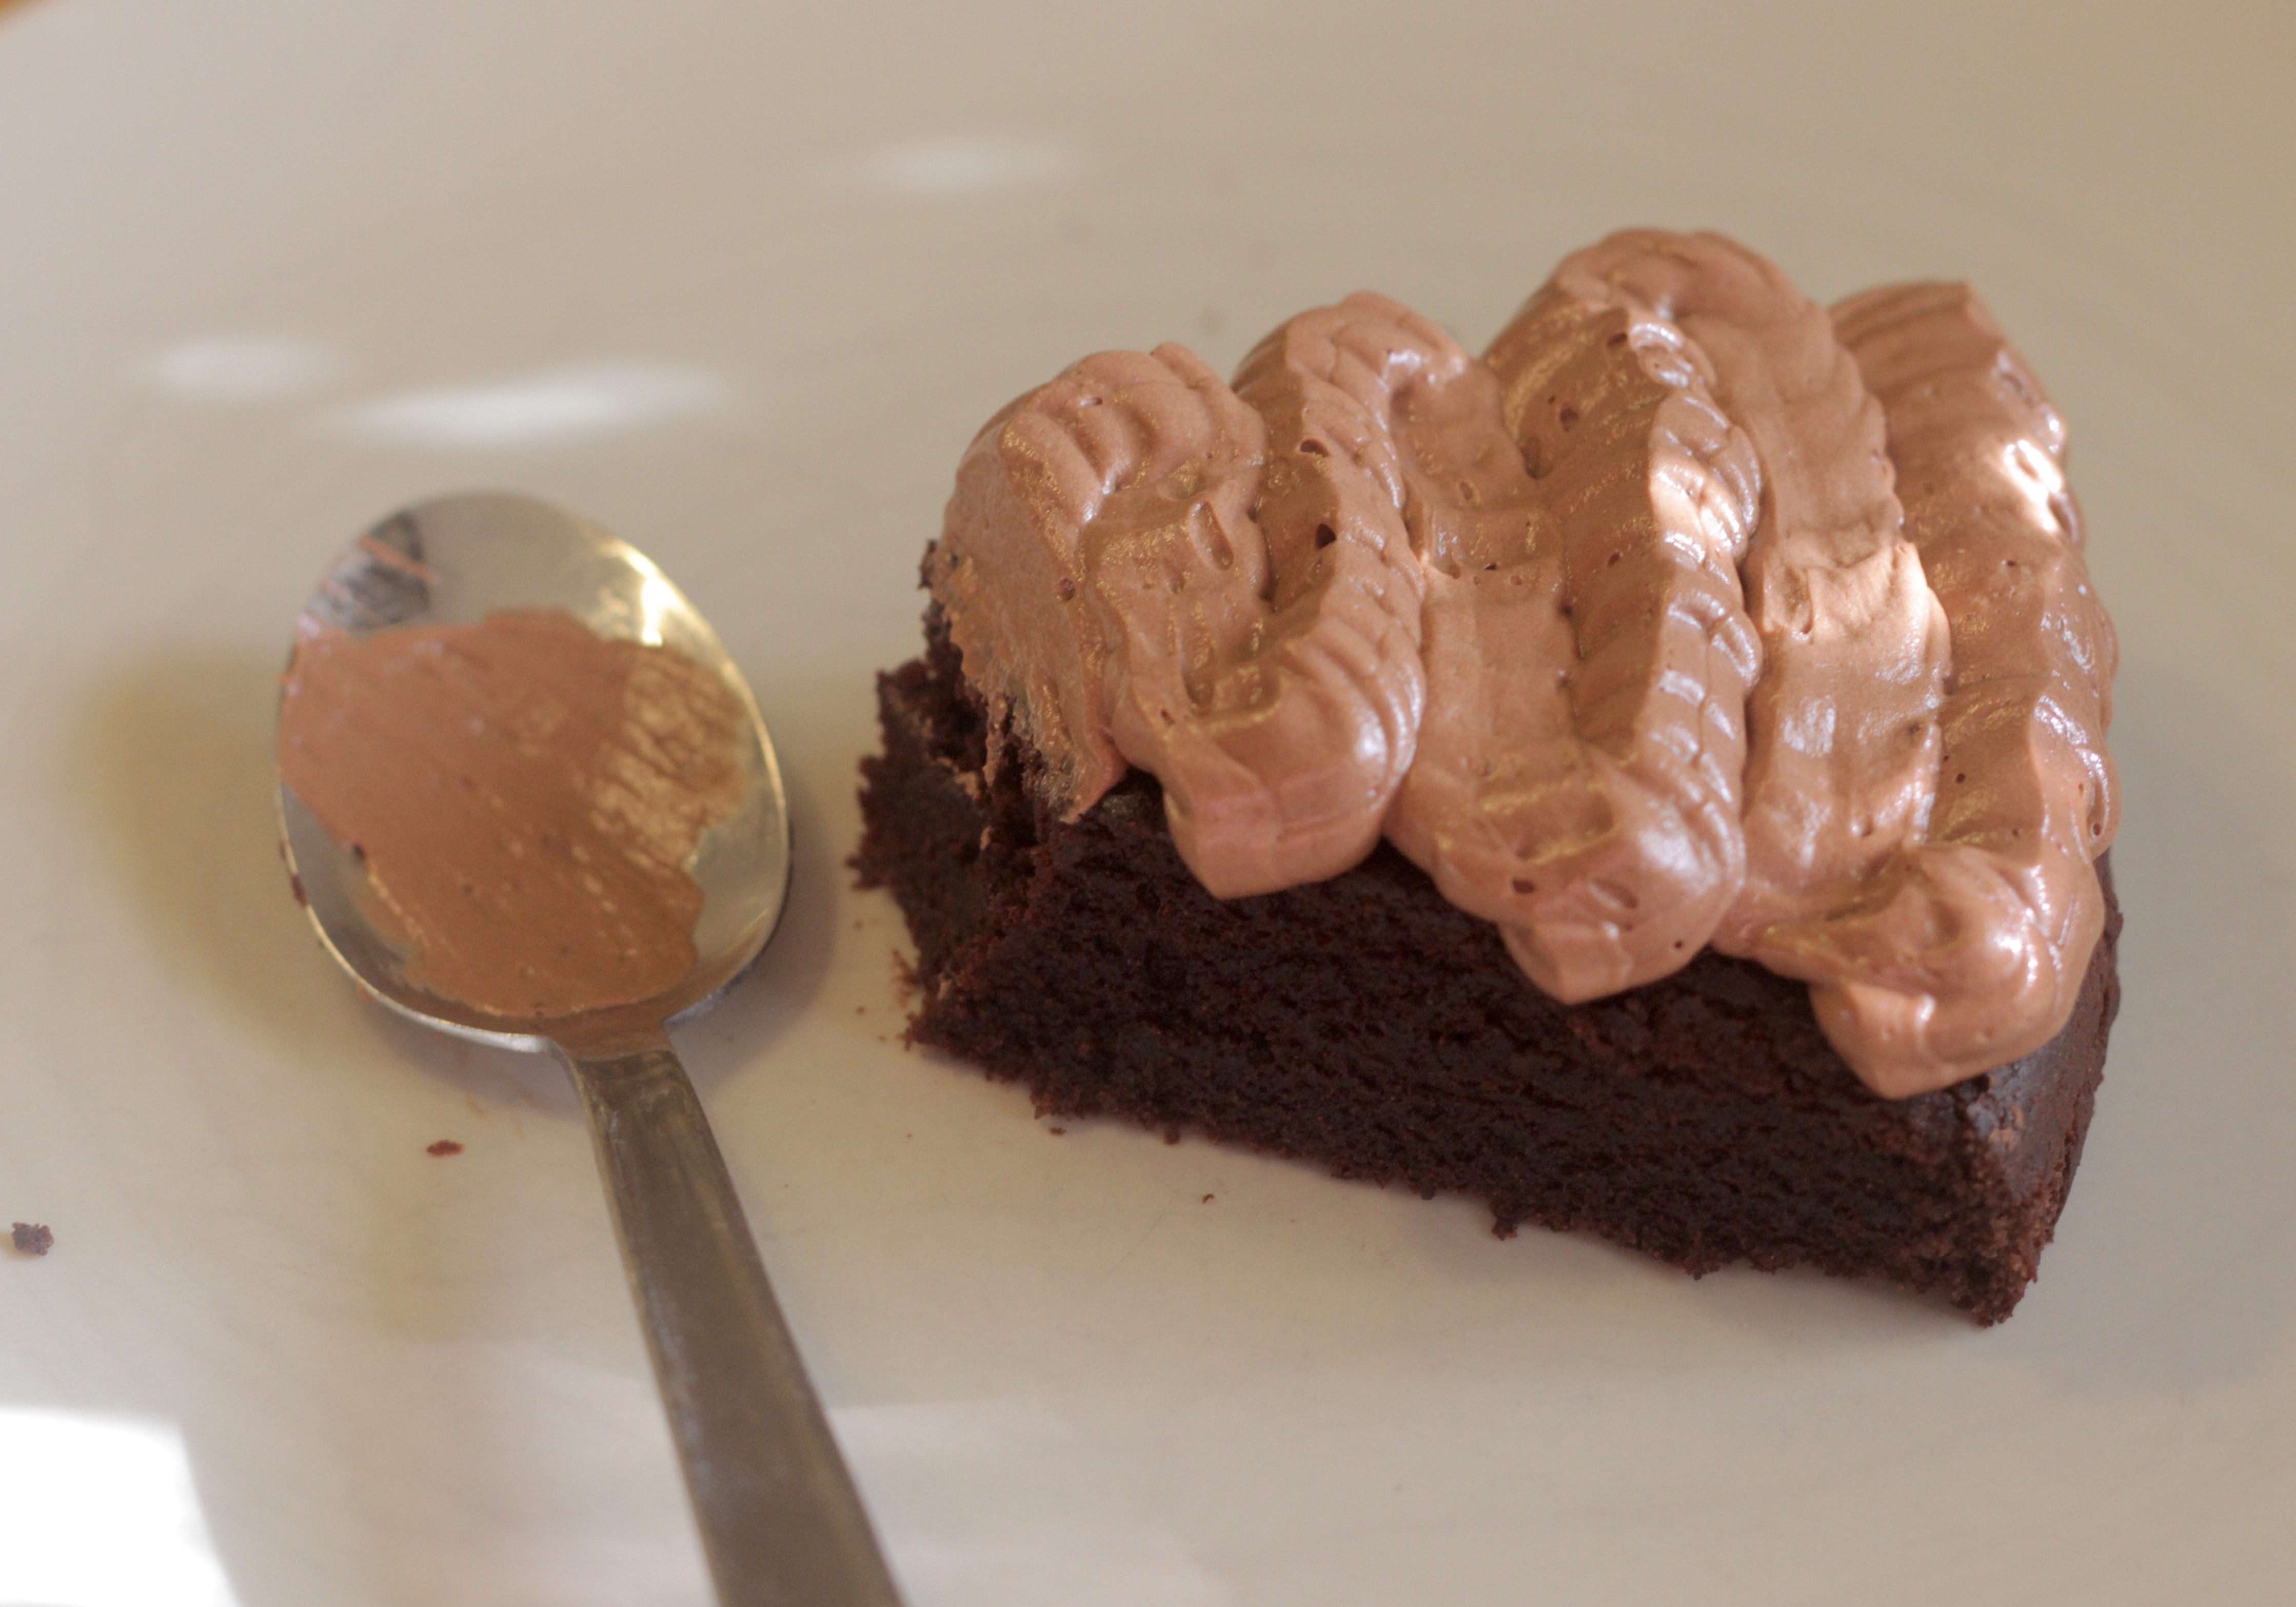
Even though I am generally not a big cake fan, chocolate cake is one of my weakness. Really, anything chocolate will get you on my good side.
Baking in itself is already more challenging for me, after switching to an egg-free diet, our baking was pretty restricted for a while. On top of that to find a gluten-free version that would be satisfying enough was rather difficult.
But, oh my, this recipe yields a cake that is moist and tender. The cake is not too sweet, topped with a fluffy and light frosting… a gluten-free chocolate deliciouceness.
Gluten free, vegan chocolate cake
Dry ingredients
1 1/4 cup gluten flour mix (I use Bob’s Red Mill 1:1 gluten free baking flour)
1/3 cup unsweetened cocoa powder
2/3 cup sugar
1 teaspoon baking soda
1/2 teaspoon salt
Wet ingredients
1/2 cup vegetable oil
1 tablespoon apple cider vinegar
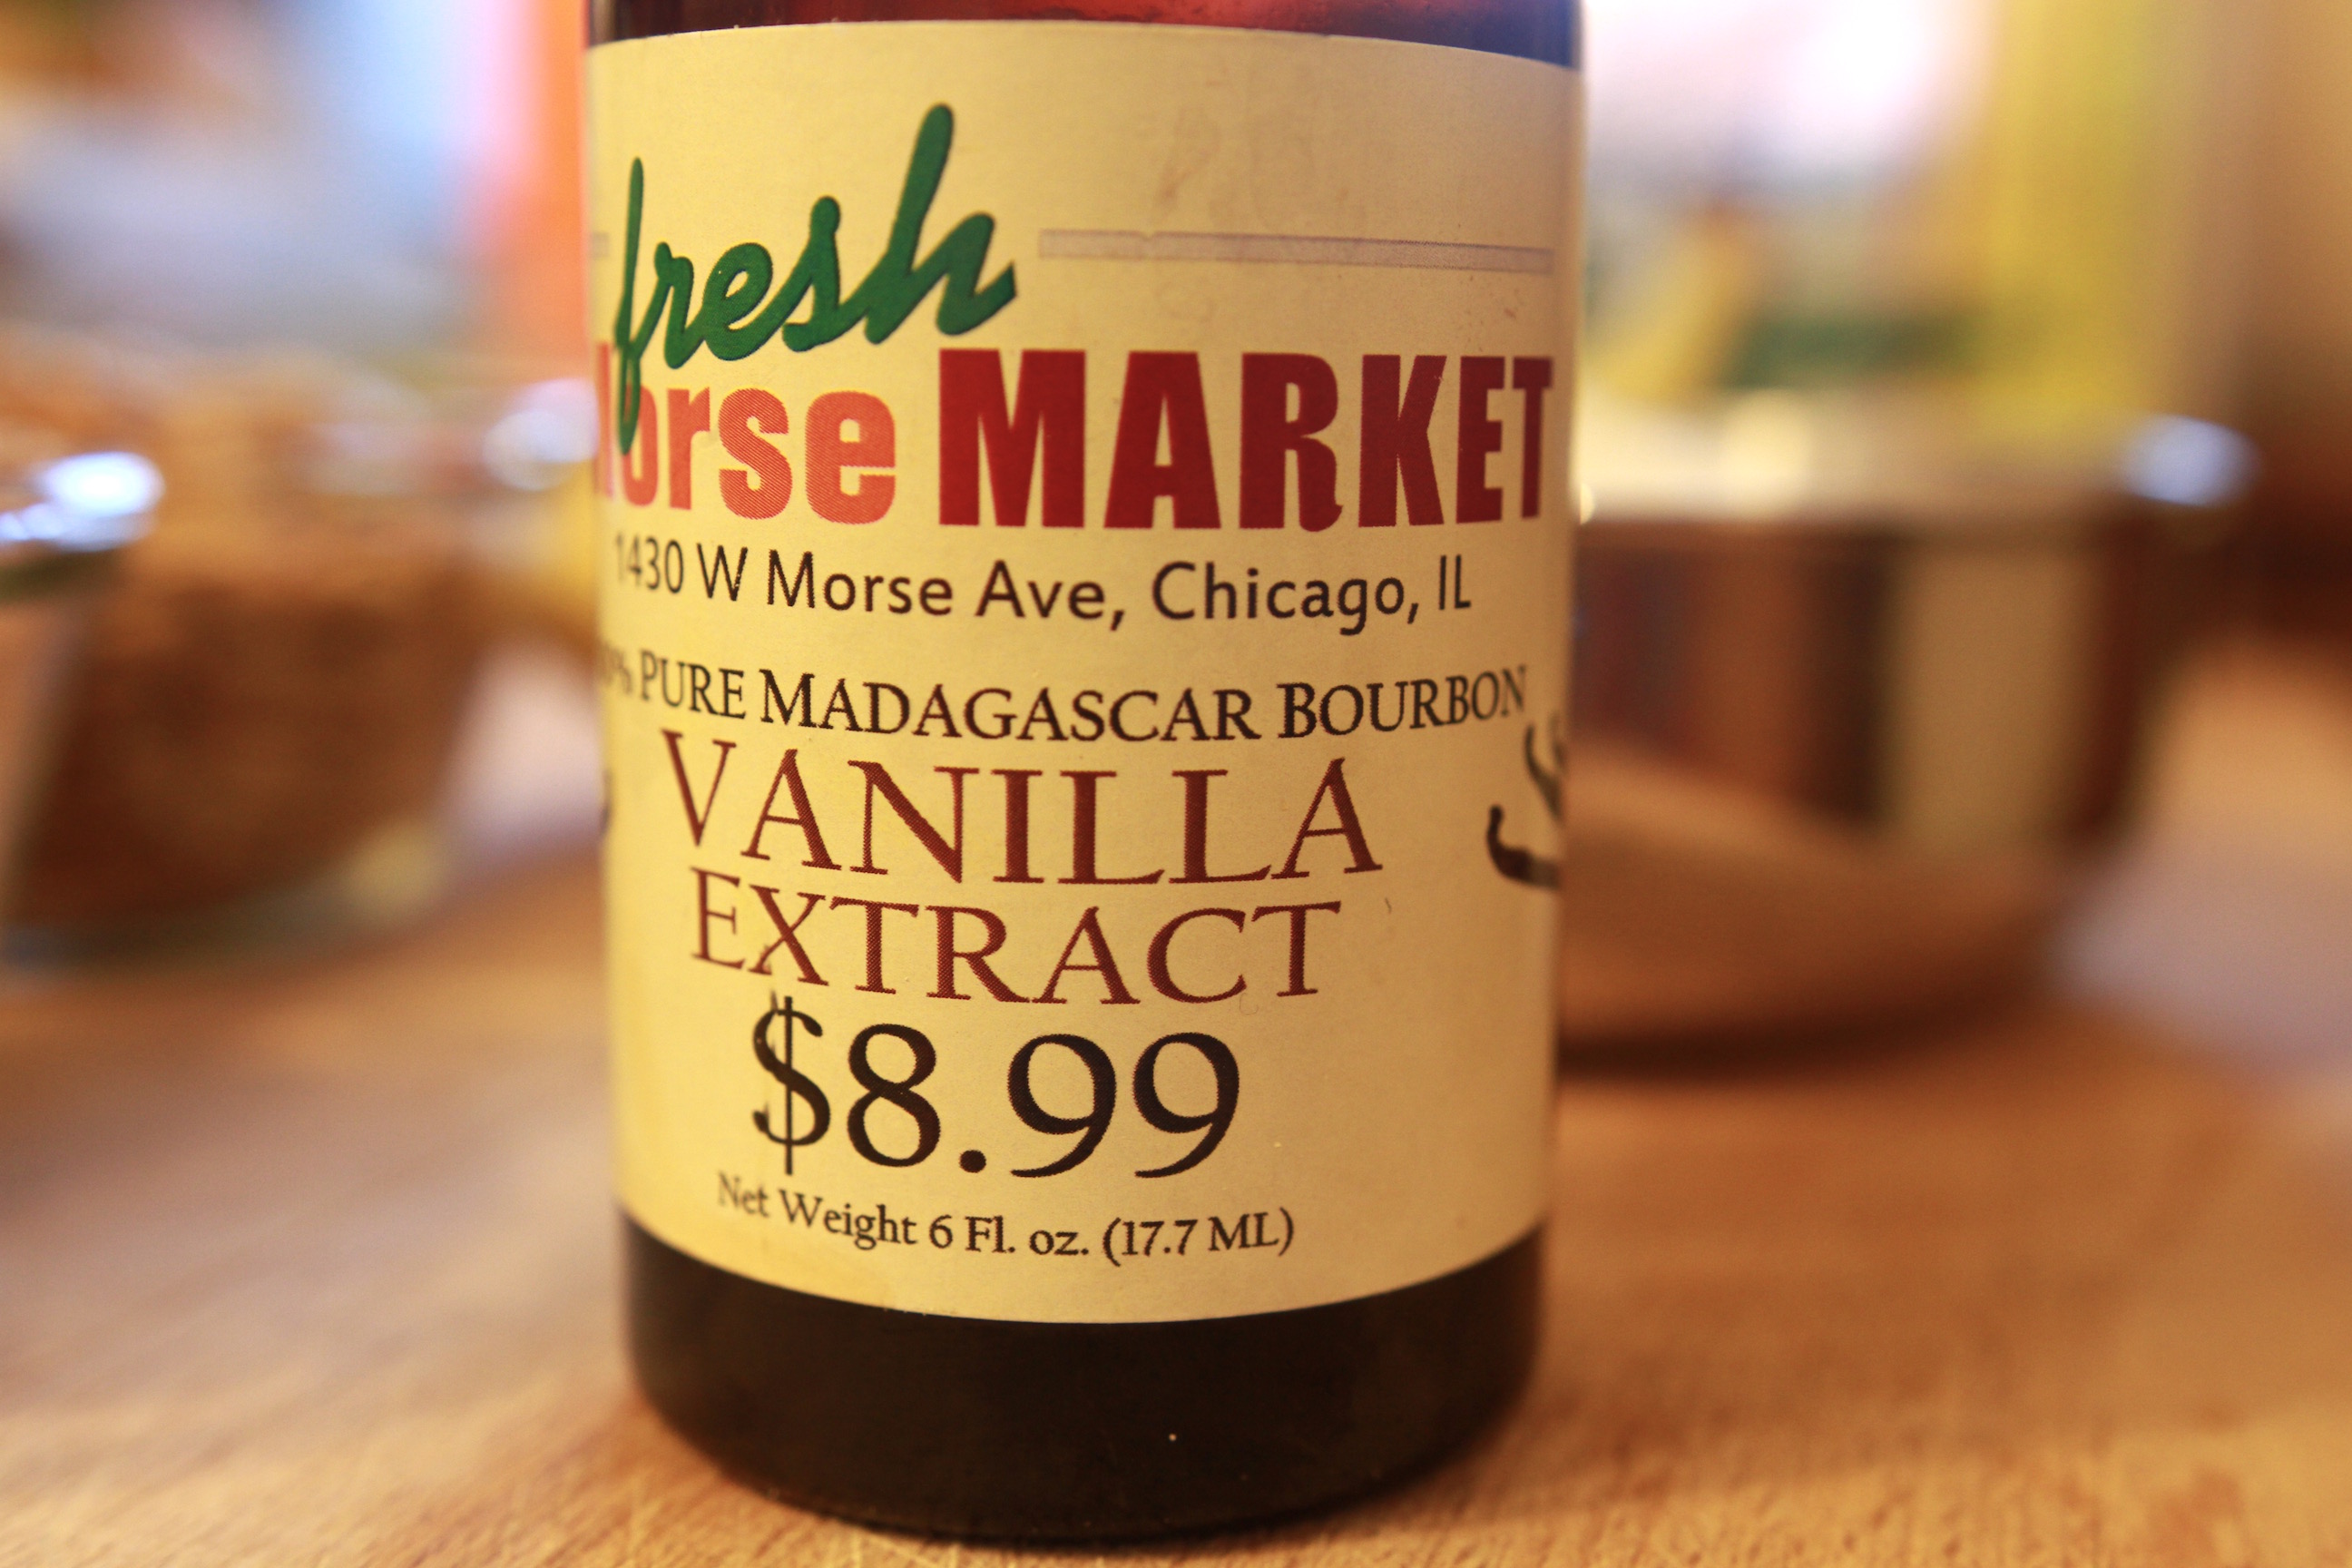
1 teaspoon vanilla extract
1 cup of warm water
Frosting
2 cups of confection sugar
1/2 cup unsweetened cocoa powder
1 cup vegan butter, softened
1 teaspoon vanilla extract
2 tablespoon coconut milk
Heat the oven to 350°F. Mix the dry ingredients in large bowl. Mix the wet ingredients in a separate bowl. Add the wet ingredients to the dry ingredients gradually while constantly mixing. Transfer to a cake pan and bake for 20-22 min at 350°F. Make sure the cake is done by checking with a toothpick, the toopick should come out dry. If not bake some additional time.
After baking, cool the cake before adding the frosting
Frosting:
Sift the confection sugar and cocoa powder in a big bowl together.
Whisk the vegan butter until soft, gradually add the sugar-cocoa powder mix. Add the vanilla extract. Whisk. Add the coconut milk. Whisk.
This year, we signed up for a CSA with a local farm. For those who don’t know, CSA stands for Community Supported Agriculture. You pre-pay for the crops before the season starts, and you receive a share of produce every so often, in our case, every week once the harvest begins. This is our first time signing up for a CSA, and we signed up with Angelic Organic farms. It is an excellent way to get fresh organic produce and helps to support the local farmers as well.
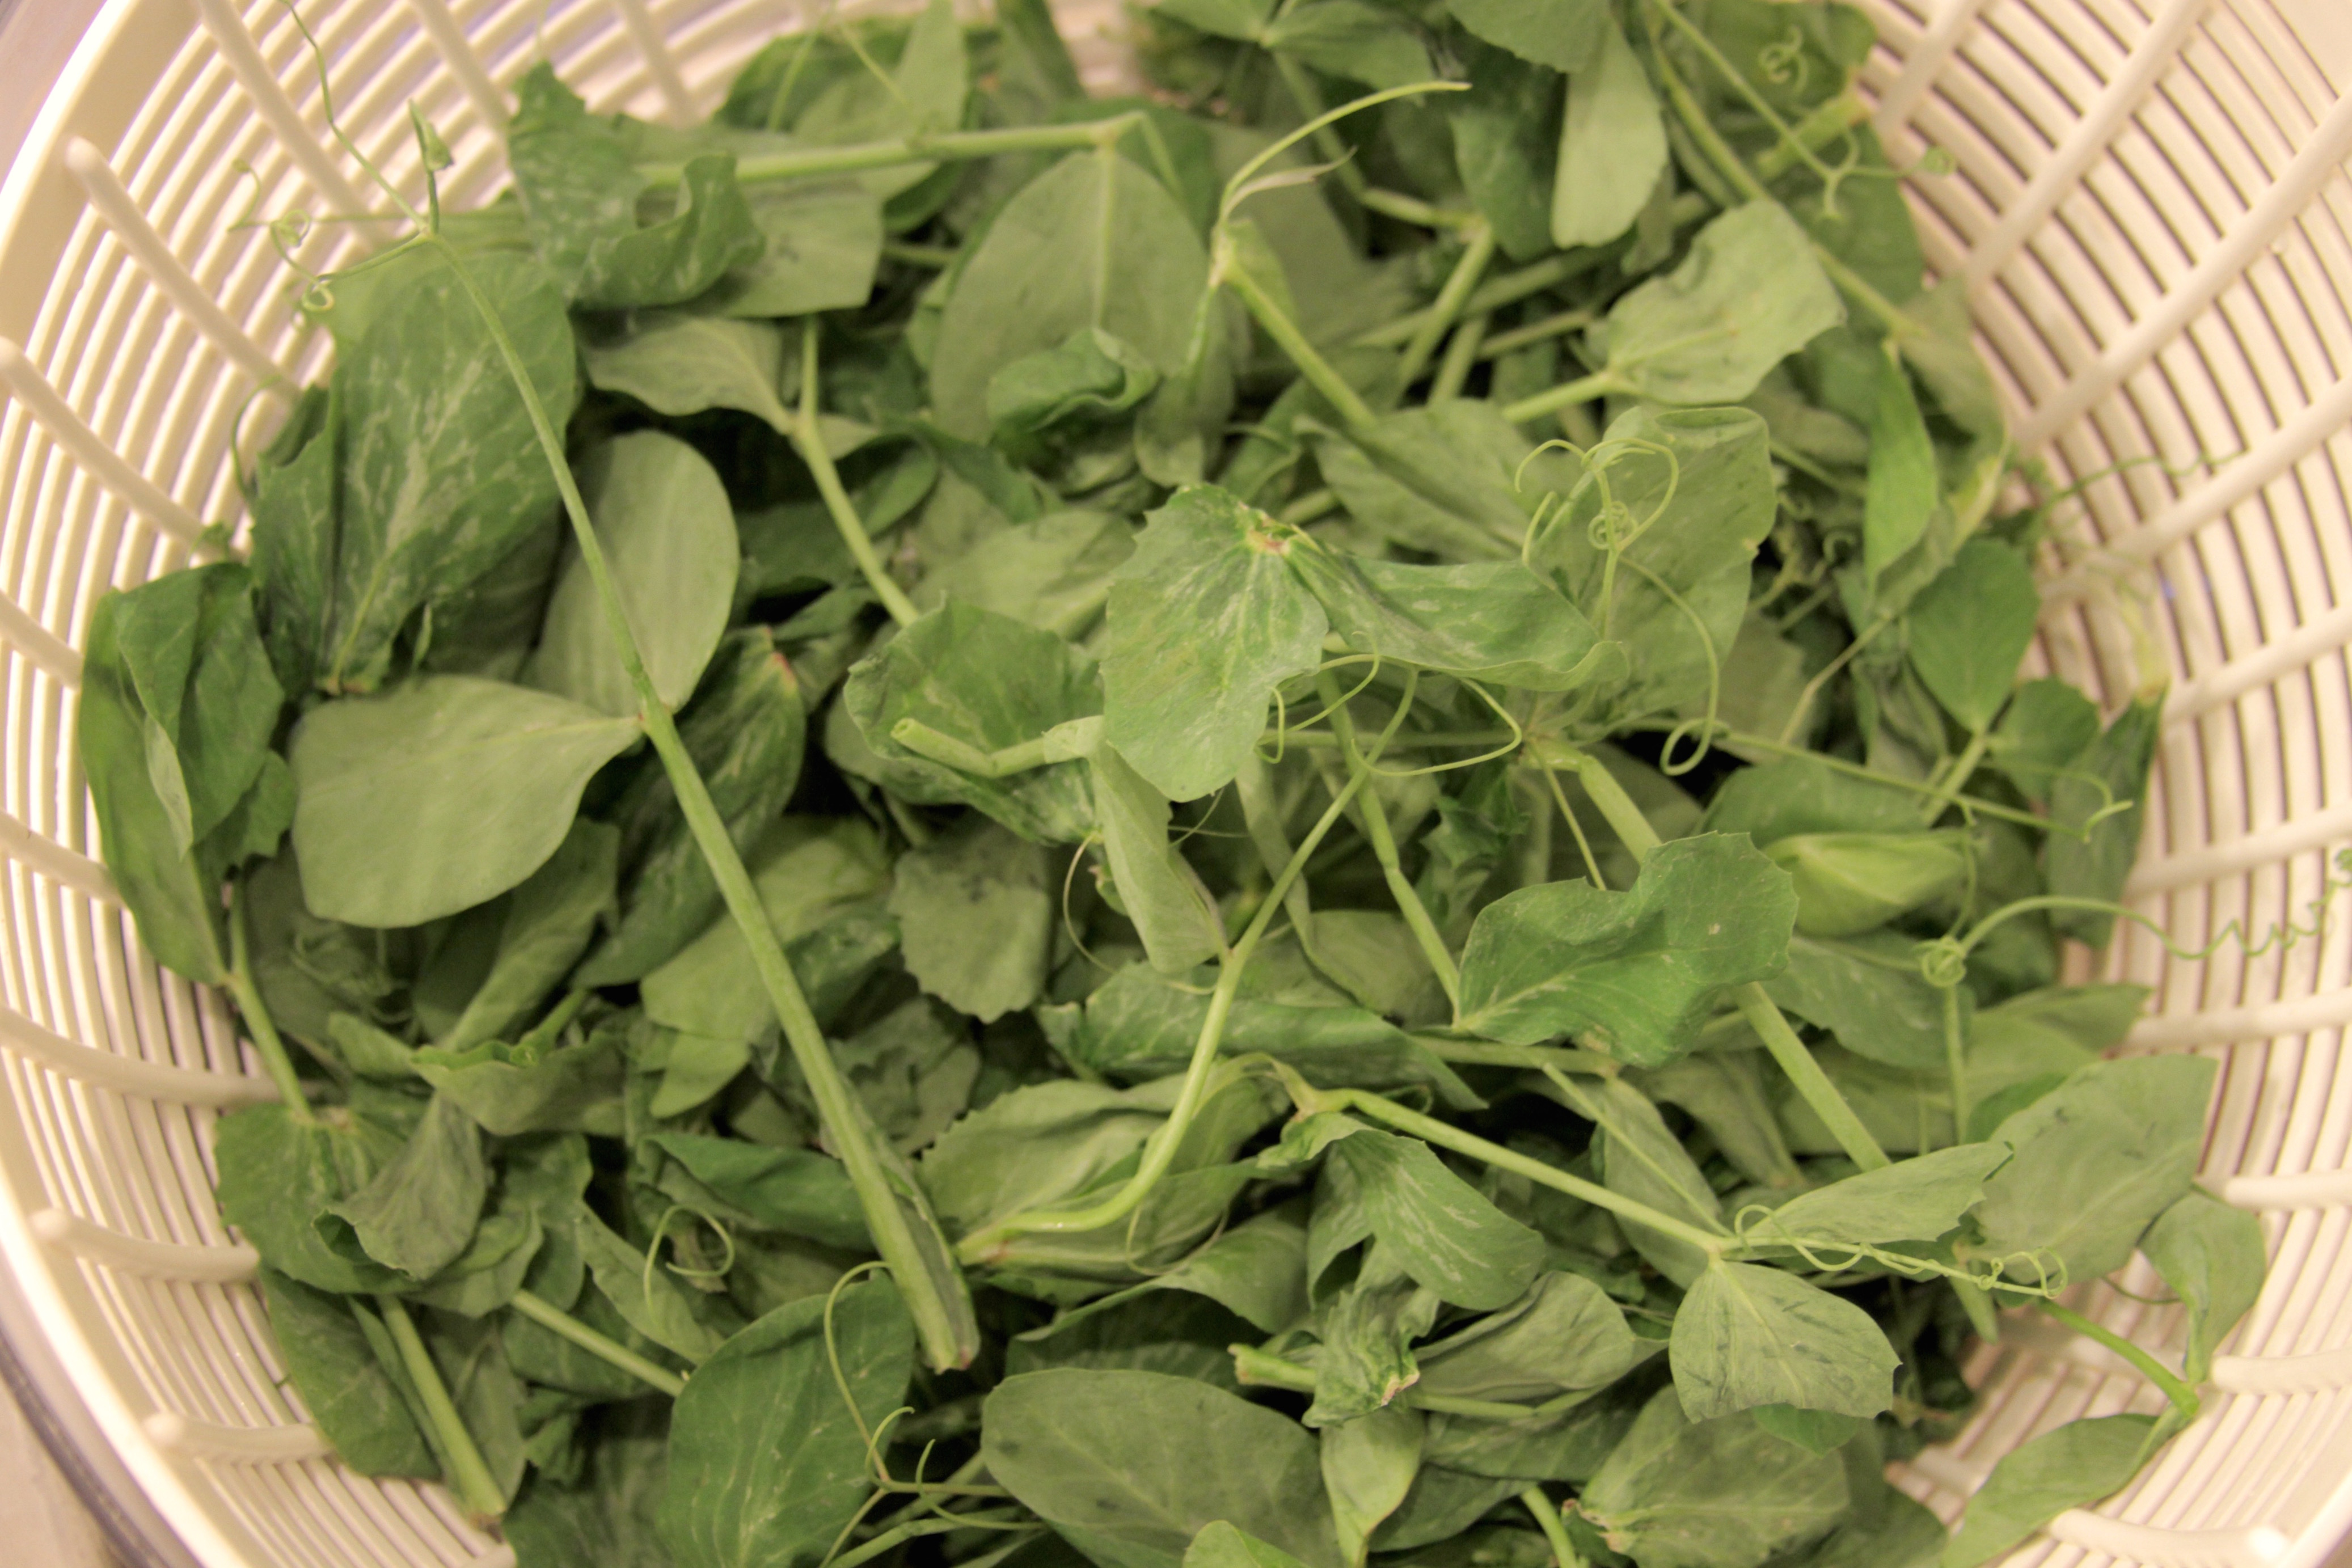
We received our first box last week, and it contained something I have never used, pea shoots. I did not even know they were edible. A lot of veggies greens, like radish and beets, are edible, but I had yet to have these.
I was intrigued and tasted a shoot. It was crunchy and tasted, not surprisingly, like snap peas.
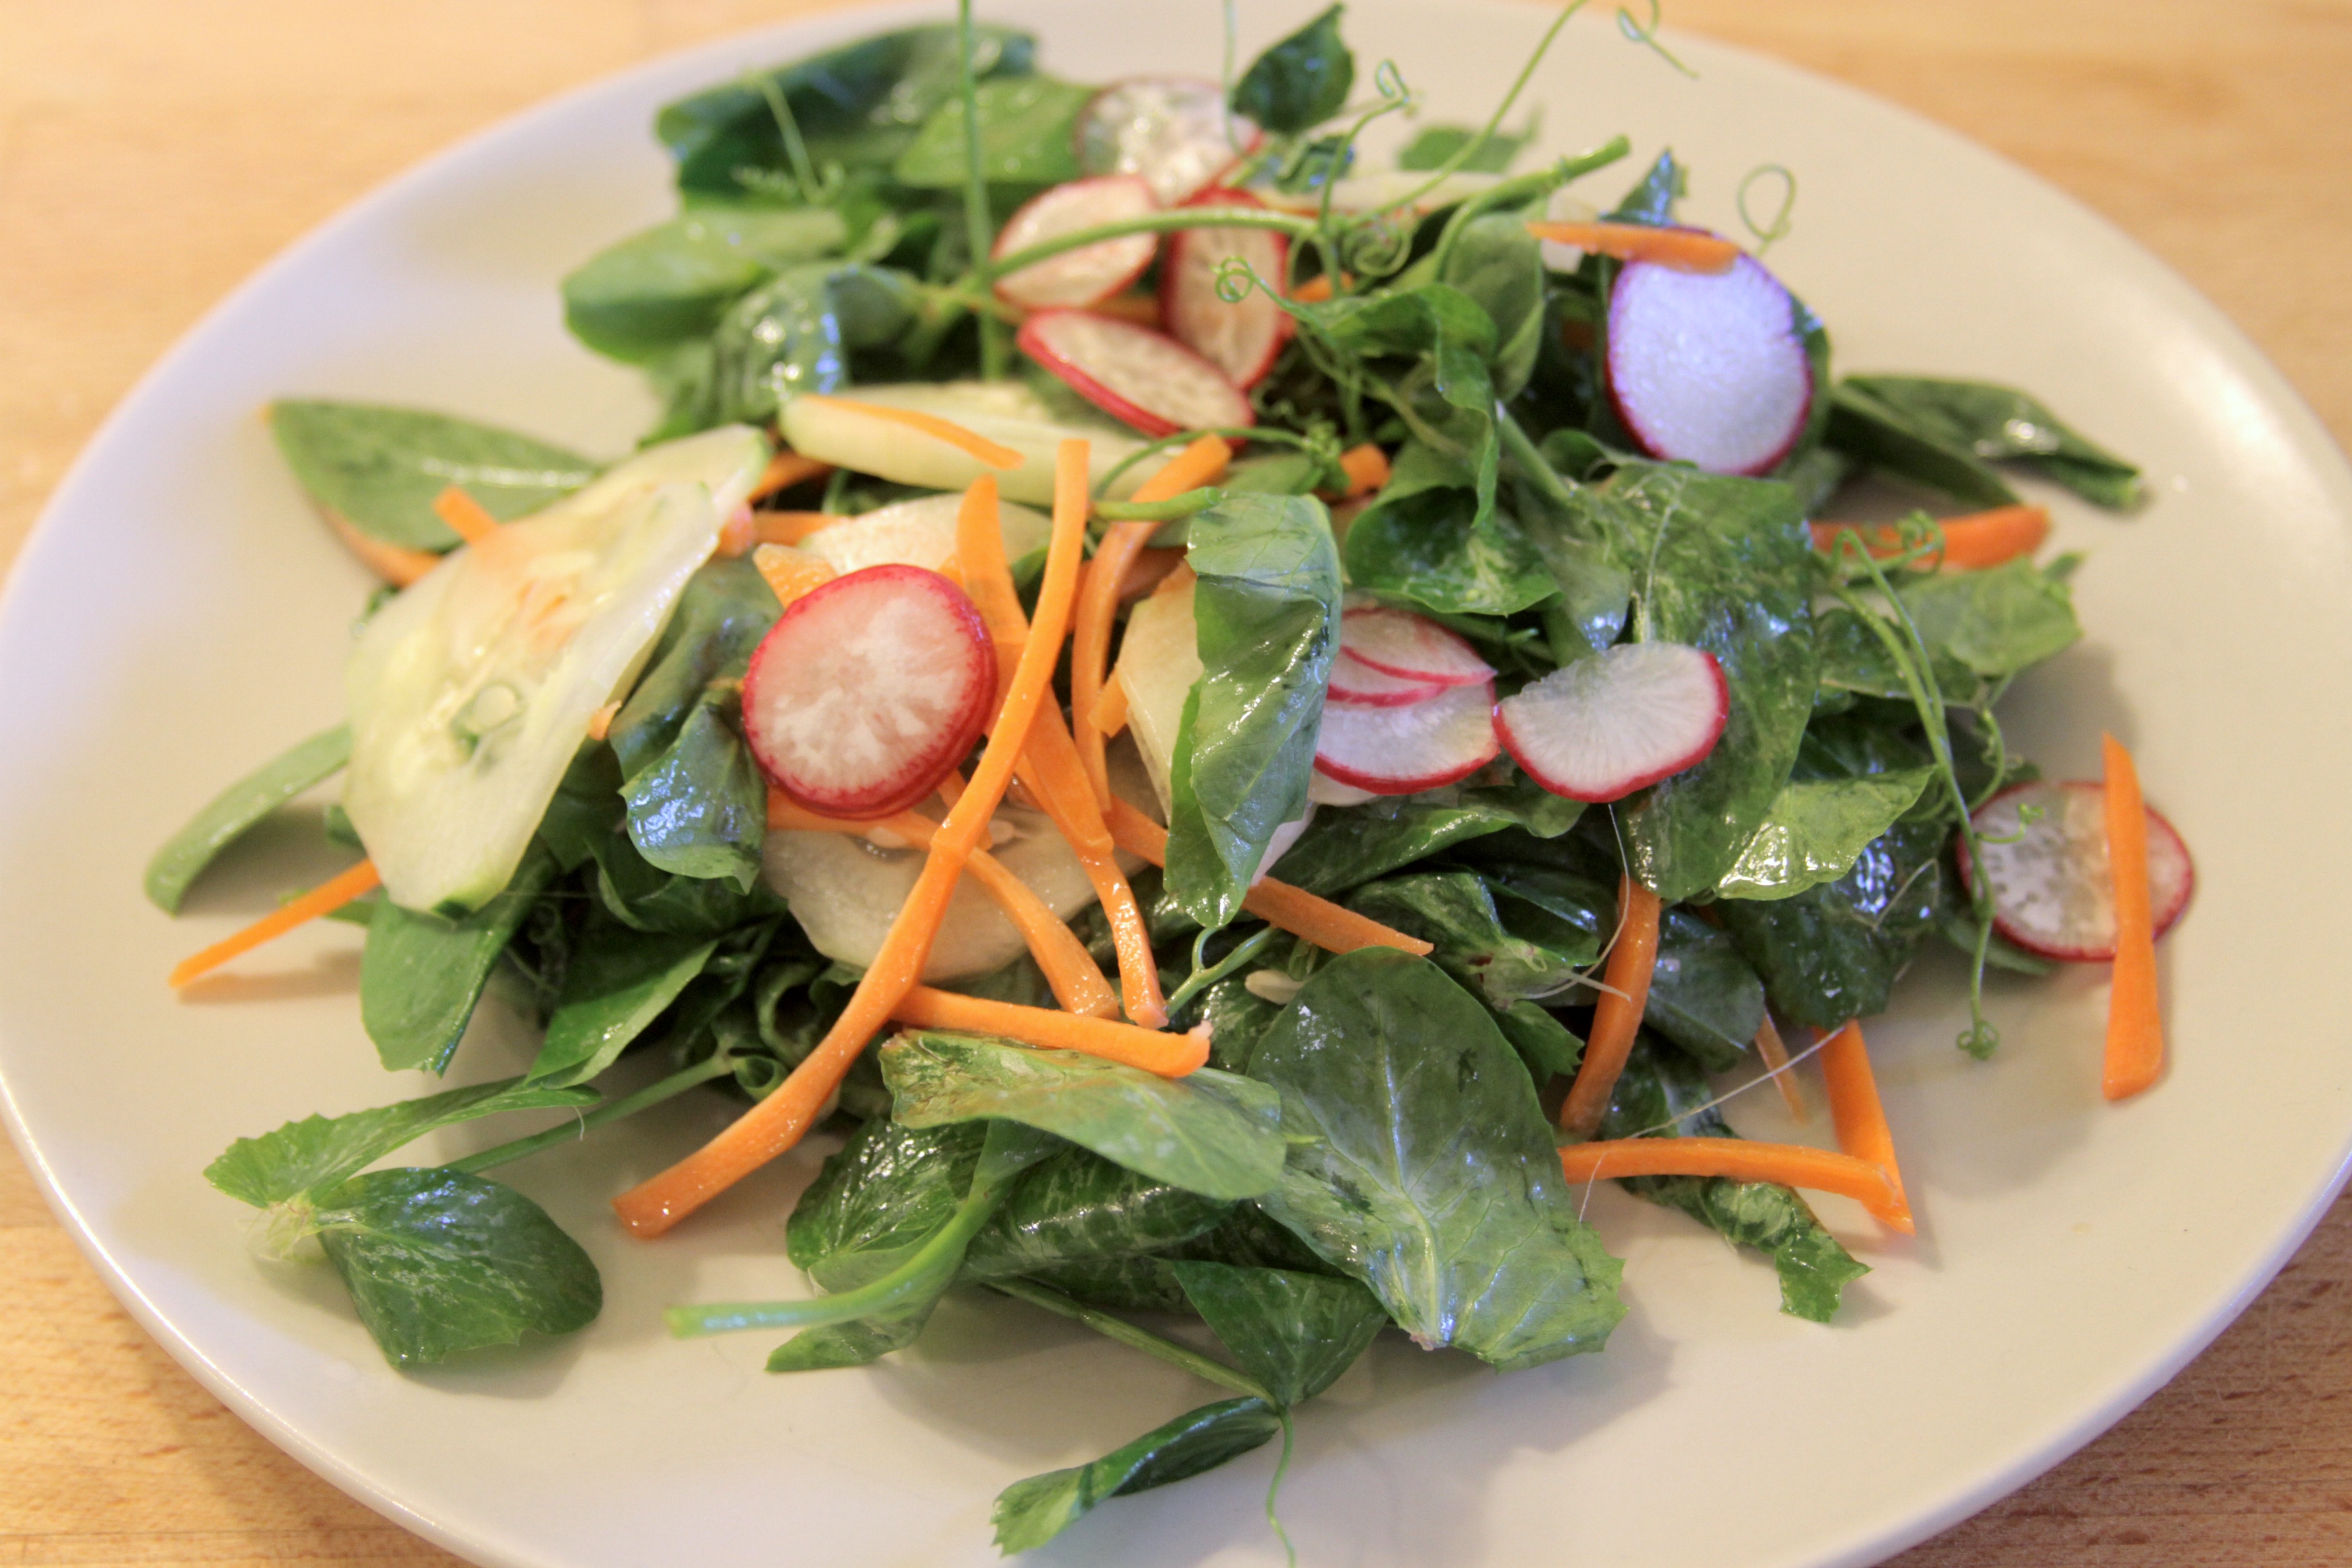
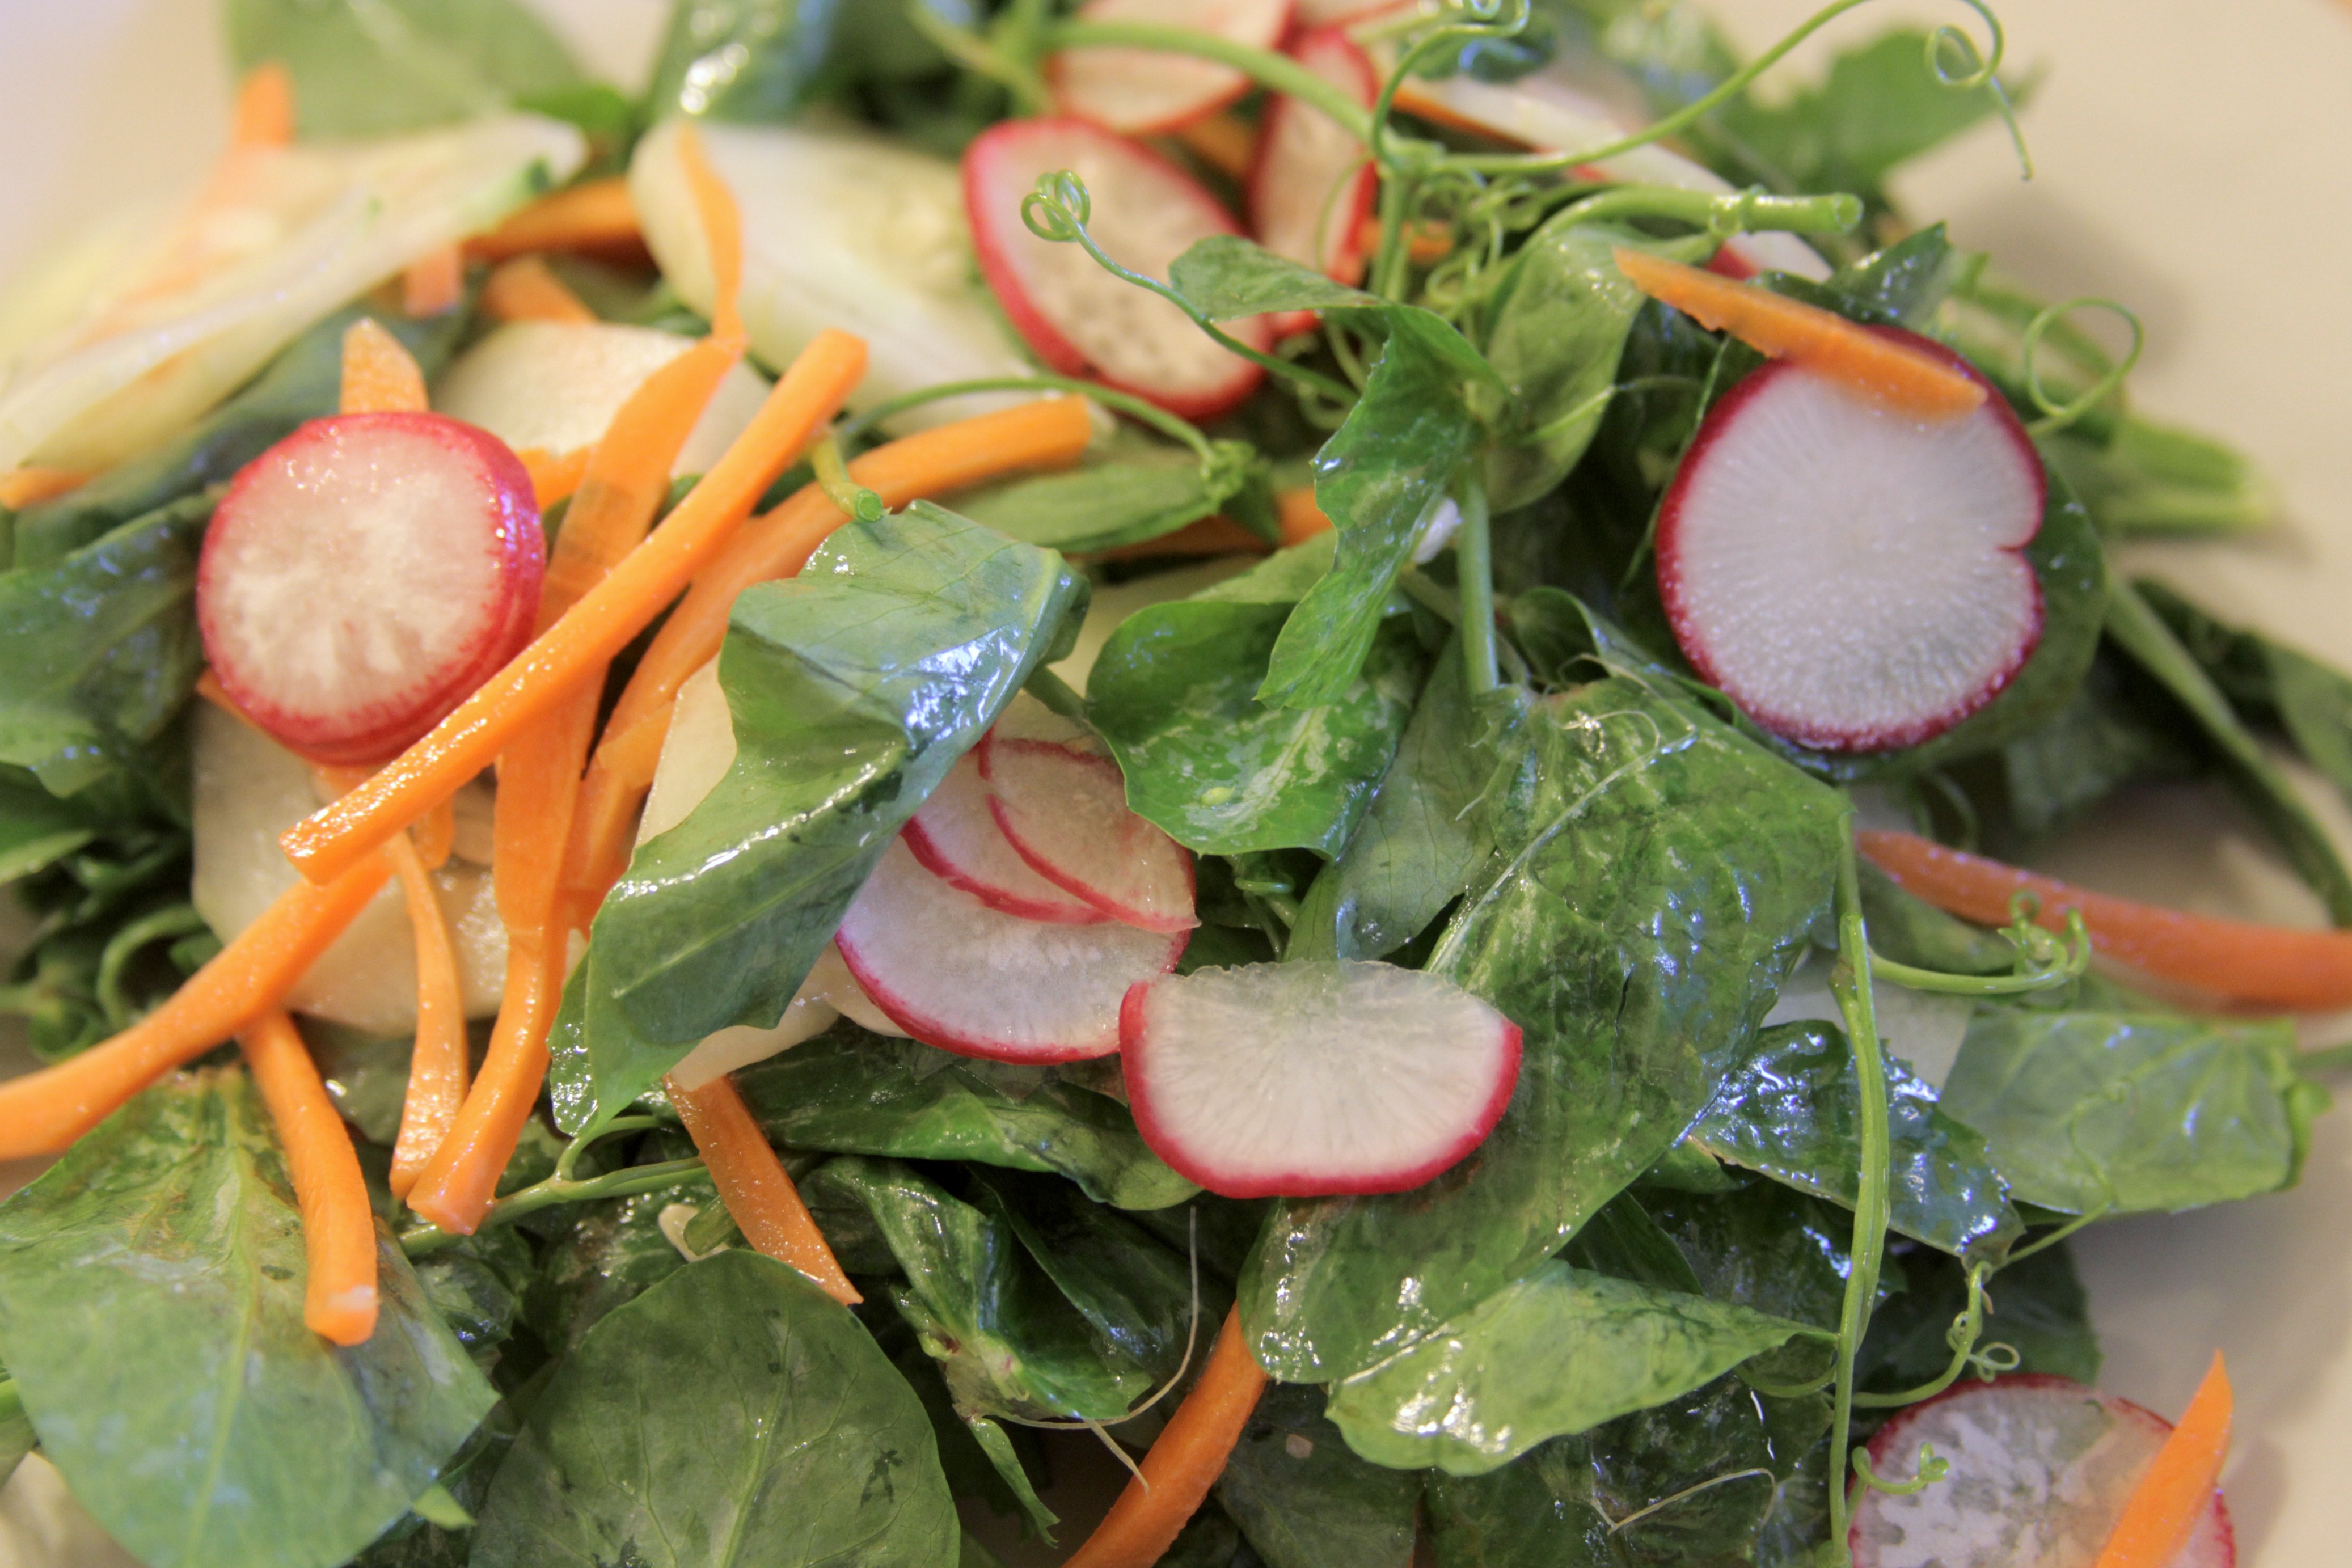
From a quick search, it seemed they could be used as salad and married well with soy sauce and ginger. I added radishes, also from the farm share, as well as some store-bought cucumber and carrots.
So, this is my first shot at a pea shoots salad. I purposely did not give accurate quantities here, as you can add in as much of each ingredient as you have or as you like. Simple, yet delicious.
Pea shoots salad
Pea shoots (I removed the big stems and kept the end shoots and all the leaves, enough to fill a large bowl
Radishes, finely sliced as needed
Cucumber, finely sliced
Finely sliced carrots
Salad Dressing:
4 Tbsp of olive oil
1 Tbsp apple cider vinegar or rice vinegar
1/2 Tbsp soy sauce (I use a low sodium one)
Salt
Pepper
Pick the end stems out, including the first leaves after the curly ends as well as all the leaves from the large stems. Wash the shoots and leaves and spin to dry or towel dry. Mix with the radish and the cucumber in a big bowl.
Mix all the ingredients for the salad dressing. Salt and pepper as needed. Add the dressing to the salad and toss. Enjoy!
Spring has finally come!
Well, technically, spring is here. We still had snow last night.
Anyway, spring is here, time for fruity desserts!
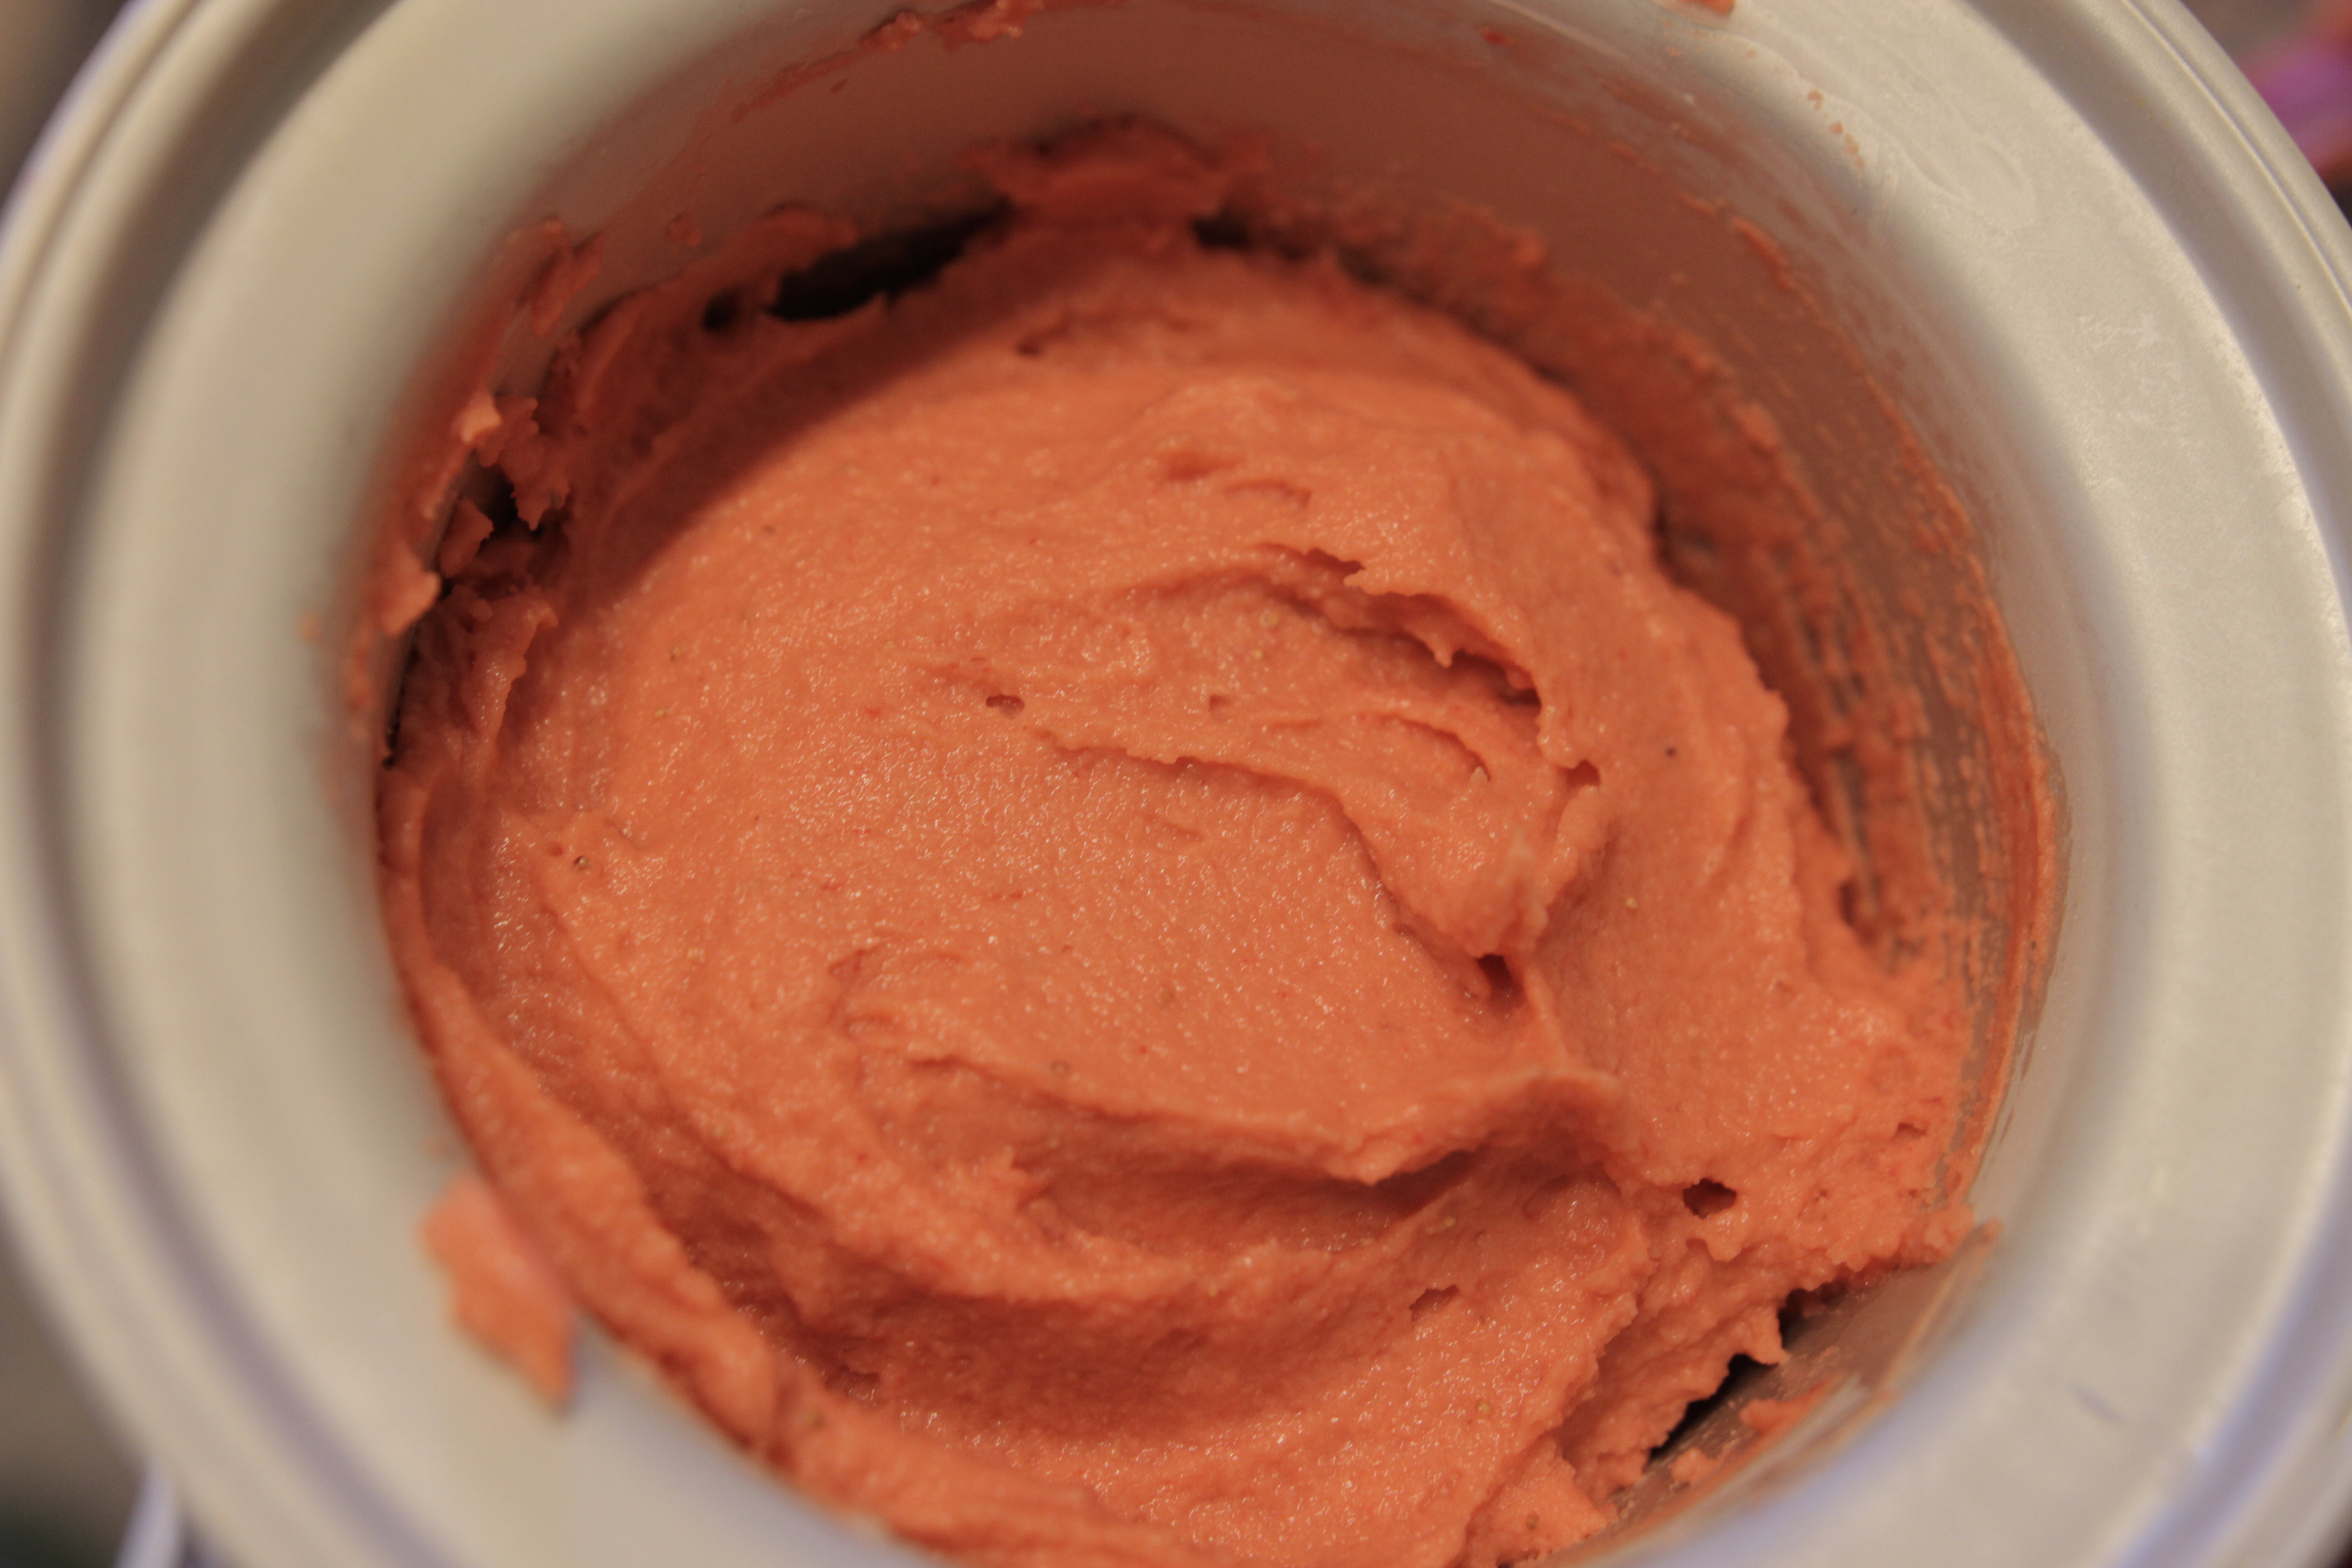
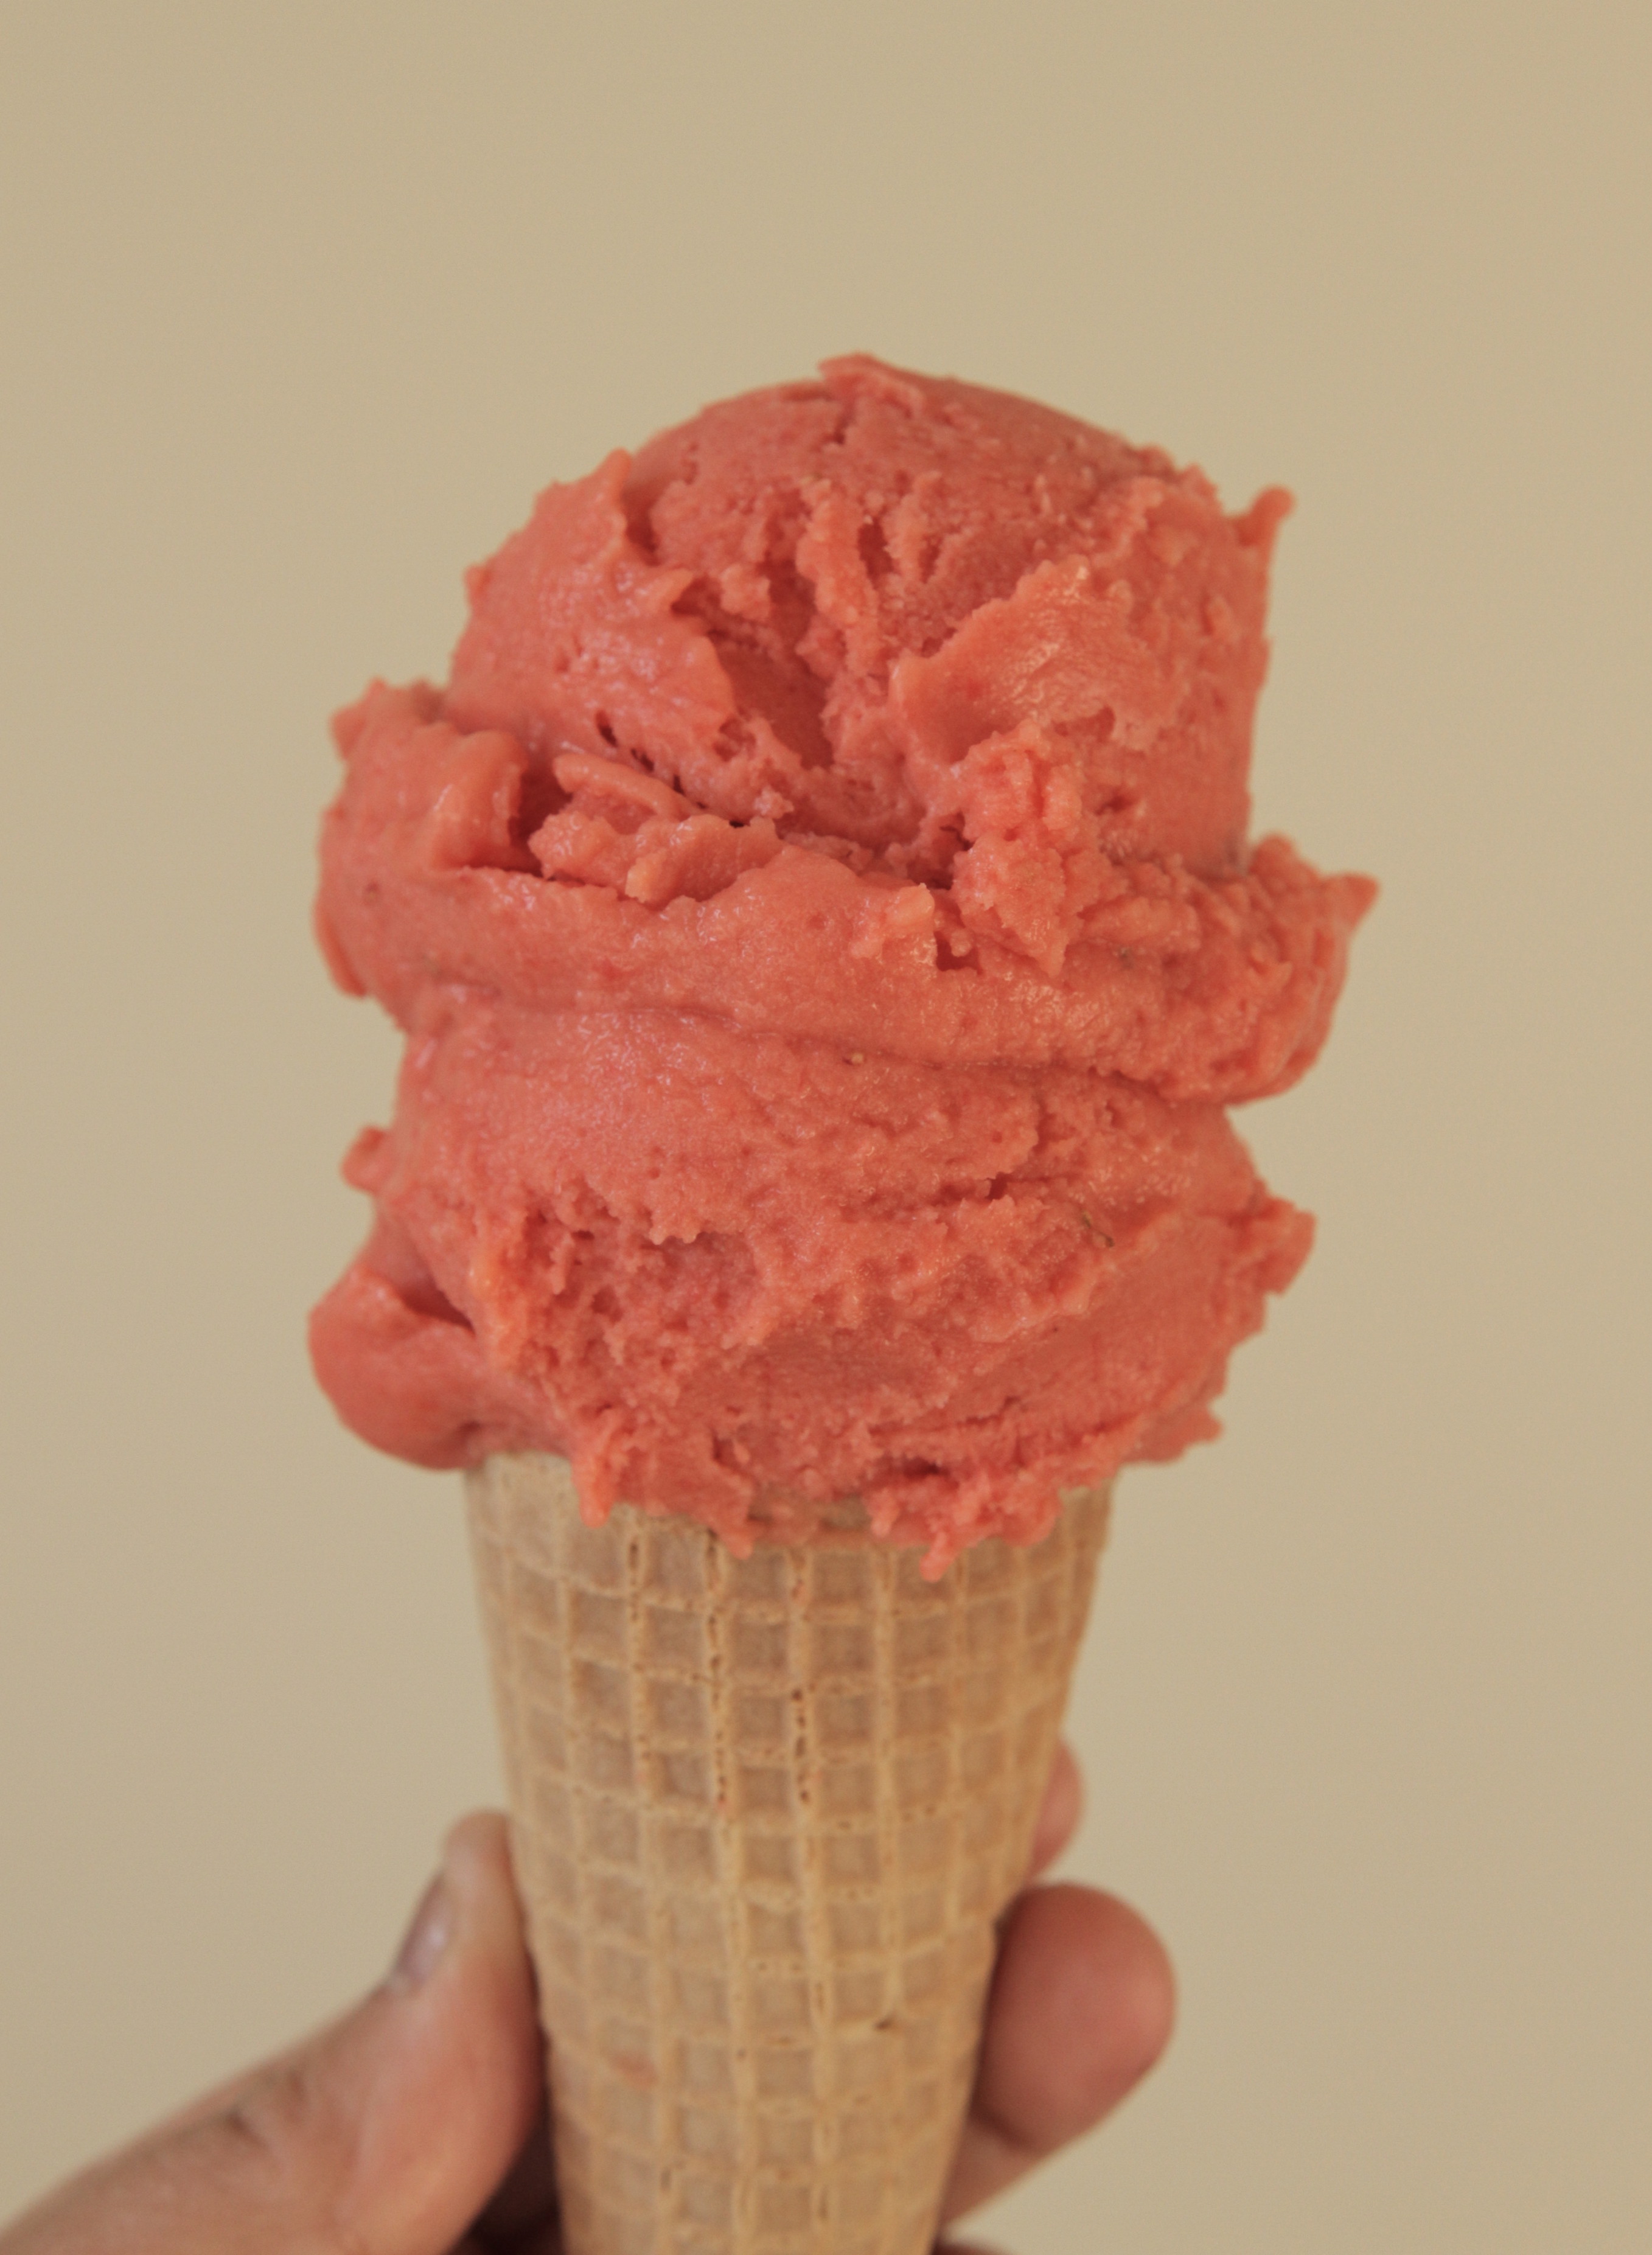
Lately, I have been really focusing on making vegan ice cream and trying to make some new flavors. And it has not been going very well. So, today when I saw that my local grocery store had some strawberries on sale, I decided I was going to make sorbet and leave the creamy desserts aside for a little while.
Growing up, strawberry sorbet was one my favorite dessert. I still have that taste of strawberry sorbet in my mind and somehow, I was sure I was not going to meet it. Yes, I admit, I was rather pessimistic, blame it on the awful weather we’ve been having, it even made me doubt myself.
I mixed the strawberries with some mangoes for some extra fruity taste, some coconut cream for some extra creaminess and a bit of sugar. Taa-Daa! The results really blew my taste buds away. This is going to be a new favorite in my house.
Strawberry mango sorbet
1 lb of fresh strawberry (can substitute for frozen)
2 cups cubed mango (can also substitute for frozen)
1/2 cup granulated sugar
1/2 cup of coconut cream (from a full fat can of coconut milk)
The day before, place the freezing pan of the ice-cream maker in the freezer. Also, put the can of coconut milk in the fridge for at least 24h to settle the cream.
If using frozen fruits, allow to fruits to thaw, or thaw quickly in the microwave. Blend the strawberry until it is really smooth. Add the mango in the blender and blend again until smooth. Add the coconut cream and blend again. Finally, add the sugar in gradually and taste. Sweeten to your desired flavor.
Churn the fruity mix until you get a soft serve texture. Transfer to a freezer-safe container and freeze for at least 3-4 hours to a scoopable texture.
My son is now 3 years old. The other night, he told me he wanted to make some treats with me. Everyday he comes up with a new word and that was the first time I heard him say “treats”. So I asked him to elaborate what kind of treats. He said: “We should make some delicious treats for Christmas”. That was clear. It is not Christmas yet, but this mama will not refuse an invitation to make some goodies to eat.
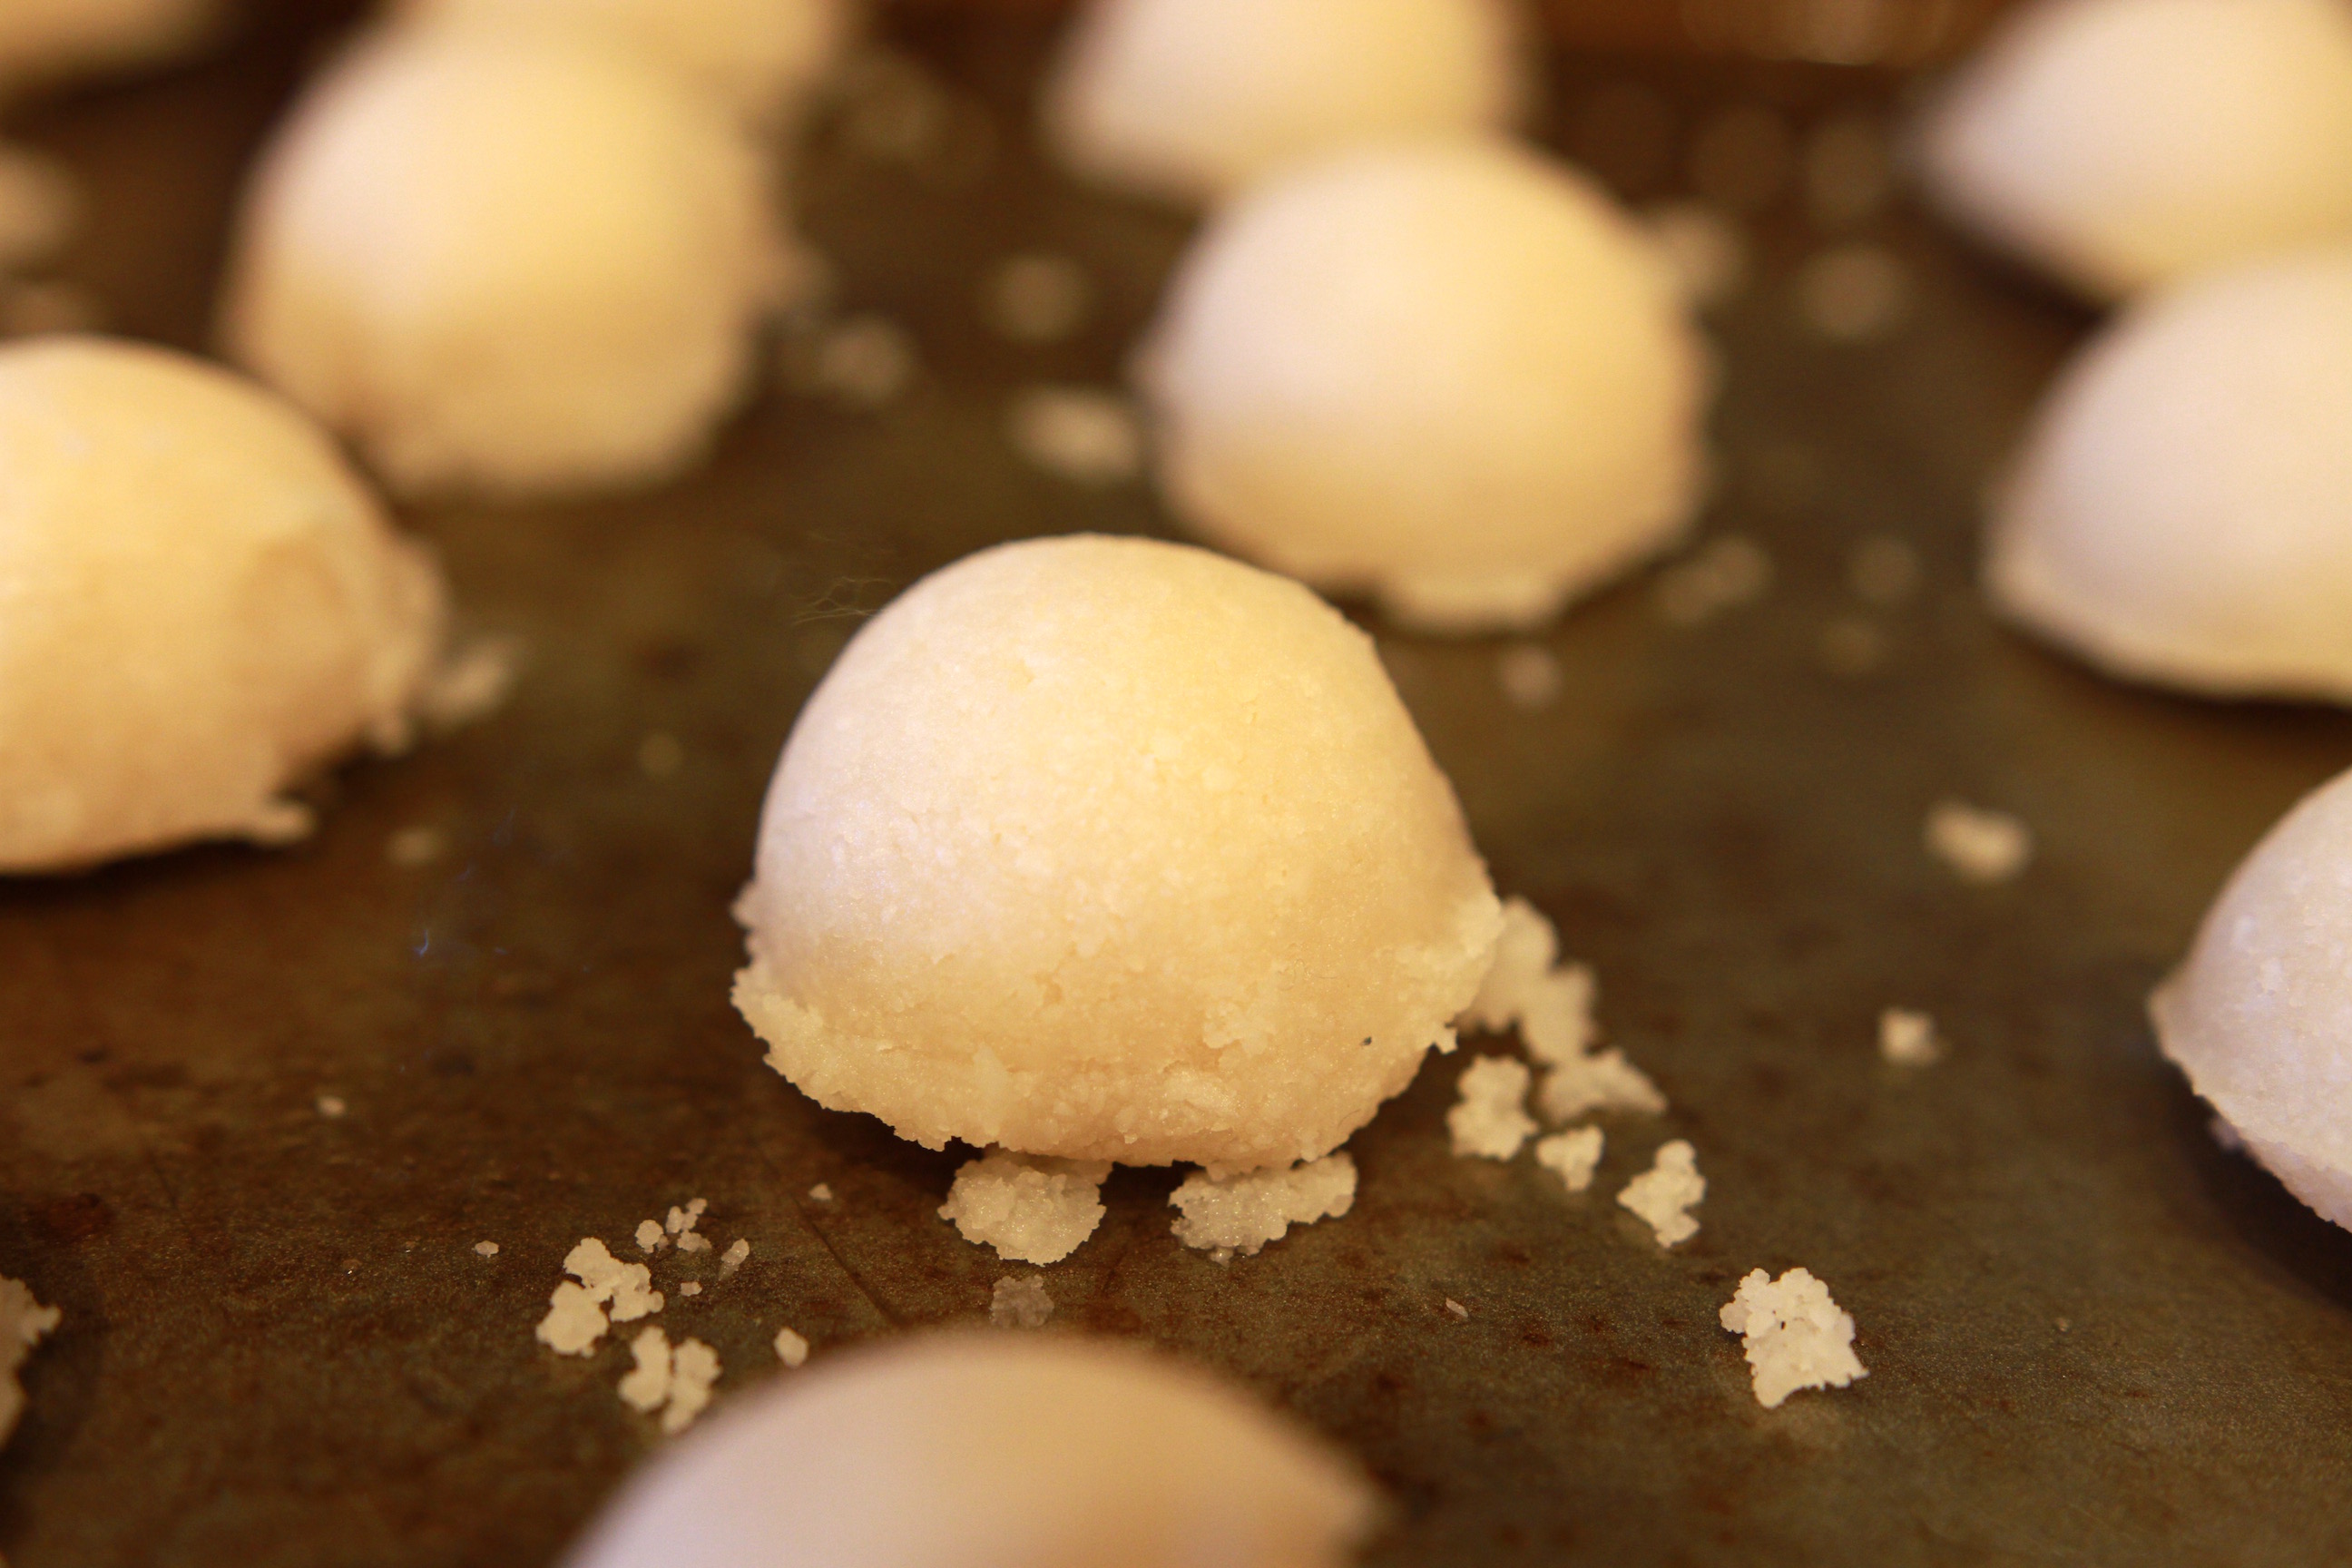
I recently just bought a boat load of shredded coconut, so I thought we could make coconut macarons. And since chocolate always make things better, we decided that chocolate dipped macarons would make the ideal treat.
I was pleasantly surprised at how this recipe turned out. It is sweet from the maple surup but not excessively and the dark chocolate brings just the right amount of sweetness with a tinge of bitterness.
The hardest part of this recipe is to wait for it to cool down and the chocolate to set before eating it. My son and I may or may have not eaten a few as soon as we dipped them in chocolate, I shall not tell. I’ll just say that this was indeed a treat.
Vegan Chocolate-dipped Coconut Macarons 3 cups of shredded unsweetened coconut
1/2 teaspoon vanilla extract
2 tablespoons maple syrup
1/4 cup melted coconut oil
1/3 cup chocolate chips
Heat the oven at 350°F.
Put the shredded coconut in a food processor or a high speed blender. Blend until you get a soft and doughy consistency. Add in the vanilla and maple syrup and blend some more. Transfer it to a bowl for ease of scooping.
Spoon out the coconut into balls onto an oiled baking sheet. I used a half tablespoon measuring spoon to make little bitesizes macarons with the coconut, but if you have a small icecream scoop, it would work as well. gently brush the coconut with melted coconut oil.
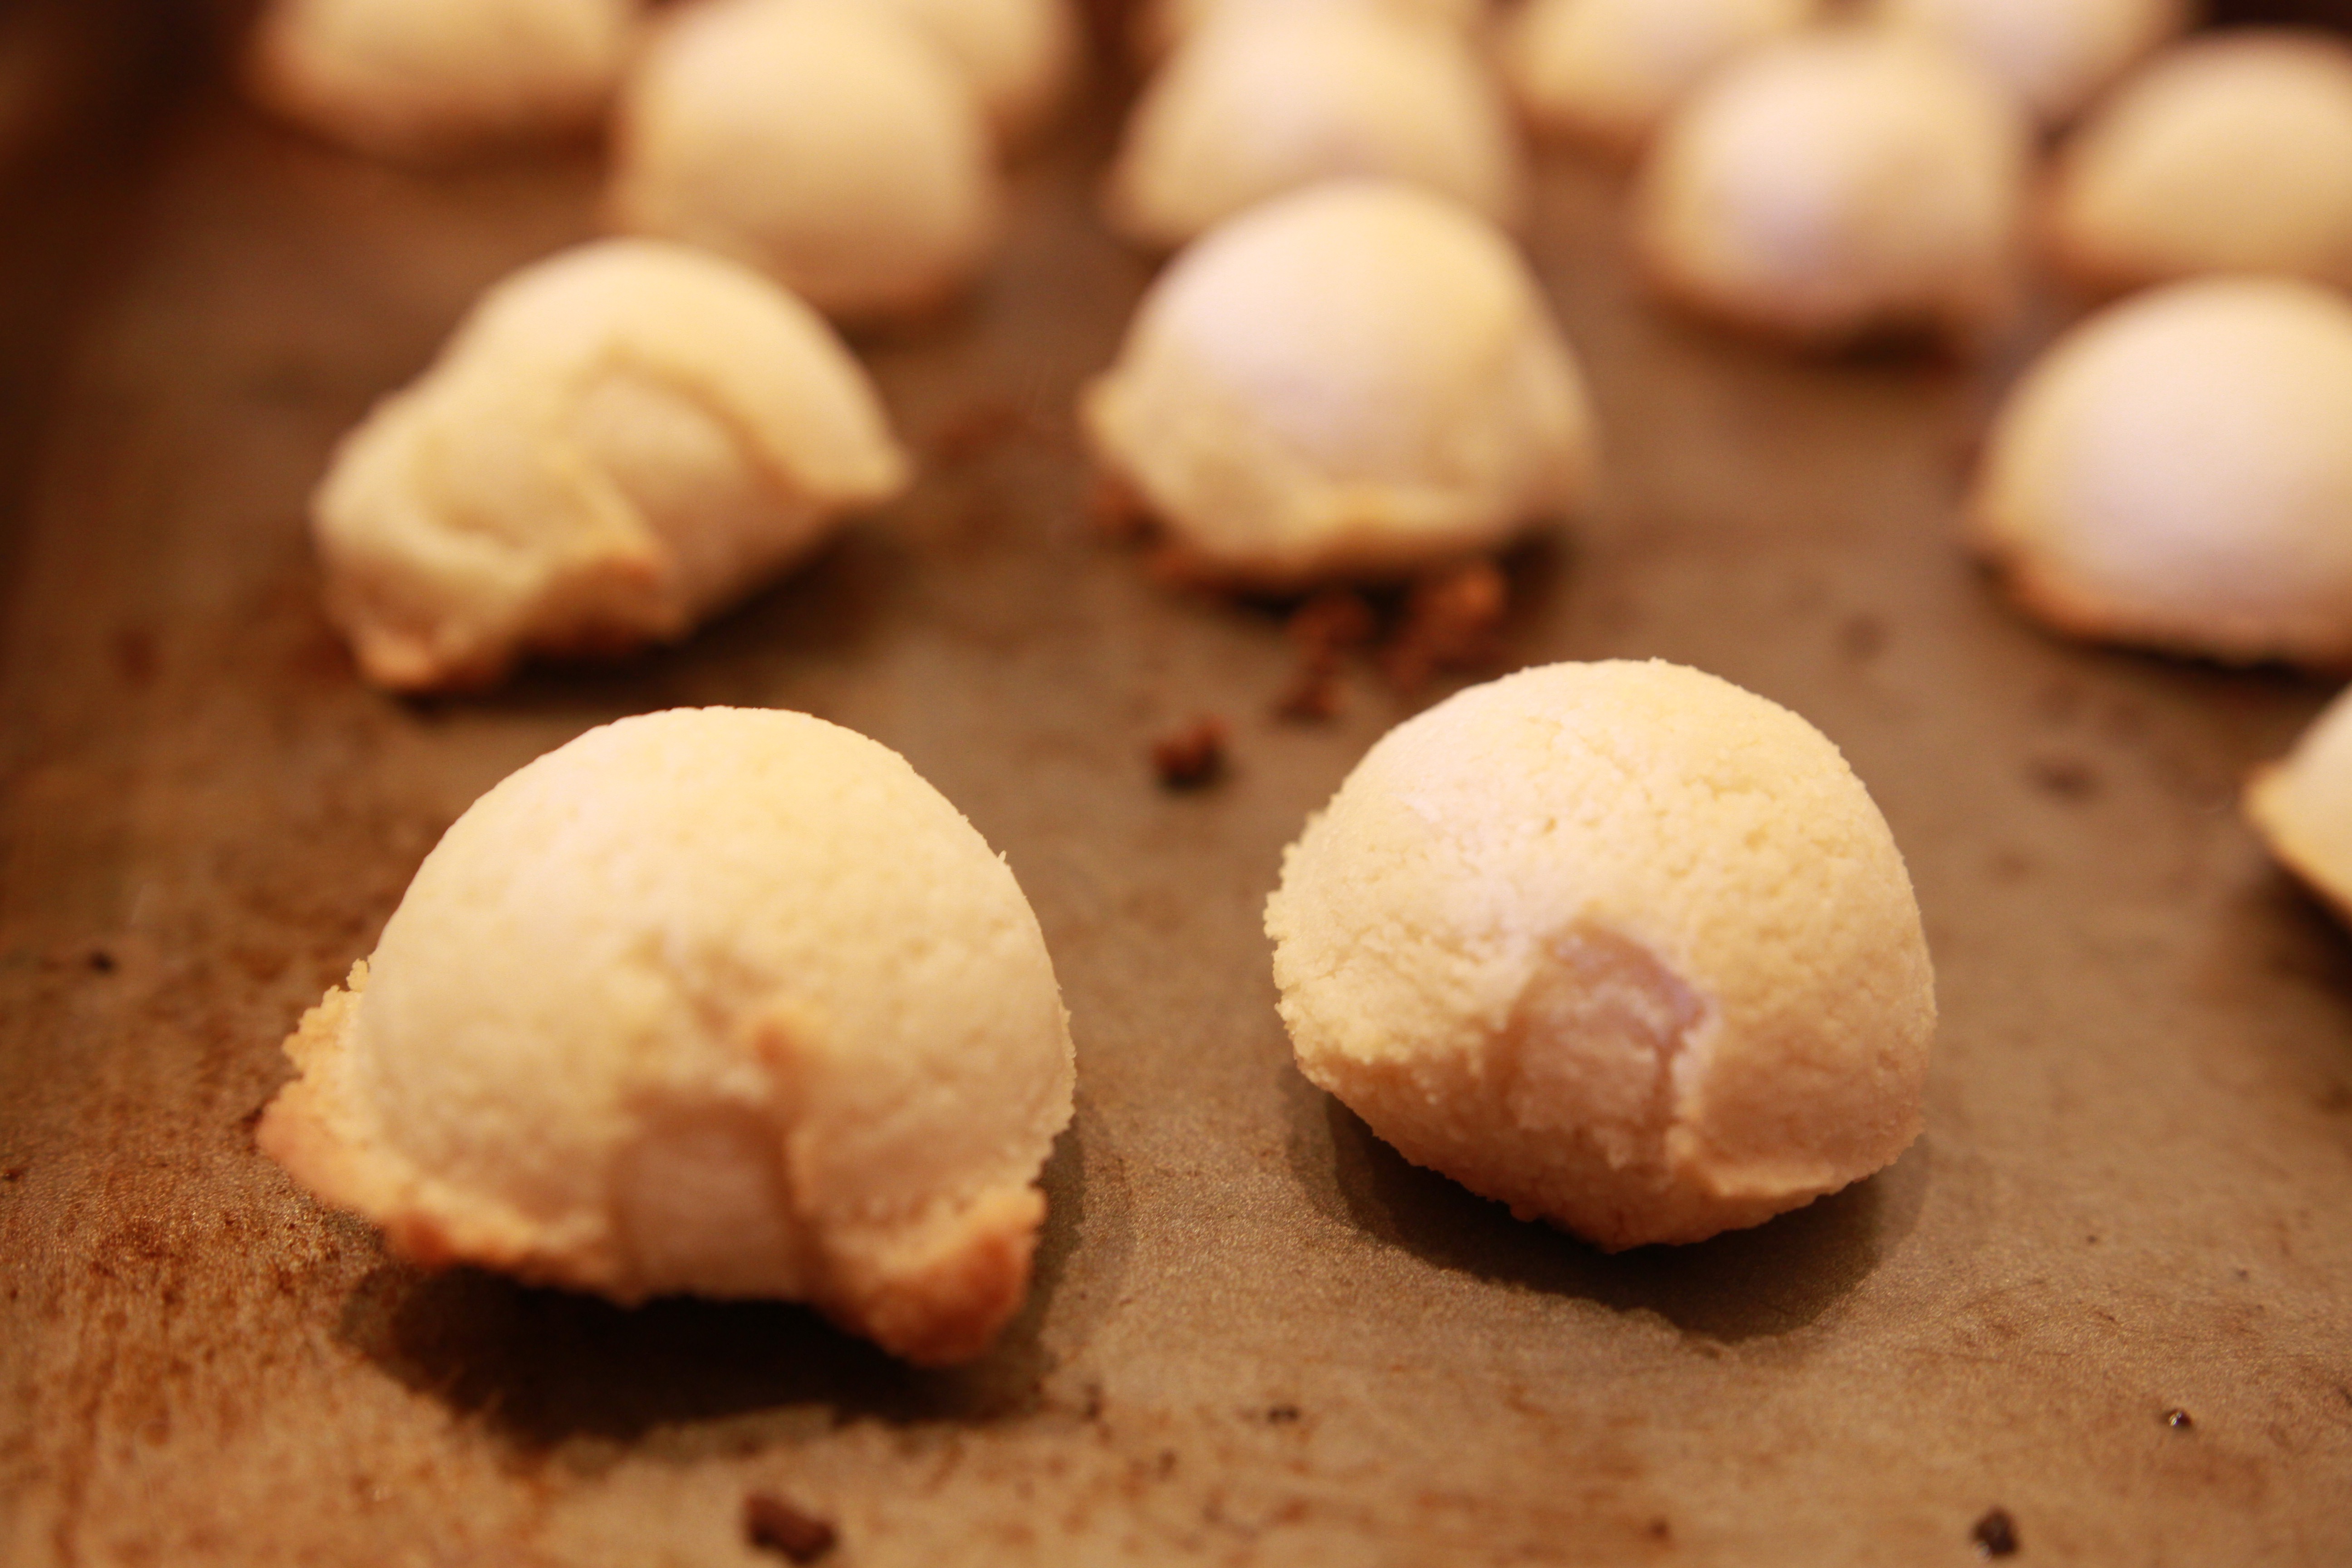
Bake for 8-10min until the bottom and edges are light brown. Cool on the baking sheet.
While the macarons are cooling, melt the chocolate chips in the microwave for 1-1.5min until melted.
Carefully dip the bottom of the cooled macarons in the melted chocolate, they are somewhat fragile and can easily crumble under your fingers. Drizzle some of the melted chocolate on the macarons. Cool on a sheet of parchment paper until the chocolate solidifies again (if you can wait that long). Store in an airtight container.
We are starting a new tradition in my house: to have a Thanksgiving dinner with typical dishes from Madagascar. One of the reasons is because I am not a big fan of roasting a big turkey. Don’t get me wrong, I love to eat it…when somebody else cooks it. I just don’t like to do it myself, and I have never done it so I would have no idea where to start. But on the other hand, I love Thanksgiving. Well, I am thankful for a lot of things in my life and I love to celebrate that, gathering with your loved ones. But mostly, I love the eating part of Thanksgiving. So, since we are from Madagascar, last year we decided to have a new tradition and cook malagasy food on Thanksgiving.
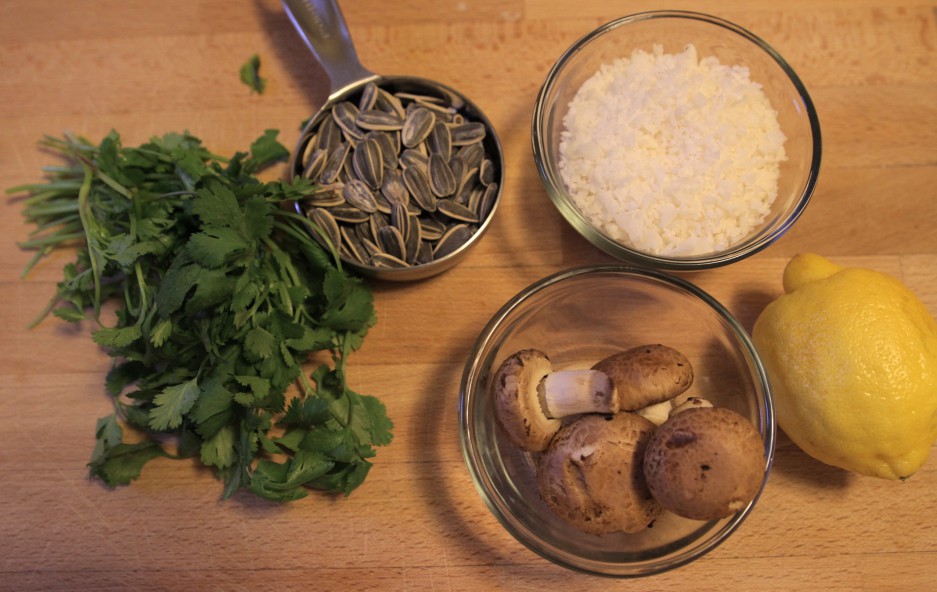
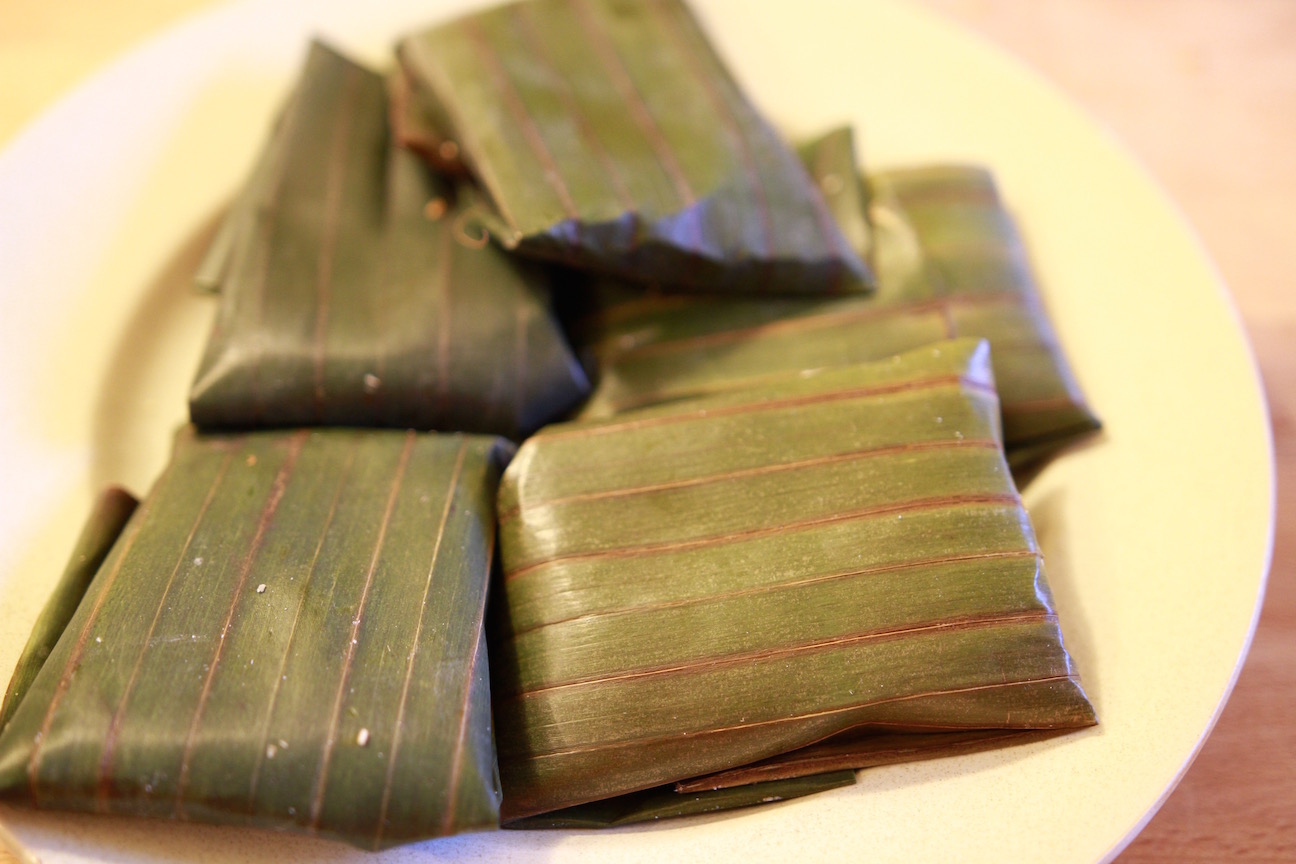
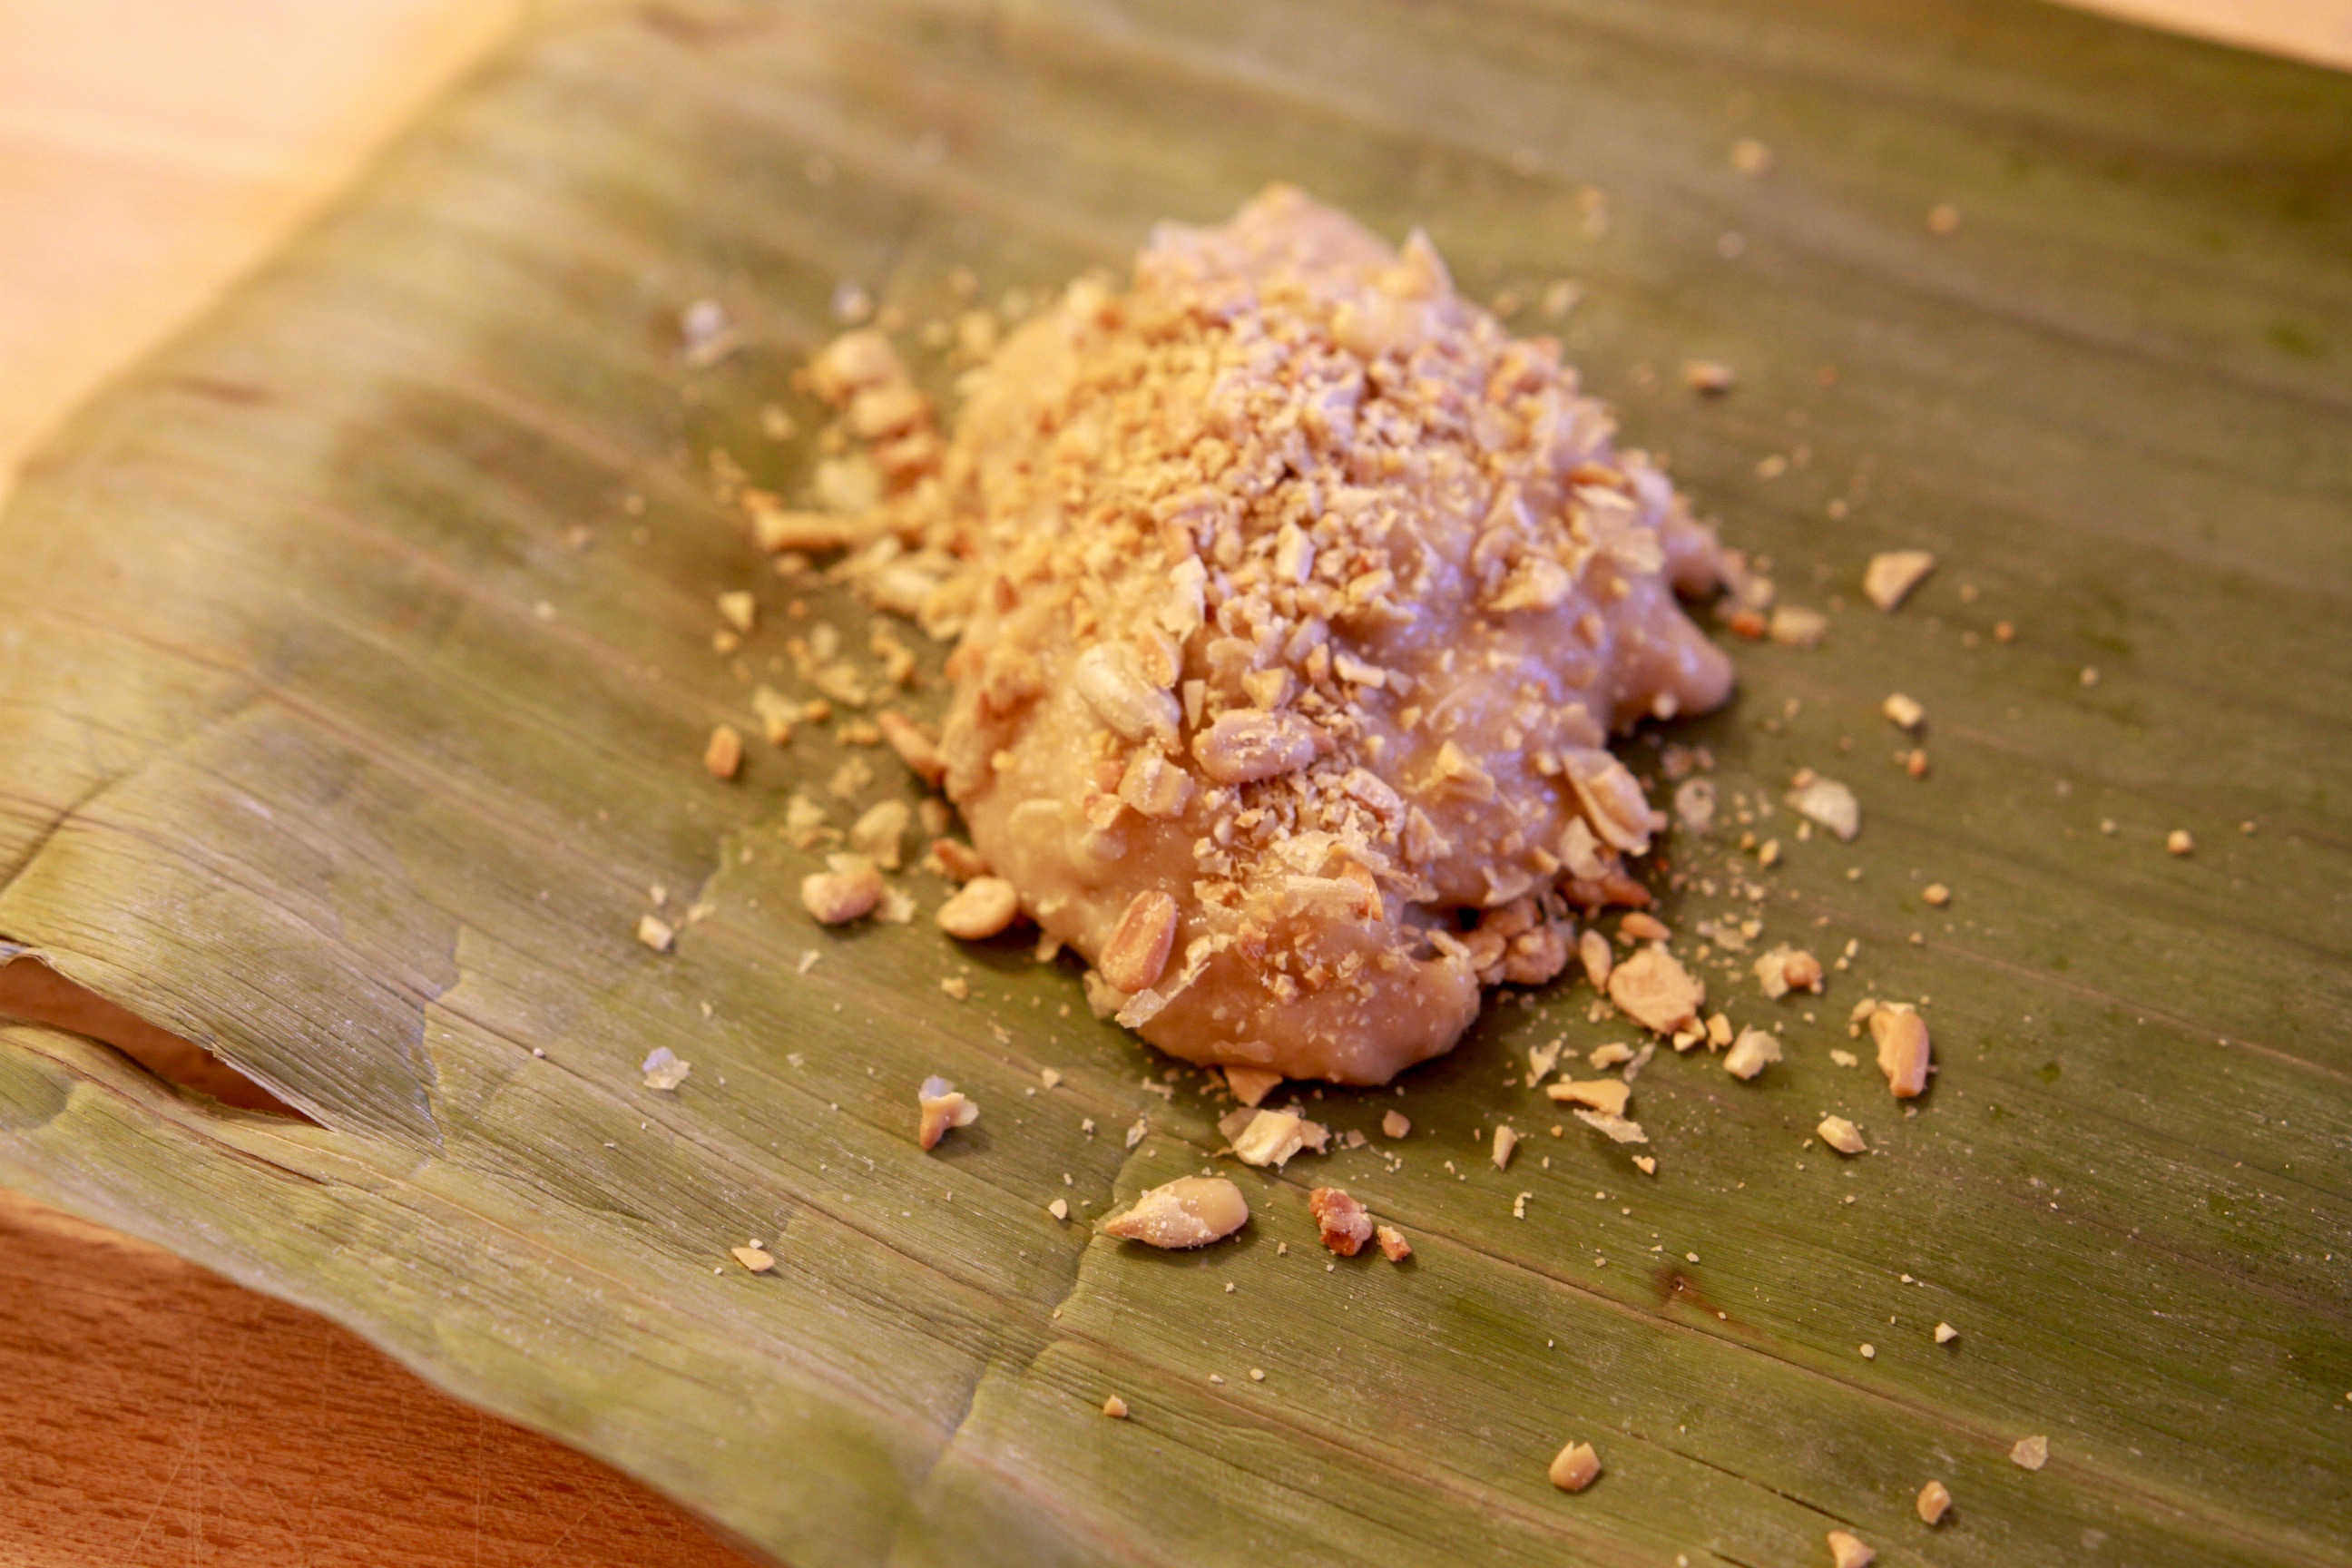
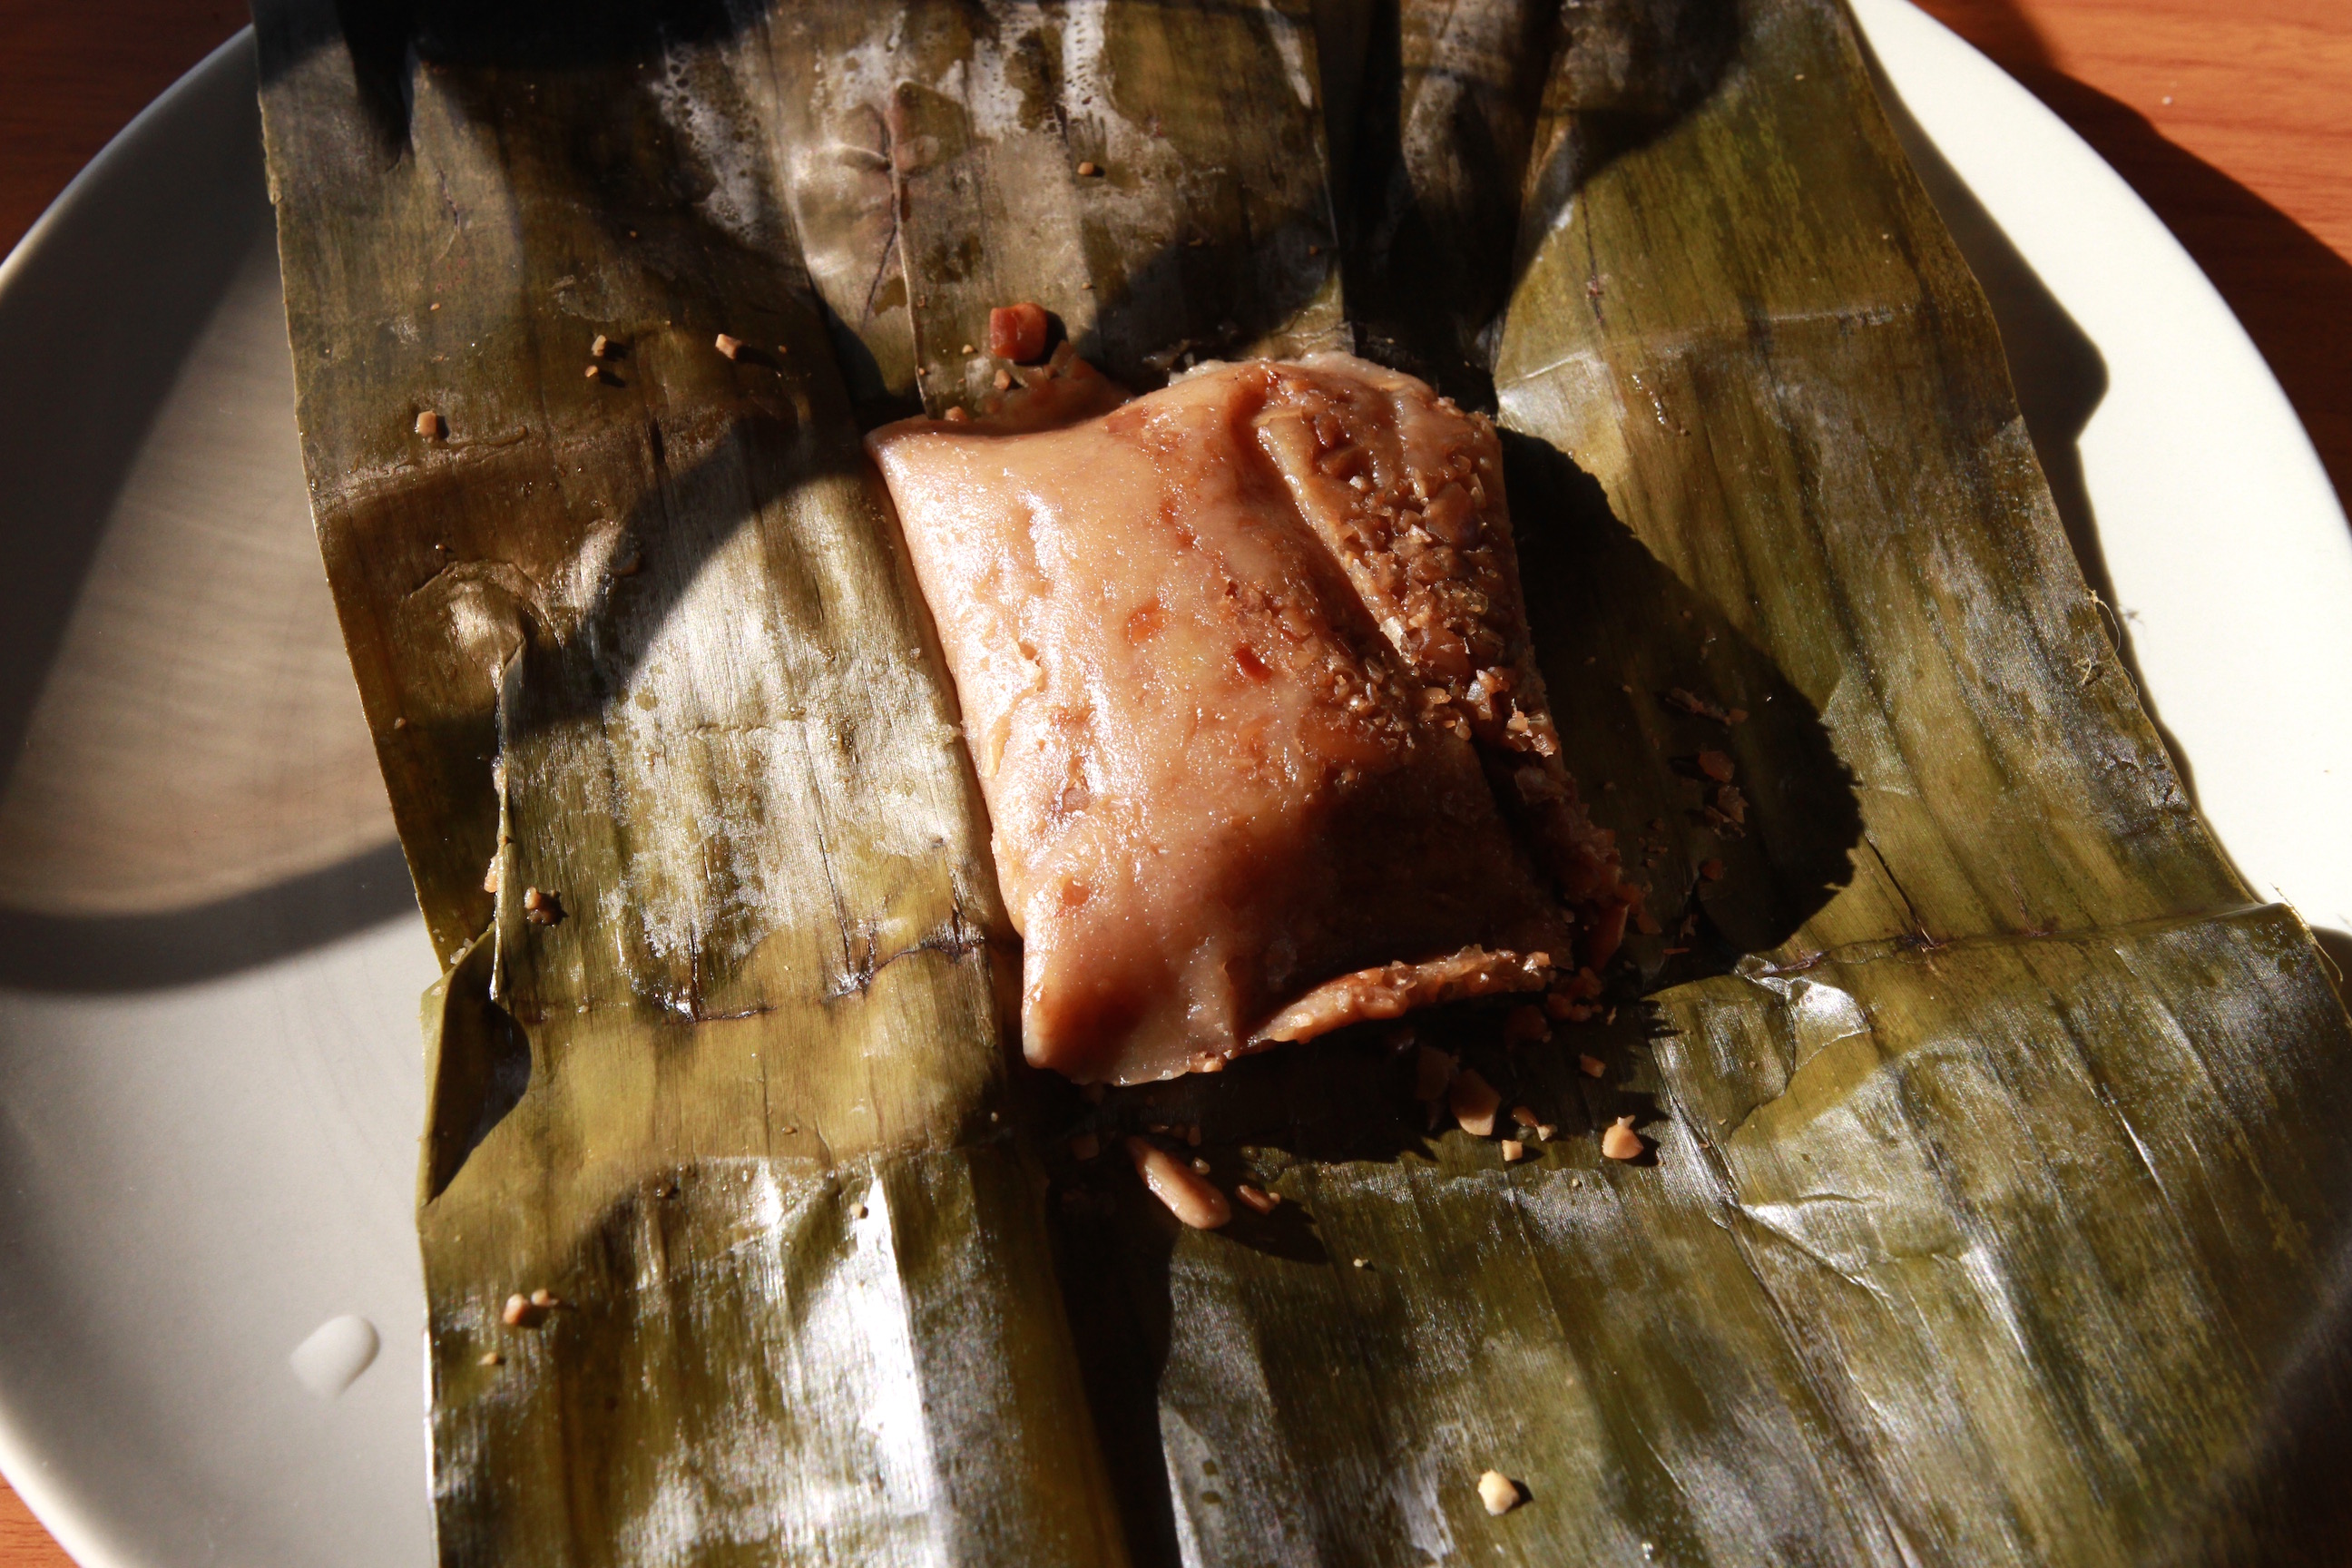
I am not going to post the whole dinner here, the dishes were not yet perfected and were just okay. I am sorry our only guest had missed her beloved sweet potatoes pie for that. Let’s say that my Malagasy Thanksgiving dinner is still a work in progress…except for the dessert. When I asked my sister what dessert I should make to be typically malagasy, she suggested to make koba. Koba is typical snack or dessert of the region where I grew up as a kid. Koban-dravina (from koba= dough, ravina = leaves) is a dough made with rice flower (and sometimes corn flour) with banana, wrapped in banana leaves and steamed. It is normally made with peanuts but since we are peanut-free, I substituted with crushed sunflower seeds. Simple and yet delicious.
Koban-dravina
5 bananas- mashed
1 1/2 cup of rice flour
1/2 cup brown sugar
2 tsp vanilla extract
1/2 cup sunflower seeds- coarsely ground
Banana leaves
Rafia (optional)
In a bowl, mash the bananas, and add in the vanilla extract. Separately, mix the flour and sugar, and add to the mashed banana. Mix everything well.
Roughly cut the banana leaves in rectangles about 10cm x 20cm or 4″ x 8″. Spoon 2-3 table spoons of the dough in the middle of the banana leaf, sprinkle with some of the crushed sunflower seeds. Fold along the length of the banana and tie with some rafia, or you can just place it with the fold down so it does not get undone during cooking. Steam for 20-25 min. Enjoy!
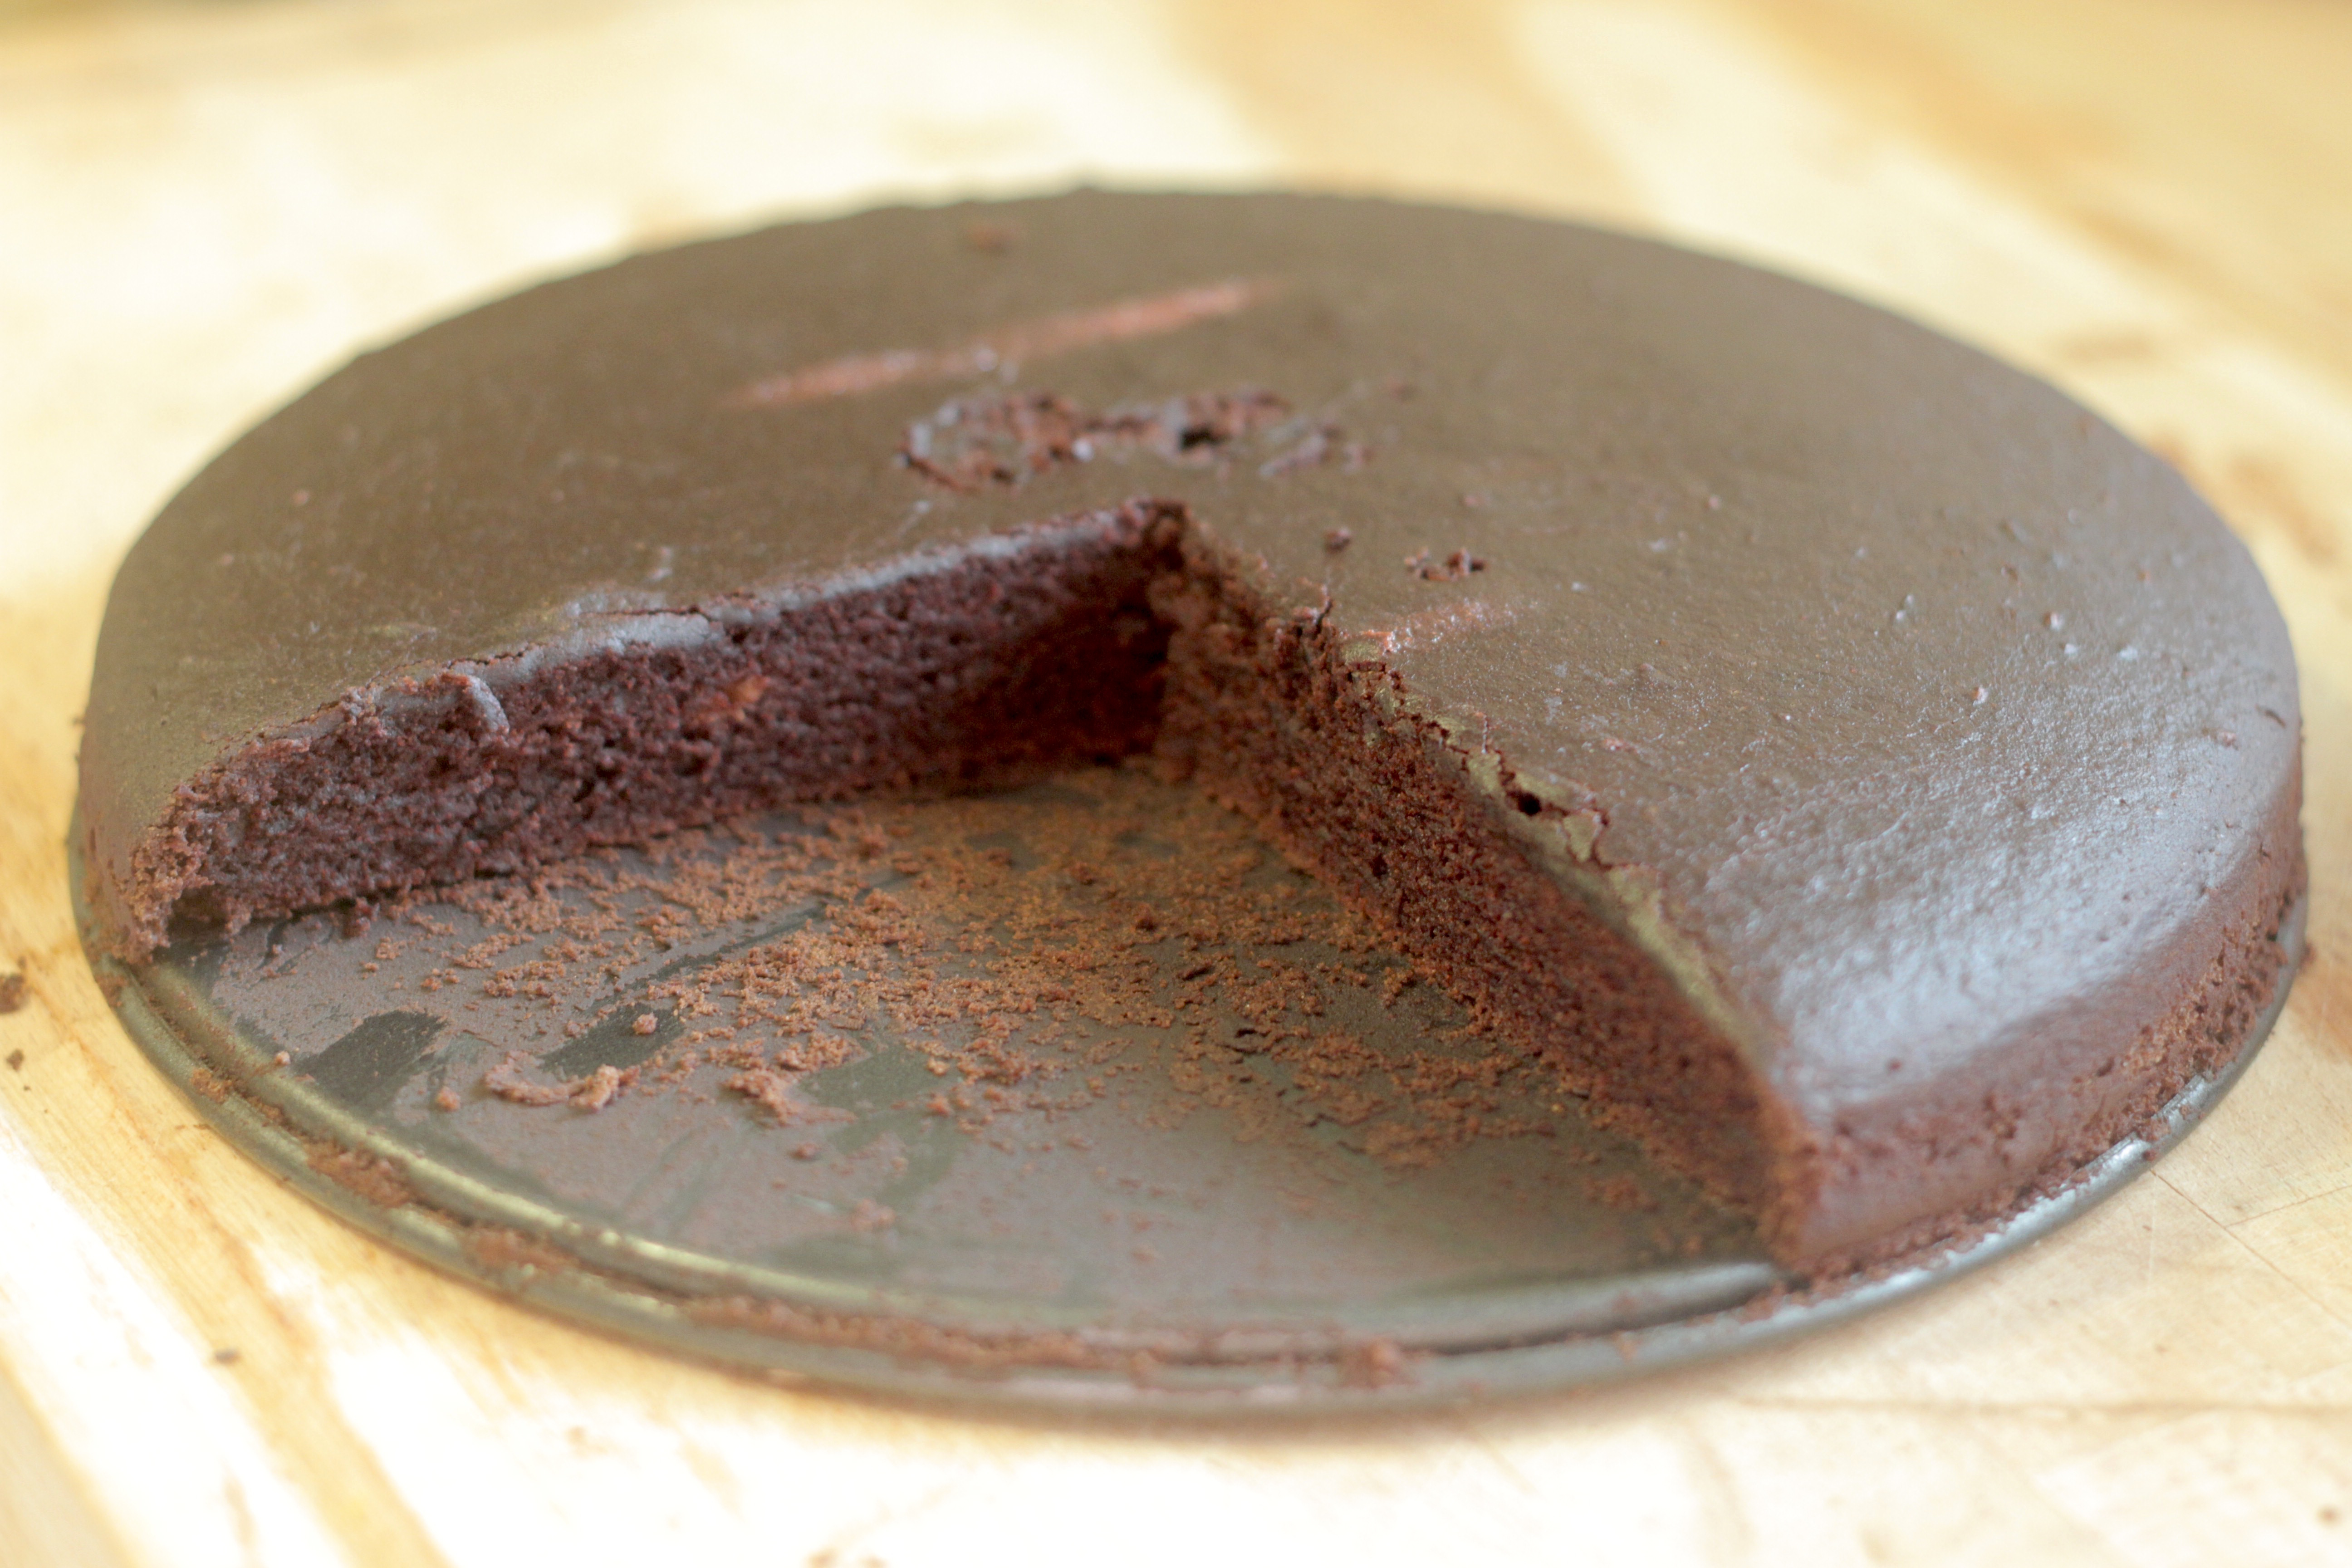
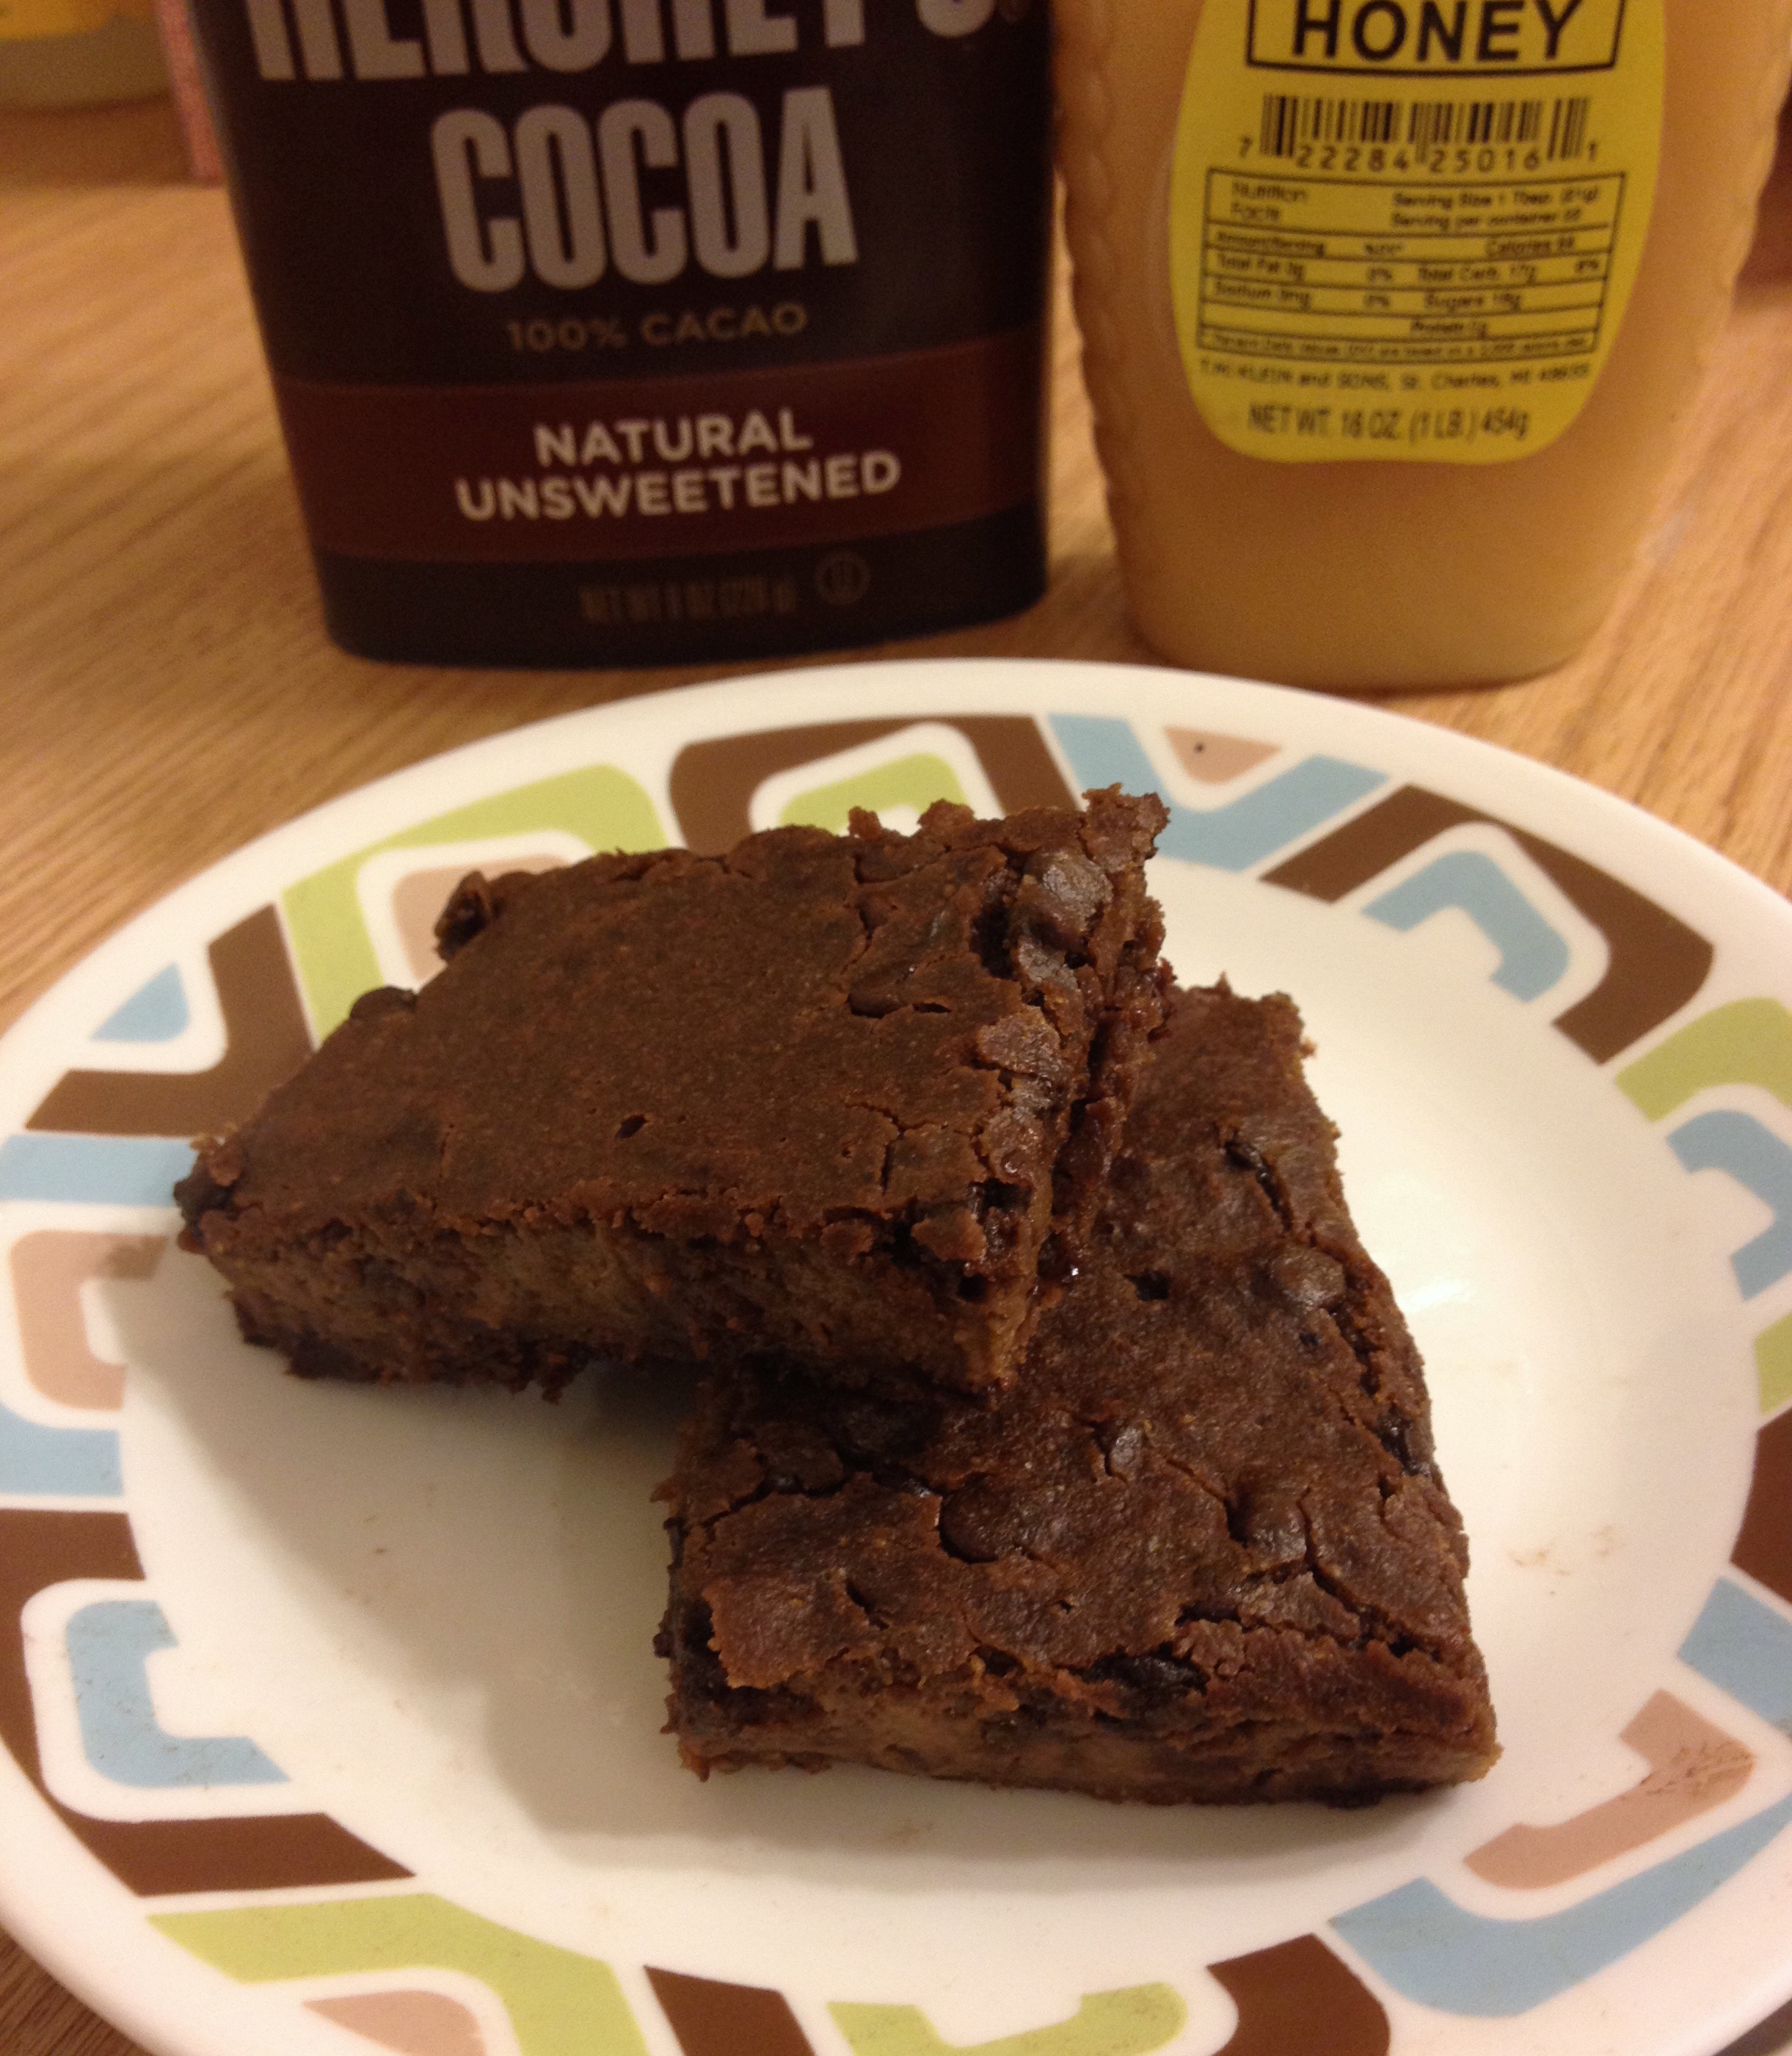
I have not baked in a while (mmm… like a whole week) and was missing it. I was craving brownies but was debating whether to find a vegan recipe or just make something a bit less guilty that everyone could enjoy, or both.
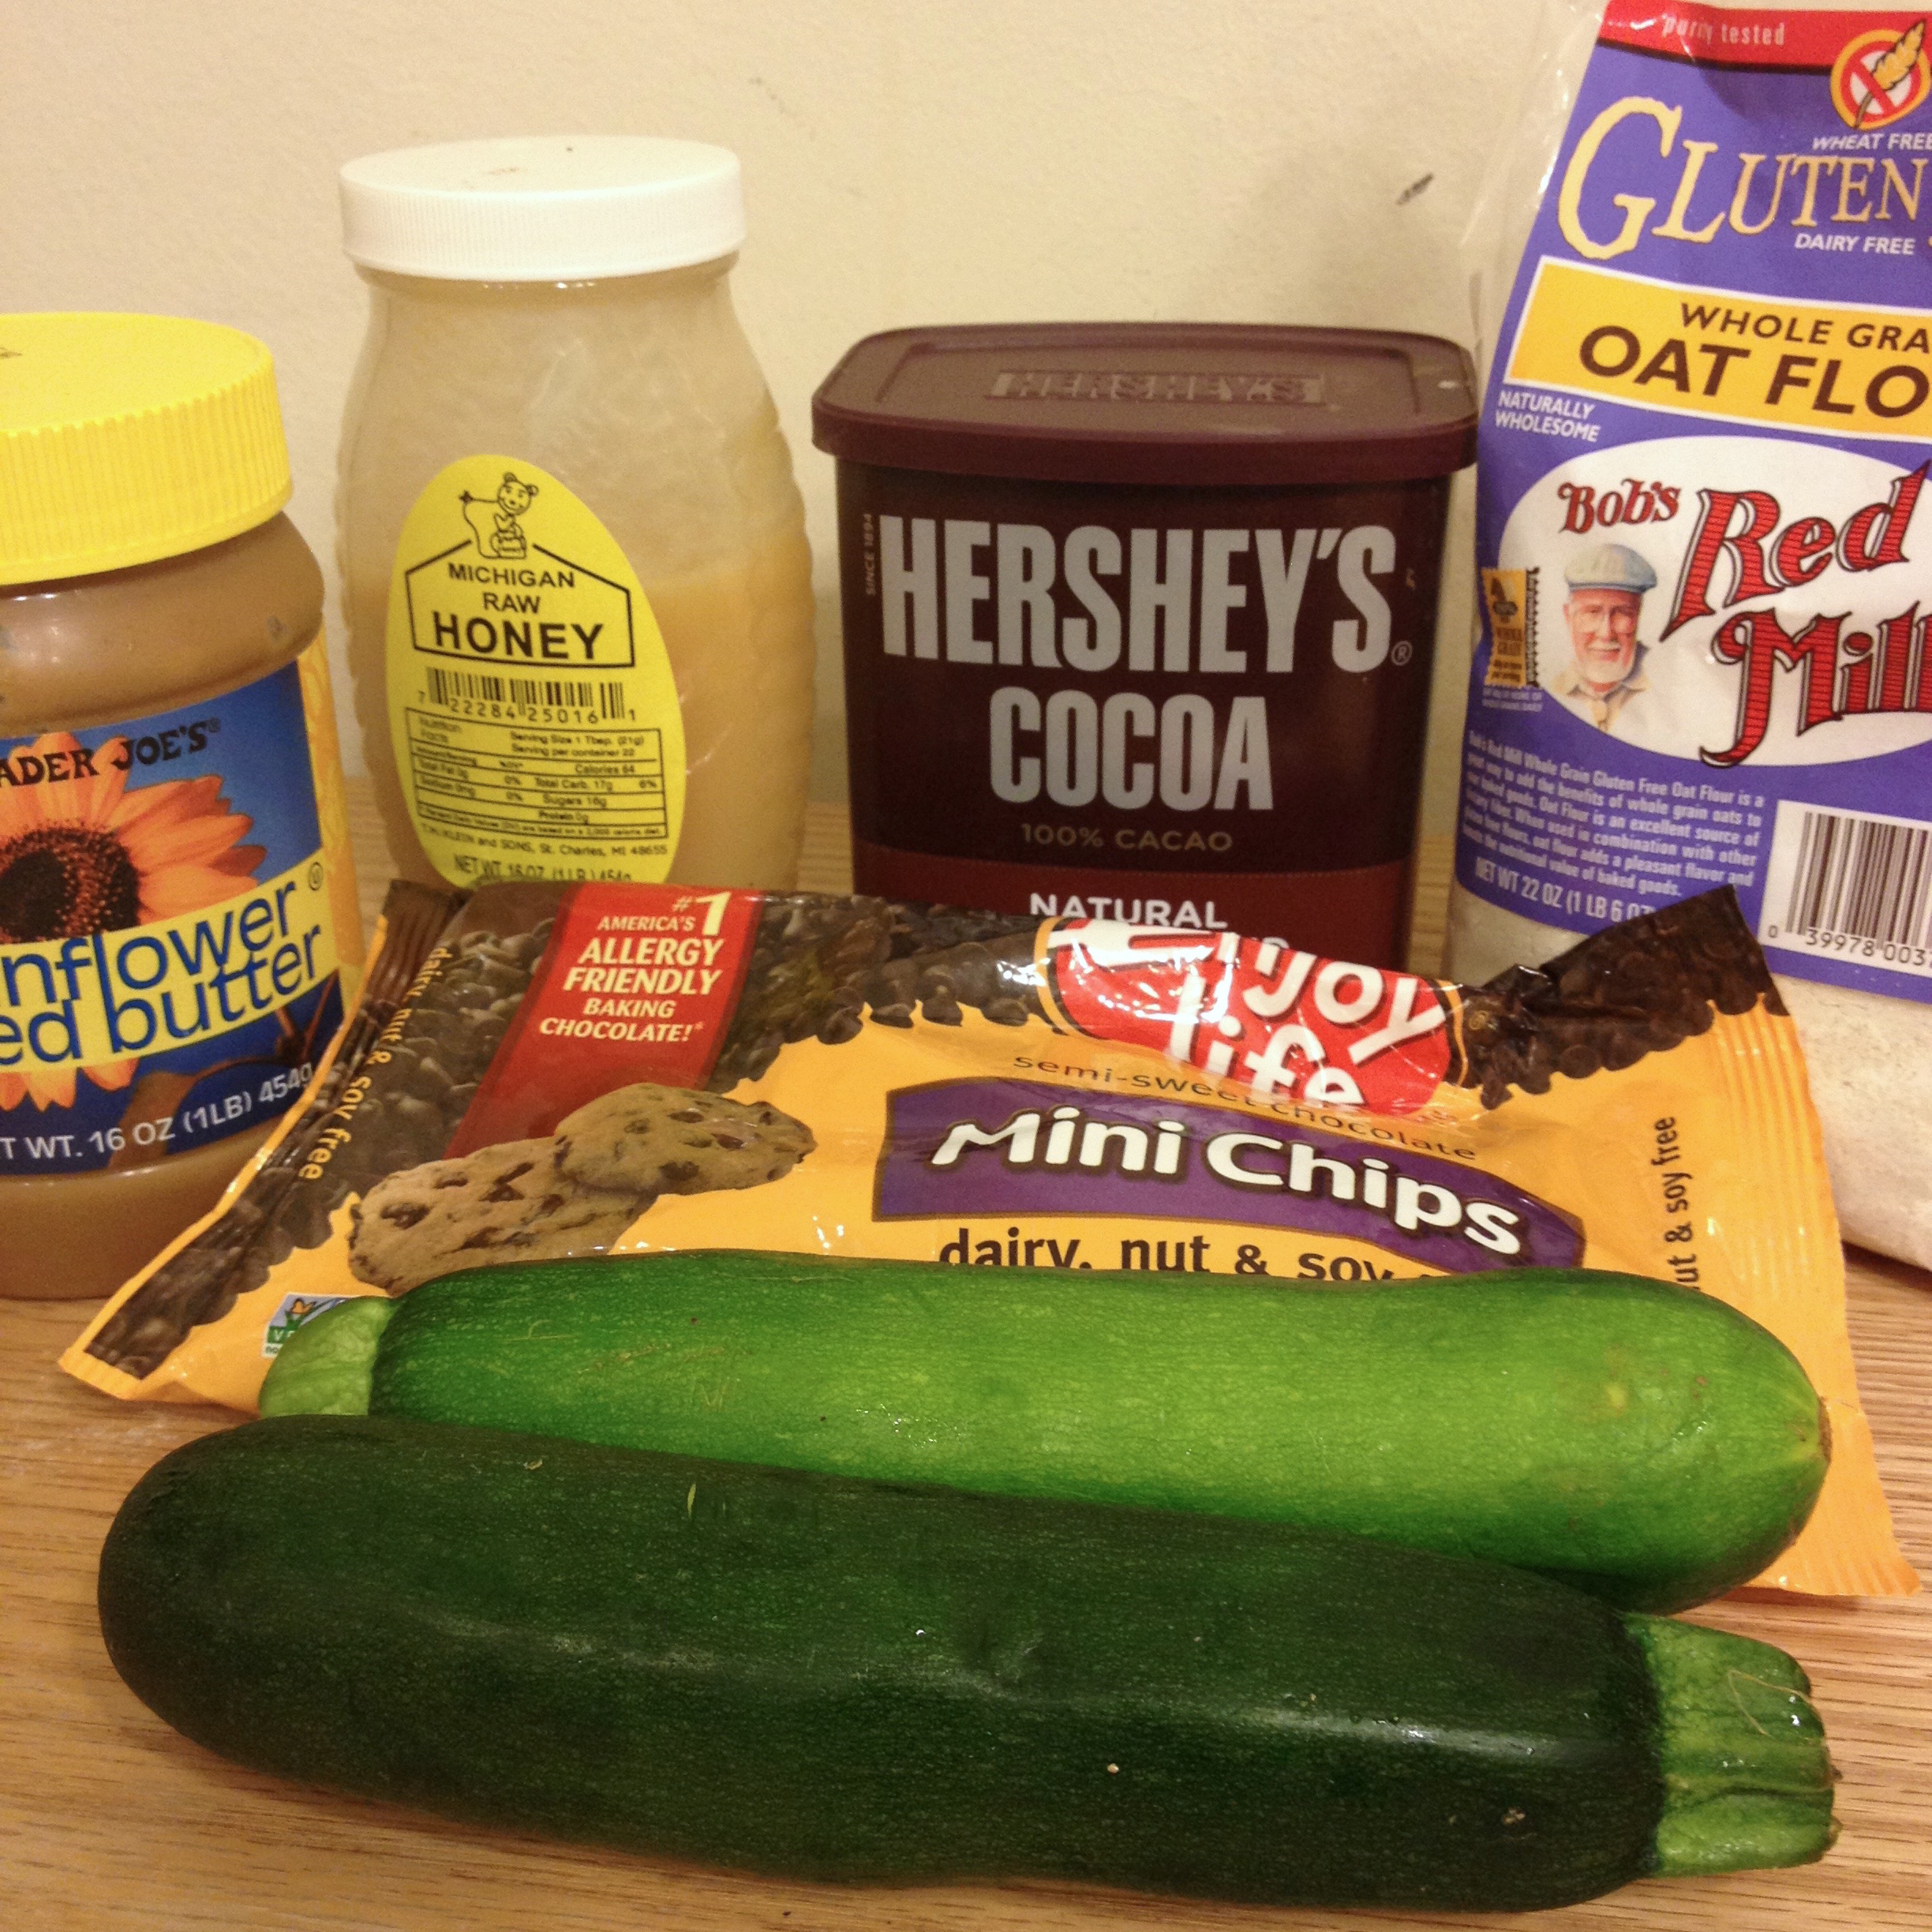
I love to bake with zucchini. It blends in smoothly with the sweet flavors and adds a soft texture to the recipe. And as the parent of a toddler, I always appreciate any way to hide a vegetable in a recipe. Here, I blended the zucchini and it was pretty runny, so I added some whole grain oat flour to thicken the consistency. We do like the dark chocolate flavor in the house, and I used dark chocolate chips with unsweetened cocoa powder. The dark chocolate married beautifully with the honey flavor.
These brownies are rather soft right out from the oven and could make a great hot and cold dessert with some ice cream. But once it cools the crust hardens a bit while the inside is soft and is great with some tea or a glass of sweet dessert wine.
Vegan zucchini brownies
Wet ingredients
1 1/2 cup of zucchini puree in a blender (from 3 medium zucchini)
1/2 cup sunflower seed butter
1/3 cup raw honey
1 teaspoon of vanilla
1 tablespoon flaxmeal (ground flax seeds) + 3 tablespoon water
Dry ingredients
2/3 cup oatmeal flour
3/4 cup chocolate chips
1/4 cup cocoa powder
1 teaspoon cinnamon
1 teaspoon baking powder
Heat up the oven to 350°F.
Mix the flaxmeal with the water and let sit for 5 minutes until it has a gelatinous consistency. In a bowl thoughtfully mix the wet ingredients until it is smooth. In a separate bowl, mix all the dry ingredients. Add the dry ingredients to the wet ingredients and mix carefully.
Line a baking pan with parchment paper and pour in the brownie mix and spread it out evenly. Bake for 35-45 min at 350°F.
One of my favorite food ever is ice cream. When I found out my son was allergic to dairy, we had to ban ice cream from our house. And because I was still nursing him, I also had to forego having my favorite treat even outside the house, otherwise he would get an allergic reaction from drinking my milk. It was a hard thing for me to give that up. Yes, sure I could still have sorbet but I really wanted and missed the “cream” part of ice cream
So imagine my joy when I found out I could have vegan ice cream. I was so excited to put my ice cream maker to good use again after it sitting idle on its shelf because I had to give up making frozen yogourt.
One way of getting the “cream”factor is using coconut cream. I like it best with non-fruity flavor like chocolate or vanilla, as the coconut blends well with those flavors.
But for fruity flavors I prefer using avocado, because the flavor is less dominant and it goes well with fruits. And boy, is it creamy! I actually have to cut it out with some juice otherwise it gets pretty heavy.
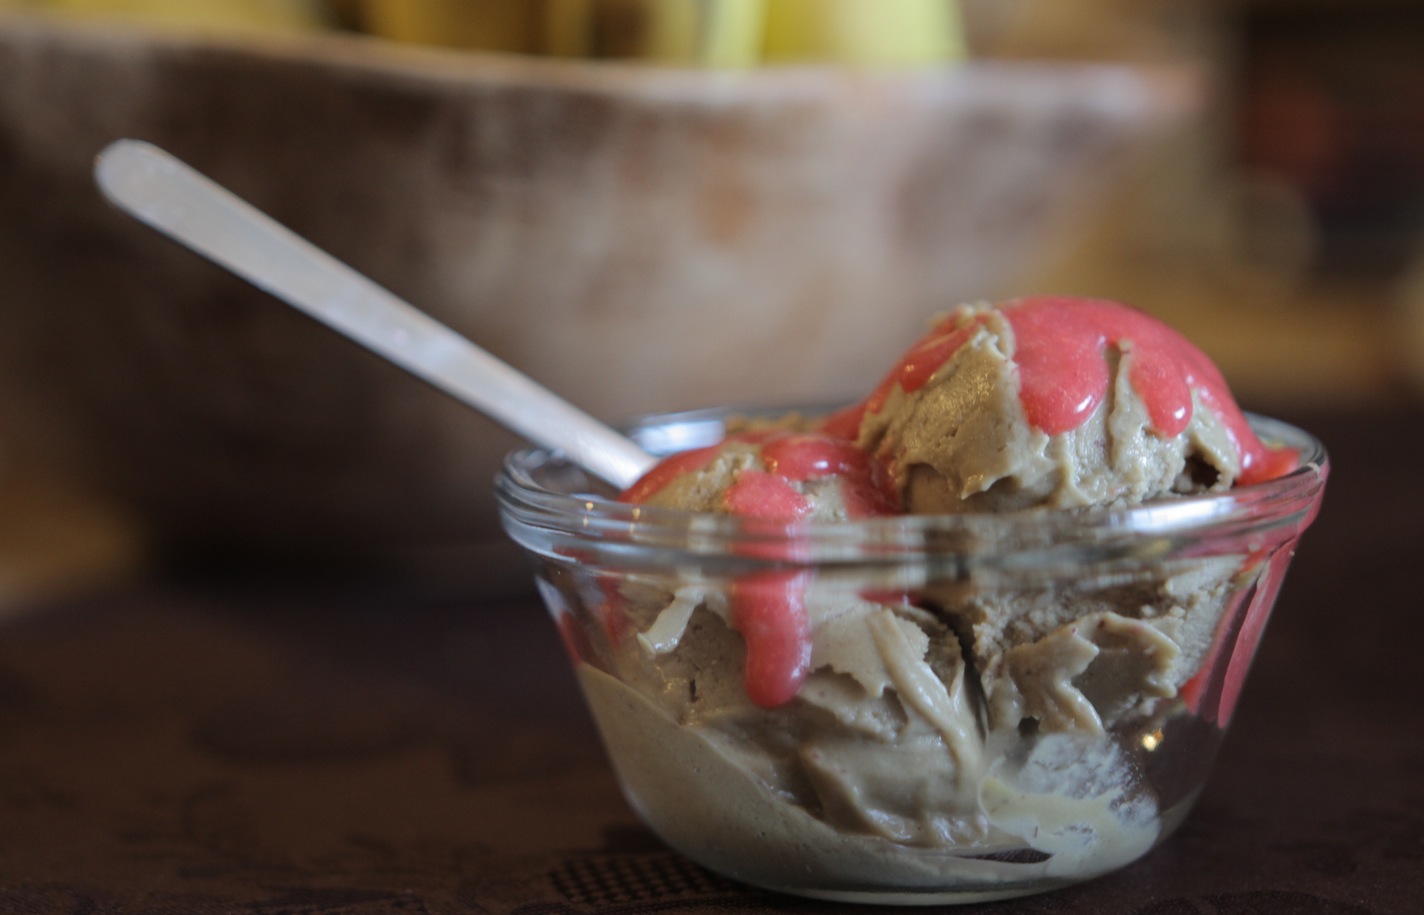
For this berry ice cream. I actually mixed avocado with a bit of coconut cream and fruit juice and blend it well. I first tried to just add pureed berries in but then the fruity taste is not very strong as the fruit is diluted in with the avocado cream. I found out that reducing the blueberry puree first with a sweetener intensifies the flavor when it mixed with the coconut cream. The result is a fruity creamy bliss.
Very berry avocado ice cream
– 1/2 lbs of frozen berry mix (fresh works as well). I use the Very berry Cherry blend from Trader Joe’s
– 1/3 cup honey + more to sweeten to taste if needed
– 2 medium avocados or 3 small
– 1/3 cup of coconut cream (from a can of full fat coconut milk)
– 1/4 cup orange juice
– Juice of 1/2 lemon (about 1-1.5 tablespoon)
To get coconut cream, place the can of coconut milk in the fridge for 24 hours or more. this will cause the cream (the fatty part of coconut milk) to separate. Upon taking the can out, gently invert it upside down, open it and pour out the clearer liquid now on top. It can be discarded or it can be used for smoothies. The creamy part that is left is the coconut cream. Reserve it in the fridge until use.
In a sauce pan, mix the berries with the 1/3 cup of honey, heat on high until it simmers then reduce the heat and keep it only stirring but not boiling over. Stir regularly to avoid it to stick. Heat until it is reduced and the liquid a bit syrupy, about 15min or so. Cool it down to room temperature. When cool, blend the mix until very smooth. Pass the fruit puree through a sieve to remove the seeds.
Place the avocado, the orange juice and the lemon juice in the blender and blend until very smooth. Add in the coconut cream and mix again until very smooth. Finally, add the fruit puree and mix well. Taste for sweetness and if necessary, add some honey and tablespoon at a time as desired.
Churn the mix in an ice cream maker until ready (about 15-20 min). This results in a soft-serve consistency. For scoopable ice cream, place in the freezer for 2-3 hours.
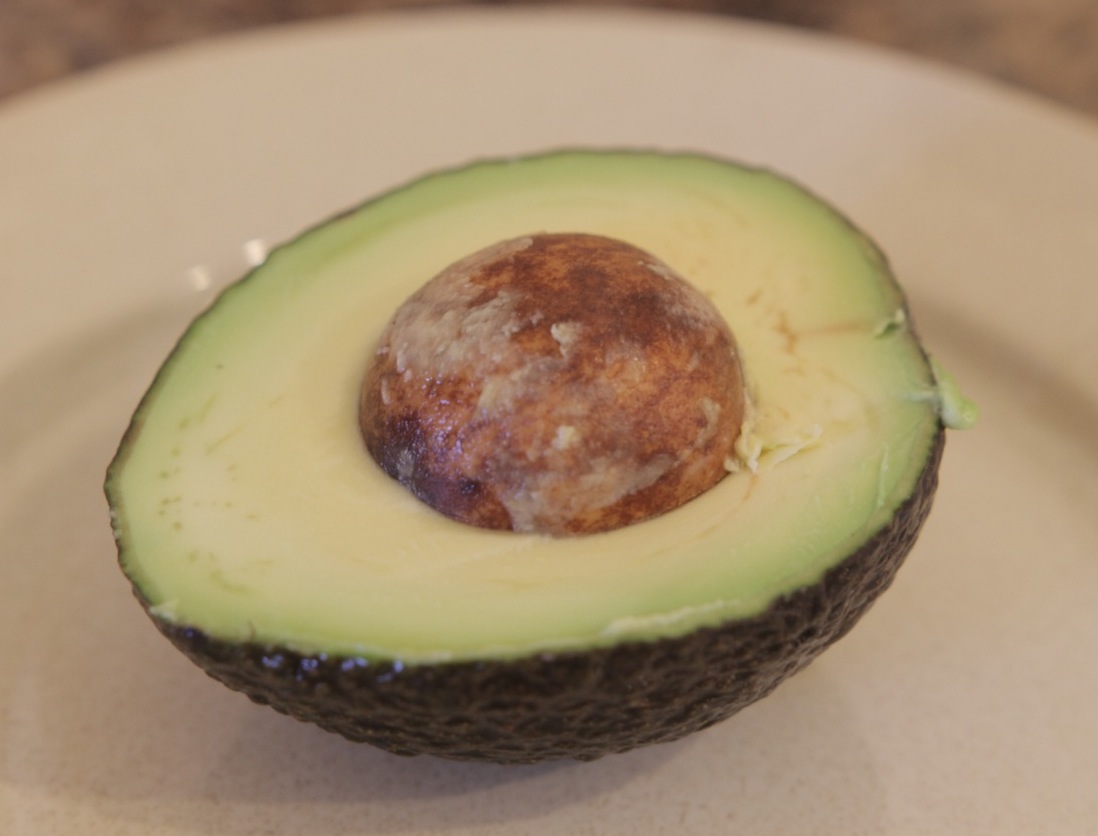
When thinking about my inaugural post, I wanted to share about something that is eaten very often in our household. My husbands loves it, my little one gulps it like there is no tomorrow. It is the avocado.
Avocado
The avocado is somewhat of a superfood. Due to their mono and polyunsaturated fat content, avocados are a great substitution for foods rich in saturated fat. Avocados also contribute nearly 20 vitamins, minerals and beneficial plant compounds that can contribute to the nutrient quality of your diet. And it is very yummy.
I asked a few of my friends to name dishes or use of avocado in food. Among the responses I got were: guacamole, in sandwiches or salads, avocado in a burger. Basically, mostly with salty foods or dishes.
However, growing up in Madagascar, we would only eat avocado as a dessert. We would mash it with a fork and add sugar or sweet condensed milk. And as a kid, that was the only way I liked to eat avocado. Sweet.
From time to time, our mom would make a stunt adding cubes of avocado in salads and I absolutely loathed it (sorry mom!). I would very carefully pick out the cubes making sure they did not break and just leave them on the side of my plate (or toss them out of the window into the garden, if I could). My husband on the other hand, as far as I have known him, has always liked to eat avocado on its own, and I have always thought that he was such a weirdo, because he did not add any sugar to it.
I only really started to appreciate eating avocado in salty dishes after I arrived in the United States about 10 years ago. Now, it is one of my favorite food to eat, and it is a staple in our house. Our little boy loves eating guacamole and chips at snack time and I always make sure I add avocado to his smoothie to make it creamy and delicious. But when I would talk to my friends about how we would only eat avocado sweet growing up, that would usually generate some interest.
So I thought for this post, I would share about how I use avocado as a dessert in a few different ways.
Pick avocado that are just ripe enough, still firm but when you push on the skin it gives a little bit, so it is creamy but not overly ripe that it is brown.
Fruity avocado cream
This basic recipe consists in blending avocado with different kinds of add-ons, which results into a creamy, fruity and fresh dessert.
The possibilities are endless but you basically need 4 types of ingredients:
2 medium size avocados
Liquid add-ons: 1/2 cup of orange juice or other fruit juice
1/3 cup of solid add-ons: any kind of fruit, but my favorites are pineapple and berries
1/8 cup of sweetener: sugar or agave nectar
Put all your ingredients in a blender and blend until smooth. Scoop out and enjoy!
For an adult version of this creamy dessert, you can use coffee as your liquid add-on. It is delightful!
Avocado also makes fabulous, creamy frozen desserts, perfect for both kids and grown-ups.
Avocado ice-cream
Very berry avocado ice-cream
– 3 medium size avocados
Juice of one orange, freshly pressed or about 1/4 cup of bottled juice
1/2 cup of fresh or frozen mixed berries, defrosted ( I use Trader Joe’s Very Cherry Berry Blend, in the frozen aisle)
1/4 cup agave nectar
Make a berry puree: Blend the berries until smooth and pass the mix through a sieve to remove the seeds.
Put the 3 avocados, the orange juice, the agave nectar and half of the berry puree in the blender and blend until smooth. Transfer the mix into an ice-cream maker and churn for 10-20min.
This results into a soft-serve type of ice-cream. For scoopable ice-cream, transfer into another container and place in the freezer for 2-2.5 hours to add more consistency.
Serve with a drizzle of the remainder of the berry puree.
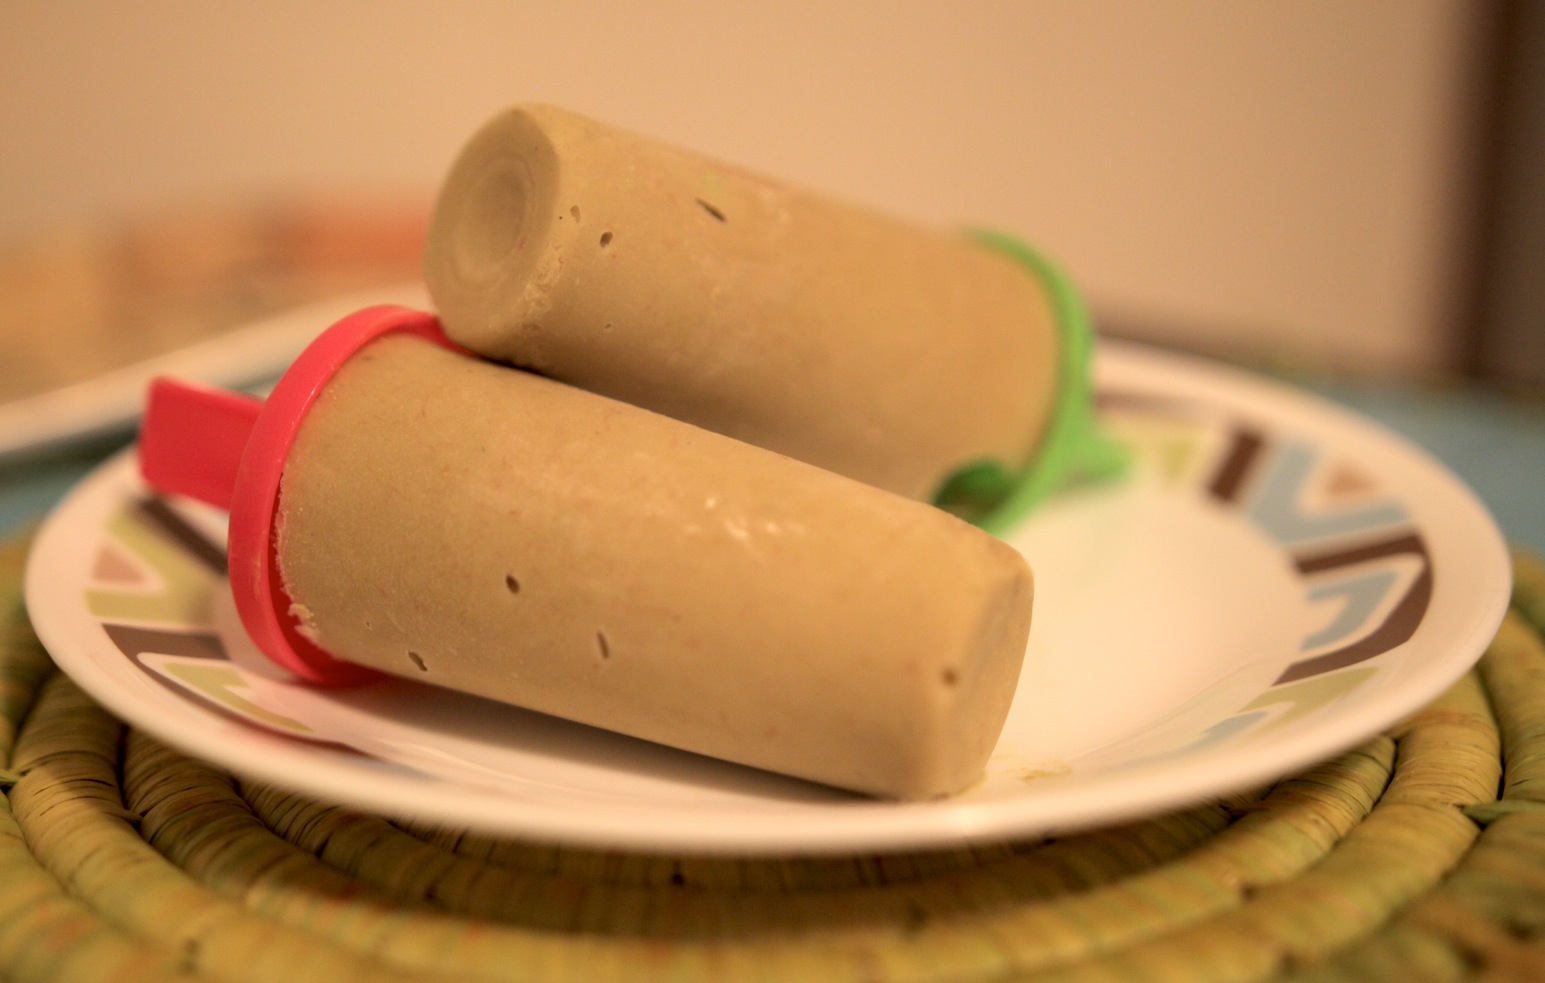
For hot summer days (or for any day for that matter!), popsicles are always a big hit.
Avocado and berries popsicles
2 avocados
Avocado popsicles
1/4 cup of berry puree (as above)
1/3 cup of pineapple chunks
1/8 cup agave nectar
Blend all the ingredients together and transfer to popsicle molds. Freeze for 4-6h or overnight.