Popcorn galore: dark chocolate and caramel popcorn

Quick to prepare, simple and delicious snack…introducing the popcorn!
For a few days now, my son has been asking for popcorn for snack. And he wants to freshly pop them every time. And who blames him? Popping corn is really fun. When they pop, he runs around the kitchen saying “Pop !Pop! Pop! ” And freshly popped corn just tastes so good.

I do like the natural flavor, but this time around I splurged and flavored them two different ways: dark chocolate and caramel.
If you don’t feel like popping corn as I did here, you can certainly use pre-popped corn in bags (non salty or only lightly salted) or microwave popcorn. It works just as well.IMG_5895

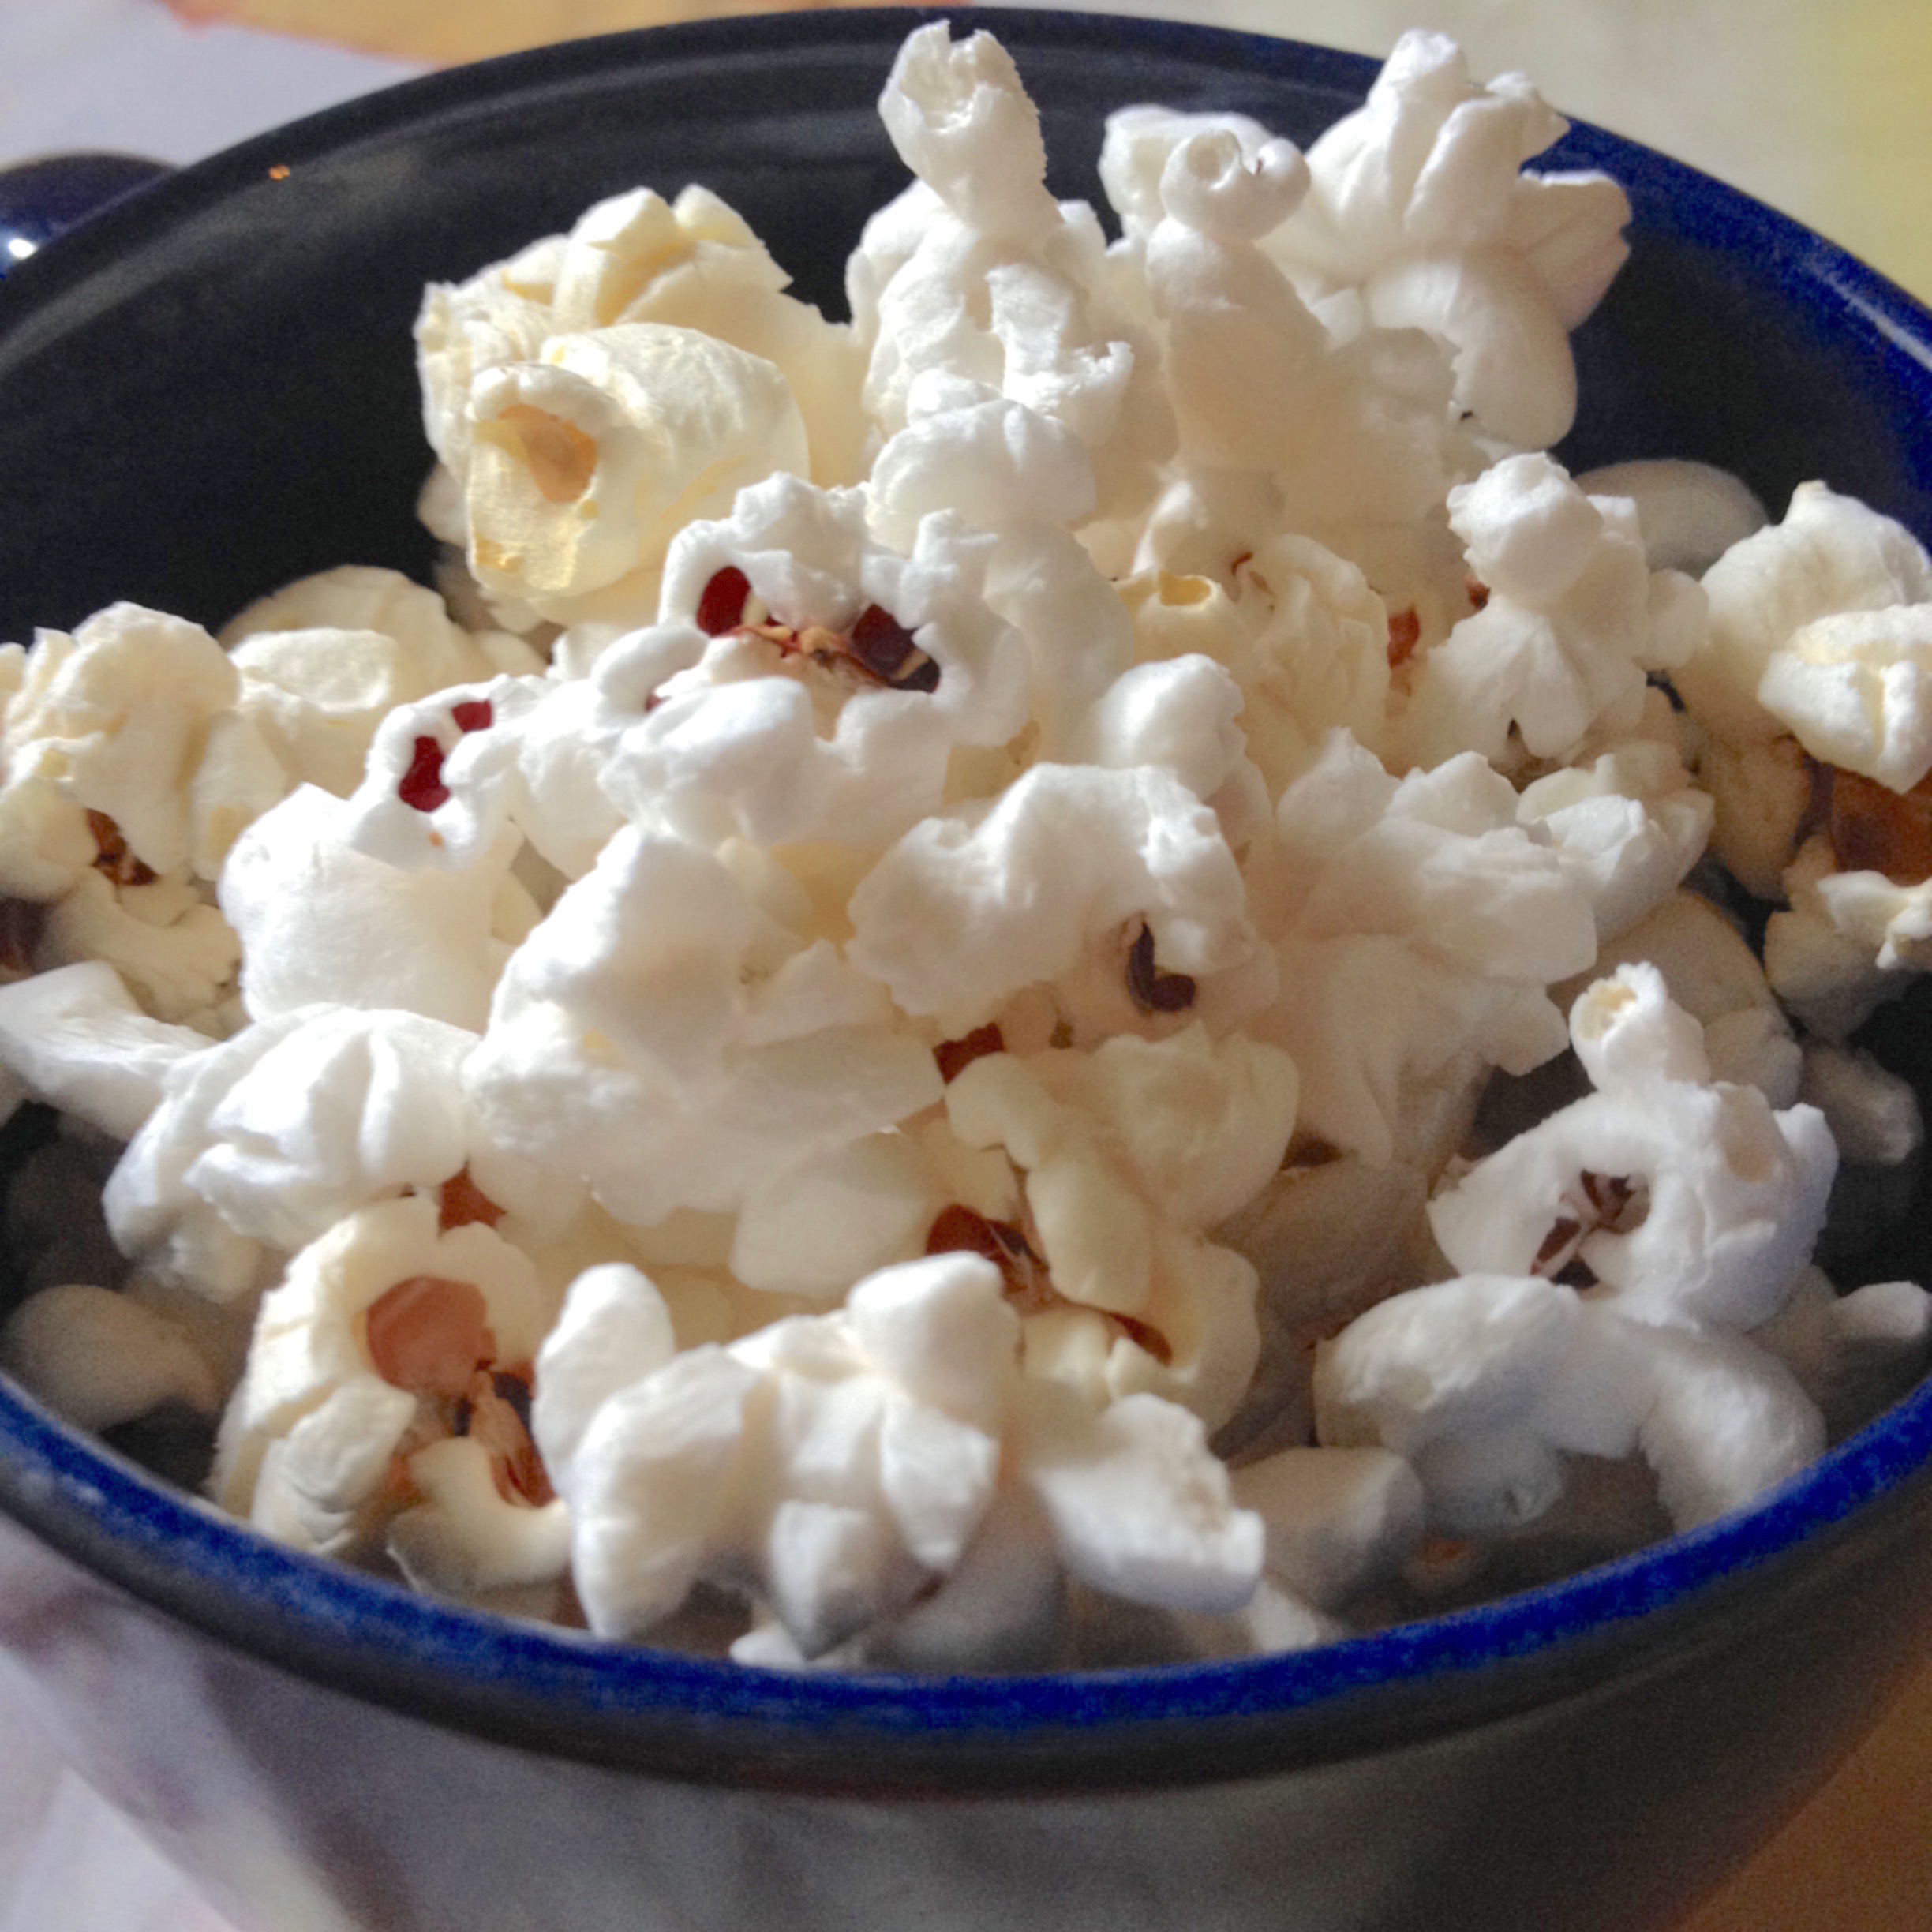
To make popcorn in a pan
– 1 tbsp of vegetable oil
– 1/2 cup popcorn kernels

Heat up a large saucepan on medium-high heat (you need a pan with a lid). When the pan is hot, put in the oil along with 3 popcorn kernels, cover with the lid. When the 3 kernels pop, dump the rest of the kernels in the pan, careful to make one layer of kernels at the bottom of the pan, so all the kernels get heat. Cover with the lid. Gently shake the pan from side to side to move the kernels around so they don’t IMG_5887
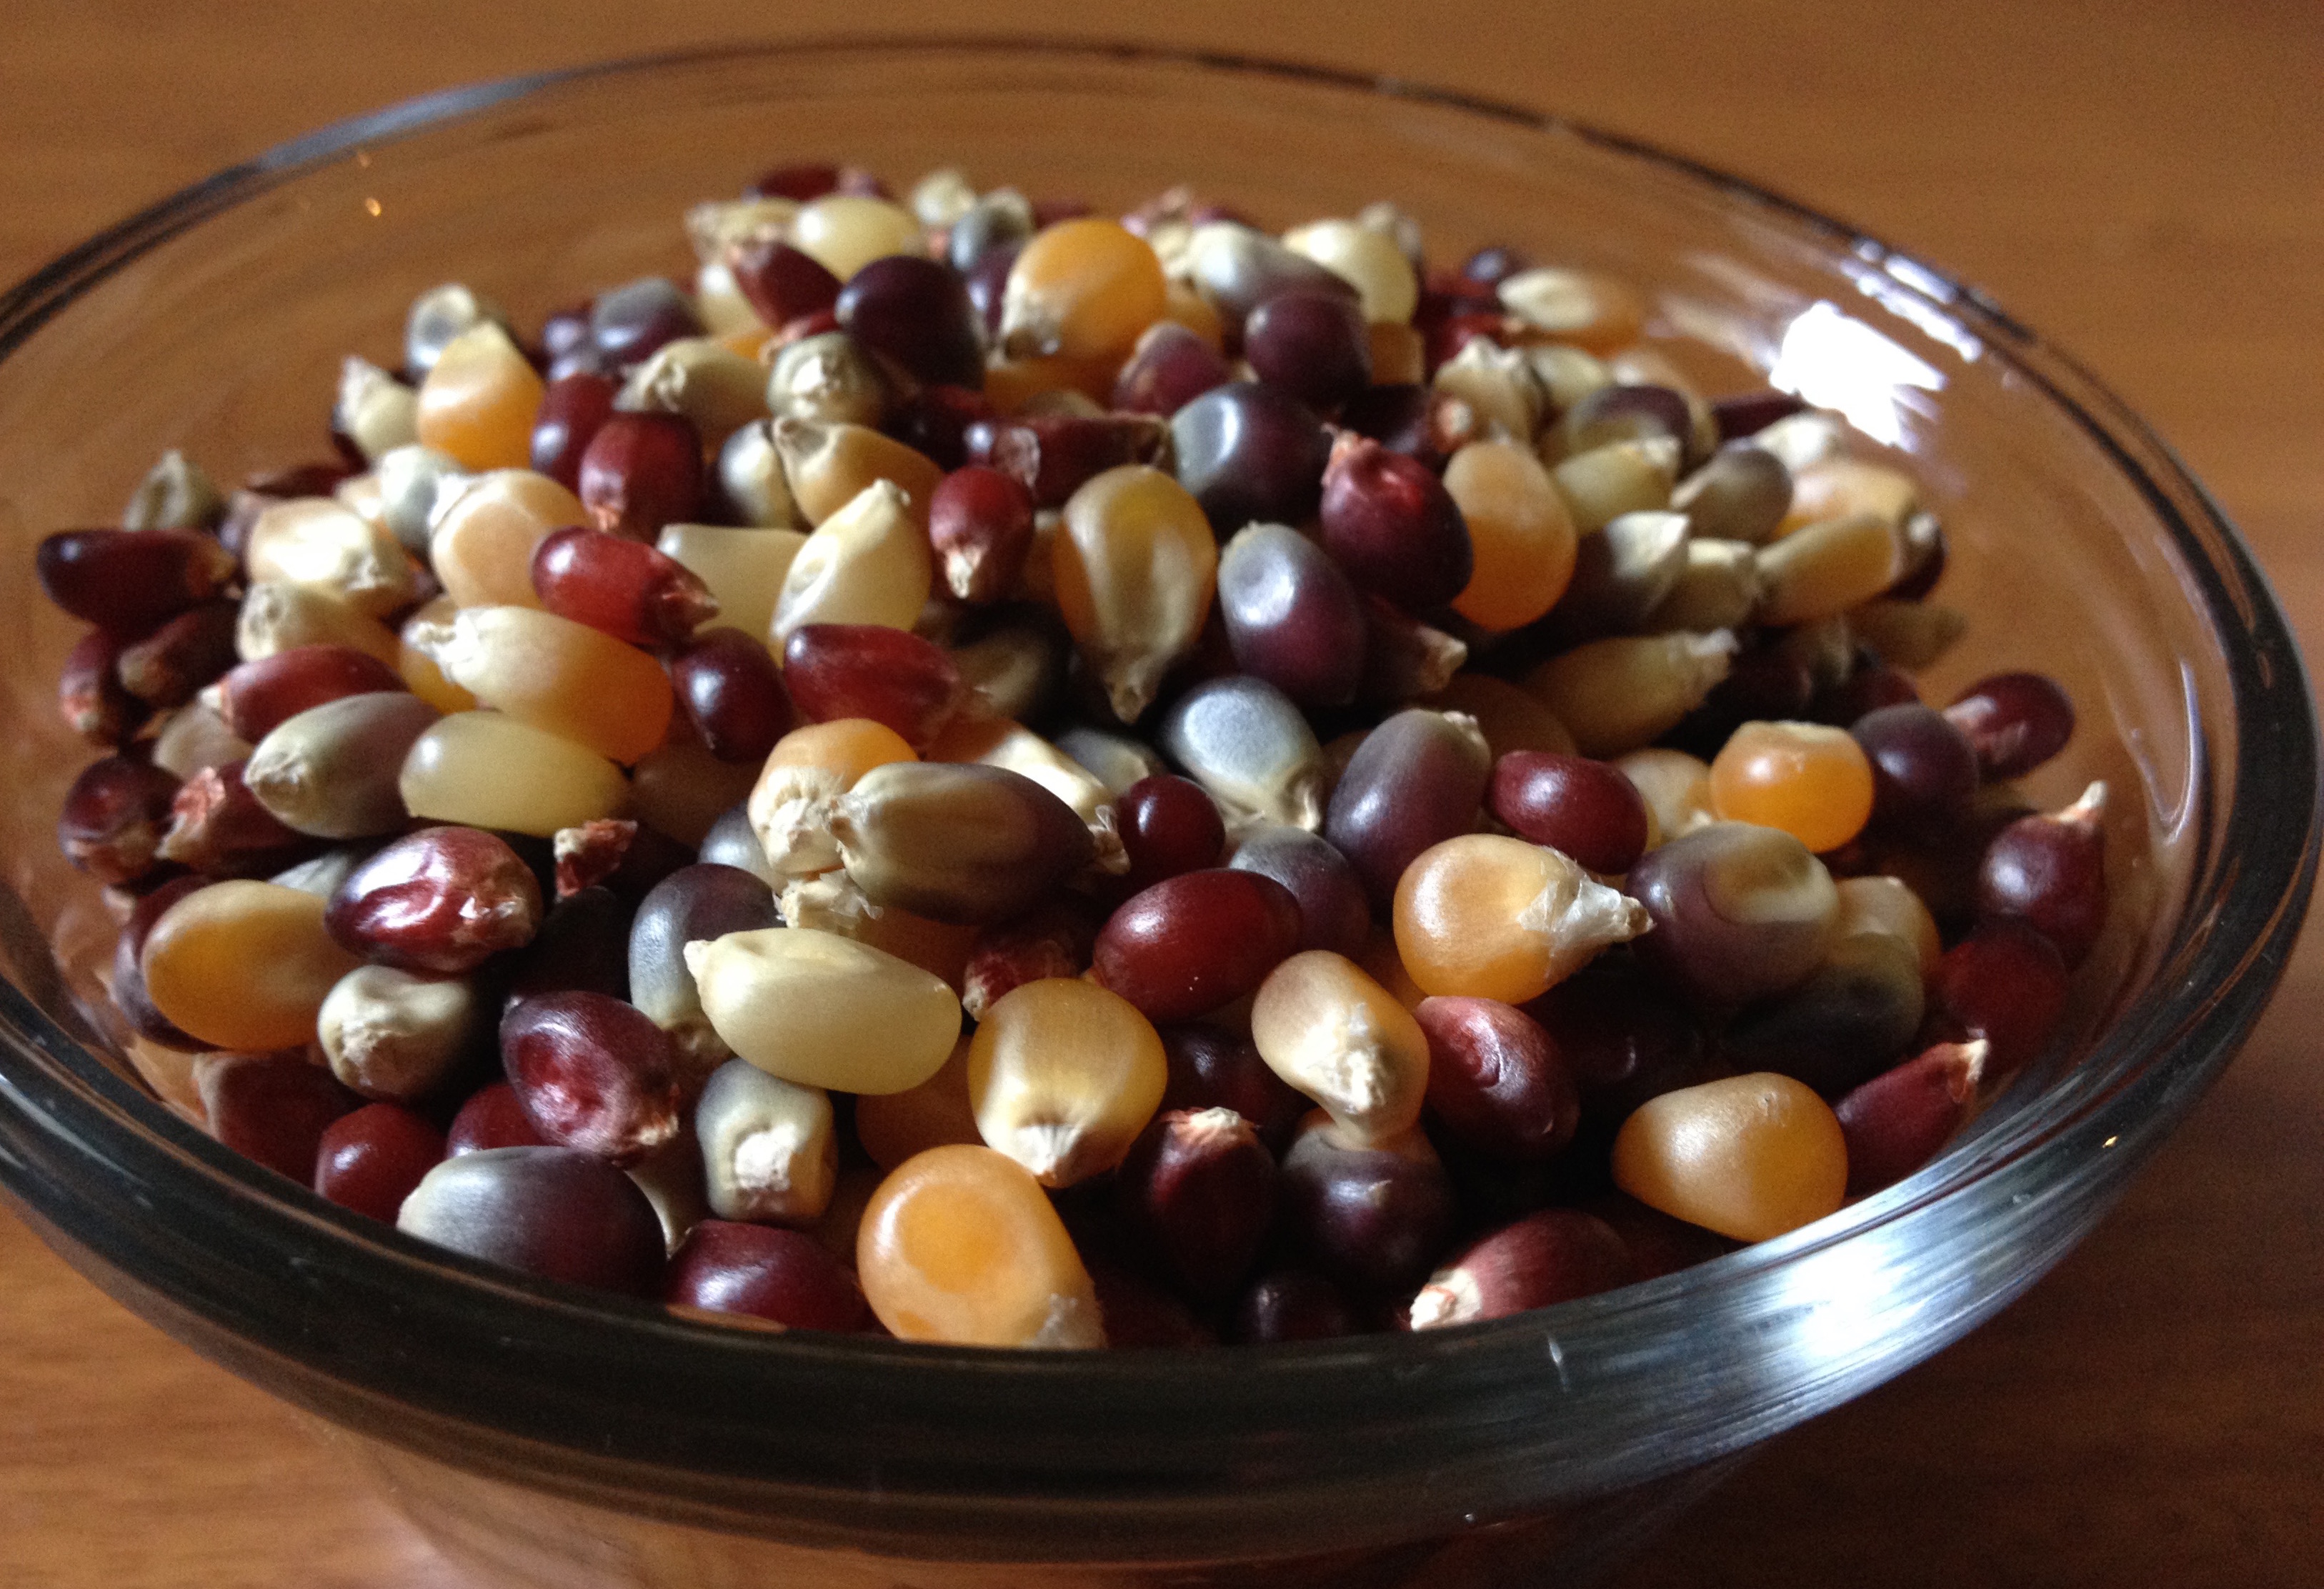
burn on one side. When the kernels start to pop,  continue shaking the pan so that the unpopped kernels always fall to the bottom and get heated to pop. Turn the heat off when there is a couple of seconds between the pops. Be careful to wait until the popping stops before opening the lid to avoid getting possibly burned by a flying popcorn.

Dark chocolate popcorn
– 2 cups of popcorn
– 2 tablespoon of mini dark chocolate chips

Heat up a sauce pan on medium-low heat. When pan is hot, add the chocolate chips. Move them around to help them melt faster. As soon as they are melted, add in the popcorn and mix well with a wooden spoon until there is no chocolate left at the bottom of the pan, but it is all coating the popcorn. Cool on a sheet covered with parchment paper to IMG_5900avoid sticking.

Caramel popcorn
– 2 tbsp brown sugar
– 1 tbsp vegetable spread (here I use the Coconut Spread from Earth balance)
– 2 cups of popcorn

Heat the pan on medium-high. Sprinkle the sugar in the pan so there are no clumps that will melt unevenly. Lower the heat to medium. As soon as the sugar has melted, add the vegetable spread and mix with a wooden spoon. Add the popcorn and mix well until all the caramel is all covering the popcorn and none is left at the bottom of the pan. Cool on a sheet covered with parchment paper to avoid sticking.

IMG_5903

Veggie pancake

Looking for a hearty breakfast or lunch? This is a perfect one.

Since I have started to dabble with gluten-free cooking, I have been looking to experiment with different kinds of flour. My gluten-free baking goods turned out pretty good. Well, to my benefit, I had an excellent recipe book to help me with that.

But I also wanted to try using a gluten-free flour in a salty dish. This is my first experience using chikpea flour and the result turned out to be quite interesting. I thought it tasted like an omelet, and my husband confirmed that as well, once he tasted it. Although, I am not going to take credit for this recipe, as I stole it from another recipe post (Oh she glows!) with some minor modifications.

Veggie pancake

  • 1 green onion, finely choppedIMG_5722
  • 1/4 cup finely chopped red bell pepper
  • 1/4 cup finely chopped spinach leaves
  • 1/2 cup chickpea flour (or garbanzo flour)
  • 1/4 teaspoon garlic powder
  • 1/4 teaspoon fine grain sea salt
  • 1/8 teaspoon freshly ground black pepper
  • 1/4 teaspoon baking powder
  • 1/2 cup of water

IMG_5724For serving
– 1/2 of an avocado
– 1/2 cup of tomatoes cut in cubes
– 1 tablespoon of finely chopped onion
– 1 clove of garlic, crushed
– fresh basil leaves


Cut the veggies finely and reserve aside. Mix the flour, baking powder, salt, pepper and garlic powder in a bowl. Add the water and whisk until there are no clumps left. Add in the veggies and mix it all.

IMG_5728
Heat a non-stick pan, or spray/rub a pan with oil. Pour in all the batter and spread out to fill out the pan. Cook for 5-6 min on one side and carefully flip it and cook for another 5 min. Transfer to a plate

Make a salsa with the tomatoes and onions. Saute the onions and the garlic with a squirt of vegetable oil. When the onions start to soften, add in the tomatoes and cook until they are slightly soft.

Serve the pancake with the sliced avocado, salsa and some fresh basil leaves.

IMG_5731

Oatmeal Chocolate Chip Cookies

Some days, one just needs a picker-upper. Today is one of these days. Nothing really dramatic or crazy happened, just that it has been a long IMG_5840week already. And to top it off my babysitter did not show today when I had planned to go down to the office. So I thought, okay let’s enjoy the afternoon and head down to the beach then! So we went, only to be caught by a fast arriving storm, which turned the sky from a clear blue to black in 10min. We run home, well, I ran , pushing the little man in the stroller, but we still got wet. Anyway, today is one of those days when chocolate chips need to be put to good use.

The chocolate chips I use here are the mini kind and they are allergen-free. Since we are on a dairy-free, egg-free and nuts-free diet, this is my go-to ingredient for anything that calls for chocolate. We also just eat them as is and they are delicious.

IMG_5843

Oatmeal chocolate chips cookie

Wet ingredients
1/3 cup sunflower seed butter
2tbsp vegetable oil
1/2 cup sugar
1/3 cup dairy-free milk (I use a mix of coconut milk and flax milk)
1 tsp of vanilla extract

Dry ingredients
1 cup flour
1/2 tsp baking powder
1/2 tsp salt
1 cup rolled oats
1/2 cup chocolate chips

Heat the oven at 425°C. Whisk the wet ingredients together in a large bowl until smooth. Mix the dry ingredients in a separate bowl. Add the dry ingredients to the wet and mix with a wooden spoon.
Line a baking sheet with parchment paper. Spoon the cookie dough onto the parchment paper with a tablespoon. Unlike regular cookies, these cookies do not spread out and will stay the size as you have spooned them, so there is no need to space them too faIMG_5833r apart.
Bake in the oven at 425°C for 8min.

Cool the cookies on a rack. Enjoy!
The cookie dough can also be frozen on the cookie sheet (already in cookie form). When frozen, transfer to a Ziploc bag. They can be baked at a later time when in need of an emergency cookie.

Baked salmon with green onions

A long time ago, when my boyfriend  (now husband), Hamy and I started living together, I barely knew how to cook. I think I could make some eggs and maybe some pasta (and that is still debatable), but that was about it. I for sure did not know how to cook rice, which is a staple in the Malagasy (from Madagascar) cuisine. We were students and did not have a lot of money then; so either we invited ourselves at our parents’ tables, or we ate street food or my husband cooked. My role in the kitchen was more to help him cut, wash etc. However, I loved to eat and soon, I was facing a dilemma of wanting to eat a dish and not knowing how to cook it.

At first, I called my mom and asked her how to make my favorite dishes then I would ask my husband to cook it with me. Then I started to watch  and observe when other people cooked and learned the basics. A friend of mine taught me how to cook rice perfectly, a la malagasy, when I was in graduate school. But even though  I got better at cooking over the years, I can still say that my husband is still the more creative one in the kitchen. He is one of those people who can just whip up a dish and it would turn out awesome. Or maybe I am just biased because I am his number one fan.

His big specialty is the makeover of left-overs. He will take a left-over dish and turn into something completely different. A sauteed dish will become a soup; a veggie asian style dish will end up a curry dish with kitchen. Unfortunately, as surprising and delicious as they are, these types of dishes are practically impossible to reproduce…and impossible to blog about. But fortunately for this blog, he can also make dishes from scratch , and this recipe here is one of those.

The quantities here are not precise, it will depend on how big your piece of fish is and your taste.IMG_5519

For the spices he used 21 Seasoning Salute from Trader Joe’s. Other herbs  I like to pair with salmon are dill, thyme and tarragon. But basically, the spirit is that you can use whatever you have, or whatever you like. I don’t think you can really go wrong.

Baked salmon with greens onions

  • A salmon tail fillet (the one used here was a frozen fillet of about 2lbs)
  • 4-5 green onions, cut about 3 inch long
  • Spices fresh or dried (Trader Joe’s 21 Seasoning Salute)
  • 3-4 cloves of garlic , crushed
  • Salt
  • Olive oil

Heat the oven at 415°C.

Line a oven proof dish with aluminum foil, with excess going off the edges. Place the fish on the foil, rub it with the crushed garlic. sprinkle with the spices.IMG_5523
Line the green onions on the salmon sideways. Drizzle the fish and onions with olive oil.
Place another sheet of aluminum foil on the top and fold the edges with the bottom foil to basically form a pocket with the fish inside.

Bake in the oven. For a frozen piece bake for 20-25min. If using a fresh cut, bake for 12-15 min

Serve with a drizzle of lemon juice and the sides of your choice.

Serving suggestion: Steamed green peas, brown rice spaghetti with pesto.

IMG_5524


Kiwi and greens smoothie

Green smoothies have always looked kind of scary to me. I used to think that smoothies should be fruity and colorful. But hey! kiwi is a fruit and it’s color is green so I guess a fruity smoothie can be green too.

I decided to make this smoothie one day I was not feeling very well, a cold was lingering and I just needed something to give me an energy punch and clean out my system, all at once…and of course taste good. Kiwis taste delicious and they are packed with vitamin C and other phytonutrients that beneficial to reduce inflammation and boost the immune system. Green leaves are also packed with vitamins and are rich in calcium. So, these sounded like a great mix for a energy-packed smoothie to me.

This is also a great way to get my toddler to have his share of fruits and greens. He loves smoothies and he readily drinks it no matter what color it is.IMG_5482

For the greens here, I used a salad mix of baby greens which had baby spinach, dandelions, kale, lettuce and others. But you can use any baby leaves of your choice. Using mature leaves will also work but will have a stronger “green” flavor which might not be to everyone’s liking. Banana or pineapple are great add-ins when making green smoothies as they tend to mask green leaves flavors pretty well.

Kiwi and greens smoothie

  • 1 1/2 cup of green leaves mix
  • 2 kiwis
  • 1 banana
  • 1 cup orange juice
  • 4 dates (can substitute for sugar or honey to sweeten)

Place all the ingredients in a blender and mix until smooth.

Serve in a glass (or a jar) and enjoy!


Very berry ice cream

One of my favorite food ever is ice cream. When I found out my son was allergic to dairy,  we had to ban ice cream from our house. And because I was still nursing him, I also had to forego having my favorite treat even outside the house, otherwise he would get an allergic reaction from drinking my milk. It was a hard thing for me to give that up. Yes, sure I could still have sorbet but I really wanted and missed the “cream” part of ice cream

So imagine my joy when I found out I could have vegan ice cream. I was so excited to put my ice cream maker to good use again after it sitting idle on its shelf because I had to give up making frozen yogourt.
One way of getting the “cream”factor is using coconut cream. I like it best with non-fruity flavor like chocolate or vanilla, as the coconut blends well with those flavors.
But for fruity flavors I prefer using avocado, because the flavor is less dominant and it goes well with fruits. And boy, is it creamy! I actually have to cut it out with some juice otherwise it gets pretty heavy.

For this berry ice cream. I actually mixed avocado with a bit of coconut cream and fruit juice and blend it well. I first tried to just add pureed berries in but then the fruity taste is not very strong  as the fruit is diluted in with the avocado cream. I found out that reducing the blueberry puree first with a sweetener intensifies the flavor when it mixed with the coconut cream. The result is a fruity creamy bliss.

Very berry avocado ice cream IMG_5479
– 1/2 lbs of frozen berry mix (fresh works as well). I use the Very berry Cherry blend from Trader Joe’s
– 1/3 cup honey + more to sweeten to taste if needed
– 2 medium avocados or 3 small
– 1/3 cup of coconut cream (from a can of full fat coconut milk)
– 1/4 cup orange juice
– Juice of 1/2 lemon (about 1-1.5 tablespoon)

To get coconut cream, place the can of coconut milk in the fridge for 24 hours or more. this will cause the cream (the fatty part of coconut milk) to separate. Upon taking the can out, gently invert it upside down, open it and pour out the clearer liquid now on top. It can be discarded or it can be used for smoothies. The creamy part that is left is the coconut cream. Reserve it in the fridge until use.

In a sauce pan, mix the berries with the 1/3 cup of honey, heat on high until it simmers then reduce the heat and keep it only stirring but not boiling over. Stir regularly to avoid it to stick. Heat until it is reduced and the liquid a bit syrupy, about 15min or so. Cool it down to room temperature. When cool, blend the mix until very smooth. Pass the fruit puree through a sieve to remove the seeds.

Place the avocado, the orange juice and the lemon juice in the blender and blend until very smooth. Add in the coconut cream and mix again until very smooth. Finally, add the fruit puree and mix well. Taste for sweetness and if necessary, add some honey and tablespoon at a time as desired.

Churn the mix in an ice cream maker until ready (about 15-20 min). This results in a soft-serve consistency. For scoopable ice cream, place in the freezer for 2-3 hours.


Pasta salad with creamy pesto

Summer meals are best enjoyed on the patio with friends and family…and salads make the best summer meals.
Pasta salads are always well appreciated in our household since our son absolutely loves pasta. He will have it at every meal, including breakfast, if he can have his way. I am happy to indulge him, so my way to compromise is to add plenty of vegetables with the pasta. So far, he will eat almost everything you give him as long you feed him, but you gotta let him pick the pasta himself. Letting him just feed himself will defy the purpose of the pasta salad as he will just eat the pasta and leave the rest untouched.

The choices of vegetables to add is based on what is on sale and in season, in addition to my “go-to” frozen veggie mix. It is a big bag of frozen mix I get from our local grocery store that has green beans, cubed carrots, peas, lima beans and corn. It never fails me and I practically add that sh*&^% in every dish.
Anyway, no matter what veggies you add for this dish though, cooked veggies will go better with the creamy pesto. I always cook the veggies quite soft as our son will not eat anything too crunchy but  a crunchier version can be made for less picky eaters.

Finally, the pesto! This has been one of my best find of this summer. I started to grow some things on our deck and I have two pots of basil and they grow so well we had to find ways to use the basil leaves, hence the pesto! The creamy pesto in this recipe is a lighter, tangier version of pesto and it totally rocks this pasta salad!

Pasta salad with creamy pesto

  • asparagus – 1 cup cooked and cut 1 inch longIMG_5327
  • spinach- 1/2 or 1 bunch depending how big
  • 2 medium zucchini
  • 1 cup of mixed frozen veggies : peas, carrots, green beans, lima beans, corn or  about 1/4 cup of each
  • 1/2 lb of pasta of your choice
  • salt

IMG_5323For the pesto (this makes a lot, feel free to cut  the amounts in half, but it also stores very well in the fridge)
– 1 avocado
– 1 or 2 cloves of garlic
– 1/4 cup of water
– Juice of 1 lemon (or 3tbsp)
– 2 cups of basil leaves
– 6 tbsp of extra virgin olive oil

Cut the zucchini in thin slices (1/4 inch thick). Saute the zucchini slices in a pan with a little bit of oil until it browns on the edges and it is soft. Add the spinach to the pan and saute with the zucchini until it is wilted. Transfer the zucchini and spinach to a large bowl.
Steam, boil  or saute the other vegetables to desired softness or crunchiness. Add in the bowl containing the zucchini and spinach, mix up with a spoon or hand mix. Sprinkle with a bit of salt to taste.

To make the pesto, mix all the ingredients but the salt in a blender or food processor. Blend until smooth and salt to taste.

Serve the salad and add a dollup of pesto on top. Taa-dahh!!Enjoy!!


Meatloaf with kale salad

Coming up with recipes from scratch is an art. You have to know how to mix tastes and smells to create something that tastes great. Or you can be like my husband, who is what I would call  “a master of substitution”. He can take a recipe and substitute the ingredients (or all of them) to come up with a dish that can be drastically different from the original recipe but would still blow your taste buds away.

Compared to my husband, I consider myself only an amateur in terms of substitutions, but I also like to make variations of recipes depending on the ingredients that I have in hand, or depending on my mood ( for example if I need a picker upper, adding a healthy amount of chocolate chips to a cookie recipe always seems like a good idea). The beauty of variations is that you can basically have endless possibilities based on what you have available. The two recipes in this post here are “variations” of recipes , if I may say so.

The meat loaf  is a variation of a recipe my mom used to make…a very far stretched variation; because the recipe I started from was stuffed tomatoes. Okay, let’s say I made a variation of the stuffing and instead of stuffing it in tomatoes, I put it in a loaf pan and made it a meatloaf. My mom’s recipe used only ground beef but I like the mix with ground pork as it makes the results more moist. As for the other ingredients (mushrooms, pepper), I just had them so I  figured I might as well put them in. I think it would be fair to say that my mom would never recognize her dish in this recipe if she tasted it.

As for the salad, it was a recipe my friend Kate told me about… I mean, she told me about a recipe she learned from a raw food chef that I believe resembles this. It involved kale and lime, avocado and other things. Last night when I was thinking about what I would bring for lunch the next day, I thought this salad would be great with the meatloaf that I just made. At least I had the kale, but I did not have lime to begin with so I substituted that with lemon. And I decided against the avocado and substituted that with bell pepper and for good measure I added cherry tomatoes. Well, to be honest, I forgot what other ingredients Kate mentioned in the original recipe and I was not going to call her in the middle of the night to ask her about it. When I decided to post the recipe I remade the salad, but then I ran out of cherry tomatoes so I used roma tomatoes instead. And bam! I just basically made a variation of the variation. See? Endless possibilities!

 Meat loaf with kale salad

For the meat loaf
1 pound of ground beef
1 pound of ground pork
1 medium sized onion, finely diced
4 white button mushrooms, finely diced
1/4 of a bell pepper, finely diced
4 cloves of garlic, finely diced
1 tsp of 21 seasoning salute from Trader Joe’s (you can substitute for other herbs or spices of your choice)
1 tsp of salt
2 Tbsp of oil

IMG_5103 copyFor the salad
3 kale leaves medium size
1 roma tomato, cut in cubes
1 bell pepper, cut in cubes (or the rest of the one you used for the meatloaf will do)
The juice of half of a lemon
1 Tbsp of extra virgin olive oil

Heat oven to 415°F. Place the ingredients for the meatloaf in a mixing bowl using and mix thoroughly. I like to use a potato masher to mix them or you can also just use your hands. Place the meat mix in a loaf pan (or a meatloaf pan if you have one). Bake for 35-40min. IMG_5106 copy

Remove the kale leaves from the stems. Wash and dry them. Roughly cut them in pieces , not too small. Place in a bowl and add the lemon juice and the oil. Season with salt as needed. Toss the kale and make sure to rub the lemon-oil well into the leaves with your hands so there are well coated. Add the cut tomato and bell pepper. Toss to mix. It is best to prepare the salad in advance and let it macerate while the loaf is cooking. The lemon juice with macerate and soften the kale leaves so it is not so tough to eat.

Chewy breakfast bars

I am a big fan of breakfast. But on weekdays, it is hard for me to get a decent one as I usually tend to stay in bed (partially because a 3 year old little man does not let me get out of bed and snuggles me real hard) until I have just enough time to shower, get dressed and go. So, making something I can take with me is my best chance of avoiding to stop for a big sweet muffin at 7-eleven and instead eat something a bit more healthy as my first meal of the day.

These breakfast bars are perfect for that kind of “on the go” breakfast but they are also good for a snack. Heck, they are good anytime!

This recipe originally asked for dates but I substituted it to raisin, and the result is a lightly sweet, energy-packed chewy goodness.

Chewy breakfast bars

3/4 cups of rolled oats, ground to flour
1/4 cup of gluten free flour
1 cup of water
3/4 cup of raisins
1/2 cup chia seeds
1/2 cup sunflower seeds
1/4 cup dried cranberries- finely chopped
1 tsp cinnamon powder
1 tsp vanilla extract
1 tsp salt

Heat the oven to 325°F. Line a square pan with two sheets of parchment paper  crossing each other. IMG_5075 copy
Grind the oats in a blender or food processor until it is the texture of flour. Transfer to oat flour to a bowl.
Add the water and raisins to the blender and blend until it is smooth. Add this to the bowl of oat flour. Add all the residual ingredients to the bowl and mix well.

Transfer thIMG_5077 copye mix to the  pan and evenly spread it. Bake for 20min until it is not soft anymore. Rest for 5 min and lift it out the pan using the parchments papers and place on a cooling rack for 10-15 min before cutting. Store in an airtight container in the fridge. I individually wrap them in plastic film to they can be transported more easily.


Plantain chips

Plantain chips are an easy and quick snack to make. Those are always hit in my boys and we eat them as is or with some guacamole. This version is fried so has a bit of contact time but the result is so yummy that to me it is worth it.

IMG_8840You will need:
– 1 green plantain
– Vegetable oil
– Salt (optional)

Peel the plantains and cut thin slices (about 2-3mm or 1/8 of an inch thick). Heat about 1 inch deep of vegetable oil in a small sauce pan. It is hot enough when a wooden spoon sizzles when inserted in the oil.
Fry the plantain slices in batches. They are done when they turn light brown and they make a “pok-pok” sound when touched with a wooden spoon (if after you take them out you realize they are not cooked enough, you can just throw them back in the hot oil again until done). That said if they are not crunchy, they are still perfectly good to eat.
Fish the slices out and place on plate with a paper towel to drain the excess oil.
Sprinkle with salt if desired.
The key for them to last is to fry them so they are crunchy without being burned. Although these usually never last that long anyway once we start eating them.